Luxor Photography Guide: Mastering Ancient Egyptian Architecture
Key Takeaways:
- Golden hour illumination at Karnak Temple creates dramatic column shadows and warm sandstone colors during the first 90 minutes after sunrise and final hour before sunset
- Wide-angle lenses (16-35mm) capture monumental scale while 70-200mm telephoto lenses isolate hieroglyphic details and compress perspective in hypostyle halls
- Circular polarizing filters reduce glare on polished granite surfaces and deepen blue sky contrast against cream-colored limestone temples throughout midday shooting
- Low perspective angles from ground level emphasize towering pylon gates and obelisks while high vantage points from temple terraces reveal spatial relationships between structures
- Side lighting across temple reliefs enhances carved depth and shadow definition, particularly effective during morning and late afternoon when sun angles graze wall surfaces
- Tripods receive permission at most Luxor sites except inside royal tombs, enabling long exposures for interior chambers and HDR bracketing for extreme dynamic range scenes
Understanding Luxor’s Photographic Appeal
Luxor presents photographers with exceptional opportunities to capture ancient Egyptian architecture, monumental sculpture, and intricate relief carving across multiple UNESCO World Heritage sites. The concentration of temples, tombs, and monuments along both Nile banks creates diverse photographic subjects within compact geographical areas, allowing comprehensive portfolio development during multi-day visits.
The architectural scale of Luxor monuments challenges conventional photographic approaches, with structures designed to dwarf human viewers and communicate divine authority through overwhelming physical presence. Pylon gates rising 40-60 meters, hypostyle halls containing 134 columns, and temple complexes covering 100+ hectares require photographers to develop specialized compositional strategies emphasizing monumentality while maintaining visual coherence.
Stone surfaces throughout Luxor sites display remarkable color variation depending on geological sources and weathering patterns. Sandstone ranges from cream to deep amber, limestone exhibits pale gray to golden tones, granite spans black to rose pink, and quartzite glows red-orange. Understanding these material properties helps photographers optimize white balance settings and exposure decisions to represent authentic stone characteristics versus creative color interpretation.
Light quality in Luxor varies dramatically between seasons and times of day, affecting both color temperature and contrast ratios. The desert environment produces extremely dry air creating exceptional atmospheric clarity, particularly during winter months when visibility extends 20-30 kilometers. This clarity enhances distant subject definition but increases harsh midday shadows requiring careful exposure management or strategic timing avoidance.
People Also Ask About Luxor Photography
What makes Luxor architecturally significant for photography?
Luxor contains the world’s greatest concentration of monumental ancient Egyptian architecture, including the massive Karnak Temple complex covering 100 hectares with structures spanning 2,000 years of construction. The Luxor Temple colonnade features perfectly aligned columns creating dramatic perspective compression opportunities. The West Bank preserves royal mortuary temples including Hatshepsut’s terraced cliff-face structure and Medinet Habu’s fortress-like walls with extensive battle relief sequences. Valley of the Kings tombs display underground chambers with original paint colors surviving in remarkable condition. This architectural diversity provides photographers with subjects ranging from colossal exterior monuments to intimate interior details, all within a concentrated area enabling comprehensive coverage during single visits.
What camera equipment works best for Luxor temple photography?
Full-frame cameras with strong dynamic range handle the extreme contrast between shadowed temple interiors and bright Egyptian sunlight. Wide-angle lenses (16-35mm) prove essential for capturing complete temple facades and hypostyle hall perspectives, while 70-200mm telephoto lenses isolate architectural details and compress perspective in long corridors. A circular polarizing filter reduces glare on polished stone surfaces and deepens blue sky contrast. Tripods enhance stability for low-light interior shots and HDR bracketing sequences. Backup batteries counter rapid power drain in heat, and cleaning supplies manage omnipresent dust affecting both lenses and sensors. Many photographers carry two camera bodies with complementary lens mounts to minimize lens changes in dusty environments.
When does the best light occur at Karnak Temple?
The first 90 minutes after sunrise provides optimal lighting at Karnak Temple when low-angle sun creates long shadows emphasizing column relief and hieroglyphic depth. Golden warm light enhances sandstone color while producing dramatic contrast in the Great Hypostyle Hall where shafts of light penetrate column forests. The final hour before sunset delivers similarly attractive conditions with warm color temperature and side lighting across the Sacred Lake. Midday light from 10 AM to 3 PM creates harsh overhead shadows reducing architectural dimension, though this period works well for detail shots where shadow elimination proves beneficial. Overcast conditions occur rarely but provide even illumination ideal for color accuracy and relief documentation without strong shadow distractions.
Can you photograph inside the Valley of the Kings tombs?
Photography remains prohibited inside most Valley of the Kings tombs to preserve ancient paint from camera flash damage and control commercial image use. Select tombs permit non-flash photography for additional fees beyond standard entry tickets. Tomb of Ramesses IX occasionally allows photography demonstrating typical New Kingdom royal tomb decoration. When photography receives permission, working without flash requires high ISO settings (3200-6400) and wide apertures (f/2.8-4) to achieve hand-holdable shutter speeds. Even with permission, tripods remain prohibited inside all tombs. Photographers serious about tomb interiors benefit from joining professional archaeology tours with special photography permits, though these opportunities remain limited and require advance arrangements.
Extended multi-day tours – 5+ days
Featured Luxor Multi-Day Tour Packages

3 days
Luxor 3-Day Discovery Tour
- ✓ Comprehensive Luxor experience
- ✓ Expert local guides included
- ✓ All accommodation included
- ✓ Transportation provided
5 days
Luxor 5-Day Highlights Experience
- ✓ Comprehensive Luxor experience
- ✓ Expert local guides included
- ✓ All accommodation included
- ✓ Transportation provided
7 days
Luxor 7-Day Cultural Journey
- ✓ Comprehensive Luxor experience
- ✓ Expert local guides included
- ✓ All accommodation included
- ✓ Transportation provided

10 days
Luxor 10-Day Complete Adventure
- ✓ Comprehensive Luxor experience
- ✓ Expert local guides included
- ✓ All accommodation included
- ✓ Transportation provided
Multi-day tour packages powered by TourRadar. Prices and availability subject to change.
Essential Camera Gear for Egyptian Monuments
Building an appropriate camera kit for Luxor photography balances weight considerations for extensive walking with optical quality requirements for architectural documentation and creative interpretation. The extreme environment—intense heat, pervasive dust, and brilliant sunlight—demands robust equipment capable of maintaining performance under challenging conditions.
Camera body selection prioritizes dynamic range, high ISO performance, and weather sealing. Full-frame sensors provide superior low-light capability for dimly-lit temple interiors and produce shallower depth of field for isolating details from busy backgrounds. Cameras with 20+ megapixel resolution allow significant cropping while maintaining print quality, beneficial when physical barriers prevent ideal camera positioning. Dual card slots protect against data loss—essential when photographing unique tomb paintings or temporary exhibitions.
Lens selection forms the foundation of successful Luxor photography with three focal ranges proving most useful. Ultra-wide angle lenses (14-24mm or 16-35mm) capture complete temple facades, hypostyle hall perspectives, and environmental context shots. Standard zoom lenses (24-70mm or 24-105mm) handle general photography and human-scale details like statue faces and stela inscriptions. Telephoto zooms (70-200mm or 100-400mm) isolate architectural elements, compress perspective in long temple corridors, and capture obelisk tops from ground level. Prime lenses offer superior optical quality but require frequent changes in dusty environments—many photographers accept zoom lens trade-offs for practical convenience.
Filters and Accessories for Stone Architecture
Circular polarizing filters rank as the most valuable accessory for Luxor photography, reducing glare on polished granite surfaces, deepening sky blue saturation, and enhancing color contrast between stone types. Rotation adjusts polarization effect—maximum polarization occurs when shooting perpendicular to sun direction. Variable neutral density filters enable long exposures during bright conditions, useful for creating movement blur in tourist-filled spaces or capturing flag movement atop temple pylons.
Tripods enhance image quality through increased stability, permit HDR bracketing sequences, and enable long exposures in dim temple interiors. Carbon fiber models reduce weight for extensive walking between sites. Most Luxor sites permit tripod use in exterior areas, though interior restrictions apply in some temples and all tombs. Compact travel tripods balance portability with stability—full-size models provide better support but prove burdensome during all-day site exploration.
Lens cleaning supplies receive daily use managing dust accumulation on front elements and filters. Microfiber cloths, lens pens, and air blowers maintain optical quality throughout shooting sessions. Sensor cleaning kits address dust spots from frequent lens changes in open environments. Some photographers apply temporary protective clear filters accepting minor image quality degradation to prevent front element scratching and simplify cleaning procedures.
Heat and Dust Protection Strategies
Egyptian summer temperatures exceeding 40°C affect camera operation, battery life, and photographer comfort. Keeping equipment shaded between shooting sessions prevents overheating-related malfunctions. White or light-colored camera bags reflect heat better than black bags absorbing solar radiation. Batteries drain faster in heat—carrying 3-4 charged batteries supports full-day shooting even with aggressive use. Memory cards rarely fail from heat but maintaining backups prevents catastrophic image loss.
Dust infiltration poses the primary environmental challenge at Luxor sites. Fine sand particles enter camera bodies during lens changes, coat lens surfaces during windstorms, and penetrate camera bags through zippers and seams. Minimizing lens changes reduces sensor contamination—selecting versatile zoom ranges rather than multiple prime lenses proves practical. Changing lenses in protected environments (inside vehicles, restaurant interiors, hotel rooms) rather than exposed archaeological sites limits dust exposure. Weather-sealed camera bodies and lenses provide additional protection though no system remains completely dust-proof.
Mastering Temple Architecture Composition
Photographing monumental Egyptian architecture requires compositional strategies addressing scale representation, perspective control, and visual hierarchy. The temples deliberately overwhelm human viewers through massive proportions and repetitive elements—successful photography captures this monumentality while maintaining compositional balance and viewer engagement.
Wide-angle perspectives emphasize scale relationships between massive structures and human figures. Including people in architectural shots provides scale reference points helping viewers comprehend monument dimensions. Positioning figures strategically within the frame—at pylon gate bases, beside colossal statues, walking through columned halls—creates compelling scale comparisons. Low camera angles from ground level exaggerate height, making 20-meter columns appear to soar toward the sky while compressed perspective makes structures appear even taller.
Symmetry dominates Egyptian temple design with central axes, mirror-image elements, and bilateral arrangements governing spatial organization. Photographers leverage this symmetry creating balanced compositions centered on doorways, aligned with processional paths, and following architectural sightlines. Perfect symmetry creates formal, authoritative imagery appropriate for architectural documentation while slight asymmetry introduces dynamic tension suitable for interpretive photography.
Working With Perspective and Distortion
Wide-angle lenses produce keystoning where vertical lines converge toward the sky, acceptable for dramatic interpretation but problematic for architectural documentation. Shifting the lens upward while keeping the camera level minimizes keystoning—tilt-shift lenses provide mechanical correction while standard lenses require software correction in post-processing. Some keystoning enhances monumentality impression, particularly when photographing pylon gates or obelisks where converging lines emphasize towering height.
Foreground elements anchor compositions while adding depth and context. Fallen column drums, lotus-shaped capitals, broken statuary, and stone paving patterns create strong foreground interest leading viewers’ eyes into architectural backgrounds. Shallow depth of field separates foreground from background through selective focus, though architecture photography often benefits from deep focus maintaining sharpness throughout the frame. Apertures of f/8-f/11 typically provide optimal sharpness across the frame while maintaining sufficient depth of field for most temple compositions.
Shooting positions affect spatial relationships and visual impact. Ground-level perspectives emphasize vertical elements and create dramatic upward views. Eye-level shooting normalizes perspective reducing architectural drama but improving documentation accuracy. Elevated positions from temple terraces, adjacent buildings, or constructed platforms reveal spatial relationships between structures and provide overview perspectives impossible from ground level. Hatshepsut Temple’s terraced design particularly benefits from elevated shooting positions showing the integration between natural cliff faces and constructed ramps.
Capturing Hieroglyphic and Relief Details
Egyptian relief carving and hieroglyphic inscriptions represent distinct photographic challenges requiring specialized approaches to lighting, composition, and exposure management. These elements provide intimate counterpoints to grand architectural scale, revealing craftsmanship quality and artistic sophistication within monumental structures.
Side lighting proves essential for relief photography, creating shadows that reveal carved depth and surface texture. Morning and afternoon sun angles graze temple walls producing optimal conditions for relief documentation. Positioning camera and subject so light strikes surfaces at 30-60 degree angles maximizes shadow definition without excessive darkness in recessed areas. Midday overhead lighting flattens reliefs eliminating depth perception—avoiding these conditions or supplementing with off-camera flash creates better results.
Focal length selection affects detail isolation and context inclusion. Wide-angle shots (24-35mm) show reliefs within architectural context—entire wall sections, doorway surrounds, column bases—maintaining spatial relationships and narrative continuity. Medium telephoto focal lengths (70-135mm) isolate specific scenes or inscription blocks eliminating distracting surroundings while maintaining readable detail. Longer telephoto lenses (200-400mm) capture minute details—individual hieroglyphs, tool marks, paint traces—from distances respecting site preservation requirements.
Hieroglyphic Photography Techniques
Hieroglyphic inscriptions require sharp focus, accurate color representation, and sufficient resolution for subsequent study or publication. Apertures of f/8-f/11 provide optimal lens sharpness while maintaining adequate depth of field for surface irregularities. Focus points should center on primary inscription areas using single-point autofocus or manual focus confirmation. Matrix/evaluative metering handles most inscription exposures though spot metering helps with extremely high-contrast situations.
Color accuracy matters for hieroglyphic documentation as pigment traces help archaeologists understand original decoration schemes. Custom white balance from gray card readings produces more accurate color than auto white balance algorithms confused by dominant sandstone hues. RAW file capture permits white balance adjustment in post-processing without image quality loss. Photographing color reference cards adjacent to inscriptions enables subsequent color correction and documentation of actual hues versus camera interpretation.
Macro photography reveals surface details invisible to casual observation—tool marks showing carving techniques, paint layers indicating decoration sequences, weathering patterns documenting exposure history. Macro lenses (90-105mm) or close-focusing telephoto zooms enable detailed work while maintaining working distances preventing accidental surface contact. Ring lights or small LED panels supplement ambient light providing even illumination for shadow-free detail documentation.
Relief Carving Narrative Photography
Egyptian relief sequences tell stories through multiple connected scenes—battle narratives, religious processions, offering presentations, daily life activities. Photographing these narratives requires decisions about completeness versus selectivity. Wide shots capture complete sequences maintaining narrative flow and spatial context. Detail shots highlight exceptional craftsmanship or significant historical information. Combining both approaches creates comprehensive documentation suitable for subsequent study or publication.
Panoramic stitching techniques assemble multiple frames into seamless composite images showing complete wall sections or extended relief sequences. Shooting 10-20 overlapping frames with 30-40% overlap between adjacent images provides sufficient data for stitching software. Using consistent exposure, white balance, and focus across the sequence ensures seamless blending. Panoramic approaches work well for long corridor walls, courtyard perimeters, and hypostyle hall columns where single frames cannot capture complete compositions.
Light Management Throughout the Day
Understanding how light quality changes throughout the day helps photographers optimize shooting schedules for different site types and photographic objectives. Luxor’s desert environment produces consistent weather patterns with reliable sun positions enabling precise light condition predictions.
Dawn shooting begins 30-45 minutes before sunrise when blue hour provides soft, diffused illumination ideal for establishing shots and atmospheric temple views. Color temperature shifts from deep blue to warm gold as sunrise approaches. The 90 minutes immediately following sunrise deliver optimal conditions for most architectural photography—warm color temperature enhances sandstone, low sun angle creates dramatic shadows, and soft light maintains manageable contrast ratios.
Mid-morning through mid-afternoon (9 AM – 3 PM) presents challenges with harsh overhead sun creating strong shadows, high contrast ratios exceeding camera dynamic range, and flat lighting reducing surface texture visibility. This period works well for detail photography where eliminating shadows proves beneficial—hieroglyphic documentation, architectural measurement photos, and color reference captures. Shaded areas under colonnades and within hypostyle halls receive indirect light creating even illumination suitable for relief photography.
Golden Hour and Sunset Photography
The final 90 minutes before sunset mirror morning golden hour conditions with warm color temperature, dramatic shadow angles, and manageable contrast. West Bank sites including Valley of the Kings face east, receiving front lighting during afternoon that emphasizes surface detail without harsh side shadows. East Bank sites face west, benefiting from sunset illumination that dramatically lights temple facades.
Sunset timing varies by season—December-January sunsets occur around 5 PM while June-July extends until 6:30 PM. Planning shooting schedules around seasonal sunset times optimizes golden hour photography. Arriving at sites 90 minutes before sunset allows time for composition refinement and lighting evaluation before optimal conditions arrive. Most sites close 30-60 minutes before complete darkness, limiting late sunset photography opportunities.
Blue hour photography begins immediately after sunset continuing 30-45 minutes while residual skylight provides illumination. This period creates atmospheric temple silhouettes against colorful skies. Long exposures (2-30 seconds) capture ambient light while maintaining sky color saturation. Tripods become essential for sharp images during extended exposures. Many Luxor sites close at sunset eliminating blue hour photography opportunities, though the Luxor Temple remains visible from public streets and the Corniche promenade after official closing times.
Temple-Specific Photography Strategies
Each major Luxor monument presents unique photographic opportunities and challenges requiring specialized approaches. Understanding site-specific characteristics helps photographers develop effective shooting plans maximizing limited time at each location.
Karnak Temple Photography
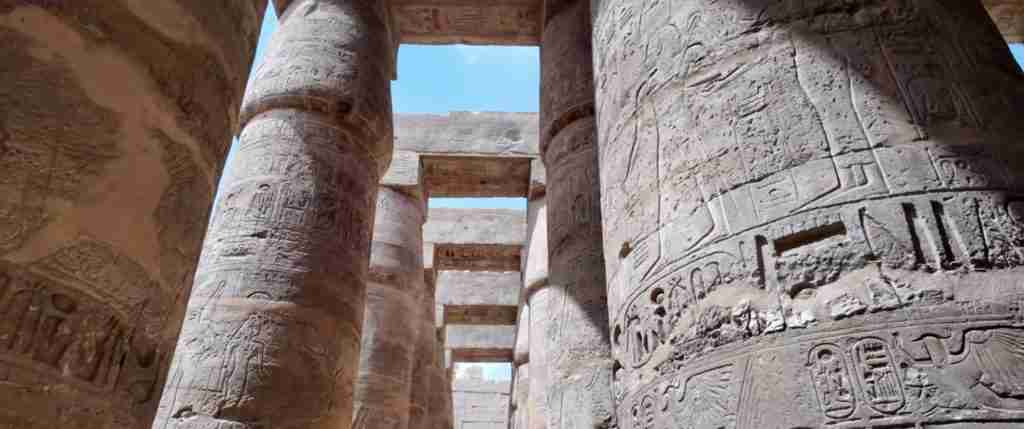
Karnak Temple’s immense scale and complex layout require multiple visits for comprehensive coverage. The Great Hypostyle Hall ranks as the most photographed area with 134 columns creating dramatic perspective compression opportunities. Shooting from the central aisle toward either end produces classic symmetrical compositions emphasizing column forest density. Side aisles offer asymmetrical alternatives with columns framing distant gateways.
Early morning light streams through hypostyle hall clearstory windows creating dramatic light shafts visible when dust particles float in air. These ephemeral light effects last 30-60 minutes after sunrise before sun angle eliminates shaft visibility. Positioning camera to include both illuminated columns and light beams creates dramatic atmospheric imagery. The Sacred Lake provides reflection opportunities during calm morning conditions before breeze disturbs water surfaces.
The First Pylon measures 113 meters wide and 40 meters tall, requiring ultra-wide lenses (14-20mm) for complete inclusion from nearby positions. Distance positions across the entrance plaza enable standard wide-angle coverage (24-35mm) with better perspective control. Including human figures at pylon base provides essential scale references demonstrating monument proportions. Afternoon light front-lights the pylon’s western face creating even illumination without harsh shadows.
Luxor Temple Photography
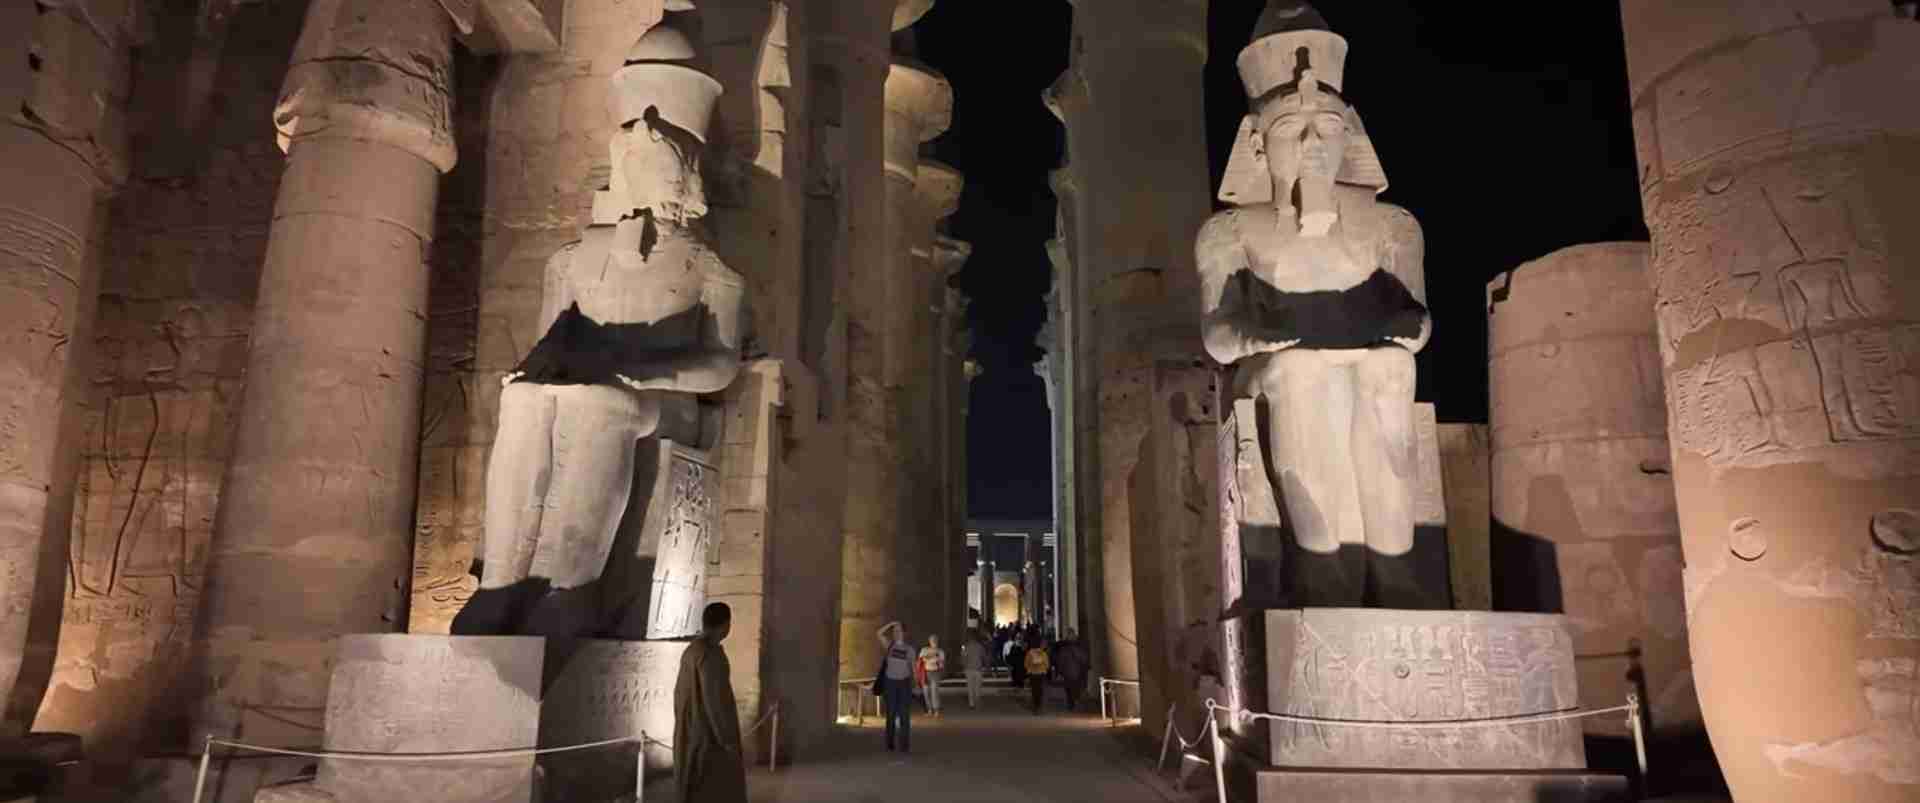
Luxor Temple sits within the modern city creating urban context opportunities unusual for Egyptian temples. Including street scenes, riverfront Corniche, and surrounding buildings in compositions provides contemporary-ancient juxtapositions. The temple remains partially lit after dark with floodlighting creating nighttime photography opportunities accessible from public areas.
The processional colonnade features perfectly aligned columns creating strong perspective convergence when shot axially from one end toward the other. Low camera positions emphasize column height while centered compositions leverage bilateral symmetry. The Abu Haggag Mosque built atop Roman-era additions creates interesting architectural layering showing continuous site occupation across millennia. This cultural palimpsest offers conceptual photography opportunities exploring temporal depth within single frames.
The temple’s north-south alignment means the eastern face receives morning front-lighting while the western face illuminates during afternoon and evening. Obelisk and colossal statue photography benefits from side-lighting during transitional periods between front and back lighting when shadow definition reveals surface detail without excessive contrast.
Hatshepsut Temple Photography
Queen Hatshepsut’s mortuary temple presents photographers with exceptional modern architectural qualities—clean geometric forms, horizontal terraced platforms, and integration between natural cliff faces and constructed ramps. The structure’s western orientation means front-lighting occurs during morning through mid-afternoon with optimal conditions from 9 AM to 1 PM when sun angle strikes the facade perpendicularly.
Distance views from the entrance plaza show the complete temple composition against the cliff backdrop. Terrace levels provide elevated shooting positions revealing spatial relationships between ramps, colonnades, and courtyards. The colored reliefs inside the colonnades maintain exceptional preservation with original pigments visible—photography here requires careful exposure management balancing bright exterior light with dim interior conditions.
Aerial perspective from surrounding hills provides overview shots showing the temple’s integration within the natural landscape. The climb to elevated positions requires 30-45 minutes and departs from established paths—photographers should obtain permission from site guards and exercise caution on loose scree slopes. These elevated views work best during late morning through mid-afternoon when sun angle fully illuminates the temple facade.
Medinet Habu Photography
The mortuary temple of Ramesses III at Medinet Habu offers extensive relief sequences depicting naval battles, military campaigns, and ceremonial activities. The fortress-style entrance gate provides imposing architectural subject matter with massive tower flanks creating dramatic vertical compositions. Morning light (7-11 AM) illuminates the entrance facade while afternoon sun (2-5 PM) lights the main temple structures within the complex.
Relief photography excels here due to the quantity and quality of carved decoration. The first courtyard walls show battle scenes with exceptional detail preservation. Using telephoto lenses (70-200mm) isolates specific scenes from larger narrative sequences. The site’s relative lack of visitors compared to Karnak or Valley of the Kings enables patient composition work without crowd pressure.
The complex’s outer walls measure 18 meters high and extend 300+ meters creating massive architectural forms. Wide-angle photography from corner positions emphasizes both height and length simultaneously. The fortification towers provide elevated shooting platforms (when access permits) offering overview perspectives of the complete complex layout.
Valley of the Kings Photography Considerations
Photography restrictions limit Valley of the Kings opportunities to exterior tomb entrances, valley landscapes, and permitted special cases. The dramatic desert landscape surrounding royal tombs creates compelling environmental photography showing the geographic context of burial site selection. Wide-angle lenses capture valley vistas including multiple tomb entrances, access paths, and the surrounding limestone cliffs.
Tomb entrance photography focuses on doorway architecture, protection structures, and numbered identification markers. These entrance shots provide location documentation useful for organizing larger photographic projects or publications. Morning light (7-9 AM) illuminates east-facing tomb entrances while afternoon sun (3-5 PM) lights west-facing openings.
The valley’s limestone geology creates interesting textures and patterns when photographed in detail. Weathering patterns, geological stratification, and erosion features provide abstract compositional opportunities. Macro photography reveals rock textures invisible to casual observation. These geological details contextualize the engineering challenges ancient builders faced excavating tombs through varying rock qualities.
Valley Landscape Photography
The broader Valley of the Kings landscape encompasses dramatic desert mountains, erosion-carved wadis, and distant Nile Valley views from elevated positions. Panoramic techniques capture the expansive desert environment where royal burials occurred. The valley’s isolation from fertile Nile floodplain becomes apparent in wide compositions showing the transition from agricultural land to barren mountains.
Hiking to elevated viewpoints above the valley provides overview perspectives showing spatial relationships between tomb locations. These hikes require 45-90 minutes and depart from marked paths—obtaining guard permission and carrying sufficient water proves essential. Morning ascents avoid afternoon heat while providing optimal lighting for east-facing views. These elevated positions work well for sunrise photography when warm light illuminates the valley floor while mountains remain in shadow creating strong tonal contrast.
Color Management and White Balance
Accurate color representation poses challenges in Luxor’s archaeological sites where warm sandstone, varied lighting conditions, and mixed light sources (daylight, shade, tungsten lighting) complicate white balance decisions. Understanding color management workflows ensures both accurate documentation and creative interpretation as shooting intentions dictate.
Daylight color temperature in Luxor ranges from 5000K during overcast conditions (rare) to 5500-6000K under clear midday sun. Golden hour drops to 3500-4000K creating warm color casts that enhance sandstone appearance but shift neutral tones toward orange. Shade color temperature rises to 7000-8000K producing blue color casts that cool warm-toned stone appearances.
Custom white balance from gray card readings provides accurate color reproduction for documentary photography. Taking gray card reference shots in identical lighting conditions as subject photography enables precise color correction in post-processing. This approach works well for hieroglyphic documentation, relief photography requiring color accuracy, and any imagery intended for archaeological publication where accurate color proves essential.
Creative White Balance Approaches
Auto white balance algorithms neutralize warm golden hour light and cool shade color casts, eliminating atmospheric qualities many photographers desire to preserve. Using daylight white balance preset (5500K) during golden hour maintains warm tones enhancing sandstone appearance and creating romantic atmospheric interpretations. This approach produces orange-biased results contradicting technically “accurate” color but matching human perceptual experience of warm light quality.
Intentional white balance shifts create mood and atmosphere beyond literal reproduction. Cooling white balance (6500-7500K) during midday shooting produces richer blue skies and emphasizes stone texture through increased contrast. Warming white balance (4500-5000K) intensifies golden hour effects creating saturated amber tones in sandstone. These creative approaches work well for interpretive photography prioritizing visual impact over documentary accuracy.
Mixed lighting situations—temple interiors receiving both window light and tungsten bulbs—create color balance conflicts no single white balance setting resolves perfectly. Shooting RAW files enables separate processing for different light sources, later composited in editing software. Alternatively, accepting mixed color temperatures as authentic environmental representation avoids artificial-looking corrections.
HDR and Bracketing Techniques
Extreme contrast between bright Egyptian sunlight and dim temple interiors often exceeds camera sensor dynamic range requiring exposure bracketing and HDR processing for complete tonal range capture. Modern cameras provide 12-14 stops of dynamic range—insufficient for scenes with deep shade areas adjacent to sunlit surfaces where contrast exceeds 16-18 stops.
Exposure bracketing captures 3-7 images at different exposure values (typically ±1-2 EV steps) providing shadow detail, midtone accuracy, and highlight information in separate files. HDR software merges these exposures creating single images preserving complete tonal range. This technique works well for hypostyle hall photography where bright skylight through clearstory openings contrasts with dark column bases, or doorway shots including both interior and exterior areas.
Natural-looking HDR processing maintains realistic tonal relationships avoiding over-processed appearance common with excessive HDR manipulation. Subtle HDR compression brings dynamic range within displayable limits while preserving natural contrast and tonal progression. Aggressive HDR creates surreal interpretations with flattened contrast and exaggerated local detail—acceptable for creative interpretation but unsuitable for architectural documentation.
Single Exposure Dynamic Range Maximization
When bracketing proves impractical—moving subjects, prohibition against tripods, or time constraints—single exposure optimization maximizes captured dynamic range. Exposing for highlights preserves sky and bright surface detail while accepting shadow detail loss. Modern RAW files permit 3-4 stops of shadow recovery without excessive noise, making highlight priority exposure combined with shadow lifting a viable alternative to bracketing.
Graduated neutral density filters darken bright skies while maintaining proper exposure on darker temple structures, compressing scene dynamic range within sensor capabilities. These filters work well for temple facade photography against bright skies where foreground structures require proper exposure. Digital graduated filters applied in post-processing provide similar effects with more flexibility though require careful application avoiding artifact-prone transitions.
Interior Temple Photography
Photographing dim temple interiors challenges camera low-light performance and requires techniques maximizing available light while maintaining image quality. Most temple interiors receive illumination only through doorways and clearstory windows creating dramatic lighting but difficult exposure conditions.
High ISO settings (1600-6400) enable hand-holdable shutter speeds in most interior spaces. Modern cameras with strong high-ISO performance produce acceptable image quality at ISO 3200-6400, particularly when downsizing for web display or standard print sizes. Noise reduction in post-processing further improves image quality. Pushing ISO limits proves preferable to motion blur from excessively slow shutter speeds or shallow depth of field from excessively wide apertures.
Wide apertures (f/2.8-f/4) gather maximum light while providing adequate depth of field for most interior compositions. Prime lenses with f/1.4-f/2.0 capabilities offer additional light-gathering ability though their shallow depth of field complicates focusing in three-dimensional architectural spaces. Zoom lenses with f/2.8 constant aperture provide good light-gathering with compositional flexibility—many photographers consider these ideal compromises for interior temple work.
Flash and Artificial Light Considerations
Flash photography remains prohibited in most Luxor temple interiors to protect ancient pigments and control commercial image use. Where permitted, off-camera flash provides more natural-looking illumination than harsh direct flash. Bouncing flash off walls or ceilings creates diffused light similar to natural window light. Multiple flash units or light painting techniques create complex lighting schemes revealing architectural details invisible under ambient illumination alone.
Continuous LED lights provide alternative artificial illumination for interior photography. Compact LED panels produce sufficient light for illuminating relief details or small statue groups. Larger studio-style LED fixtures generate enough output for comprehensive interior lighting though their size and power requirements limit practical field use. Any artificial lighting use requires site permission and respect for preservation priorities.
Post-Processing for Archaeological Photography
Digital post-processing enhances raw captures optimizing tonal range, color accuracy, and detail clarity while maintaining natural appearance appropriate for documentary architectural photography. Processing workflows balance technical optimization with artistic interpretation according to image purpose—archaeological documentation requires different approaches than creative interpretation.
Basic adjustments address exposure, white balance, and contrast establishing proper tonal foundation. Exposure adjustments compensate for camera metering errors common in high-contrast scenes. White balance correction achieves accurate color or enhances desirable color casts. Contrast adjustments optimize tonal separation across shadow, midtone, and highlight regions without blocking shadows or blowing highlights.
Detail enhancement through clarity, sharpening, and noise reduction brings forward surface textures and architectural details. Clarity adjustments increase local contrast enhancing midtone detail particularly effective for relief carving and hieroglyphic inscriptions. Sharpening compensates for subtle focus softness and lens characteristics. Noise reduction smooths high-ISO grain particularly in shadow areas while preserving detail in important regions.
Color and Tone Optimization
Selective color adjustments optimize individual hue representation independent of overall color balance. Warming sandstone tones while cooling sky blues creates aesthetically pleasing imagery. Vibrance increases color saturation in muted tones without over-saturating already-saturated colors. Saturation adjustments require careful application avoiding garish over-processing destroying natural appearance.
Local adjustments through gradient filters, radial filters, and brush masks apply corrections to specific image areas without affecting entire frames. Brightening foreground shadows while maintaining sky exposure, enhancing relief detail in specific wall sections, or adjusting color temperature in mixed-light areas becomes possible through localized editing. These selective adjustments prove essential for complex architectural photography where uniform global adjustments cannot address all image areas appropriately.
Perspective correction eliminates keystoning from wide-angle architectural photography. Vertical line correction ensures temple columns appear parallel rather than converging toward the top. Horizontal line correction prevents barrel or pincushion distortion from wide-angle lenses. Some converging lines enhance monumentality—deciding when to correct versus preserve distortion depends on photographic intent and personal aesthetic preference.
Creating Luxor Photo Essays and Narratives
Combining individual photographs into cohesive essays or narratives creates more impactful presentations than isolated images. Thoughtful sequencing, varied perspectives, and balanced coverage of different subjects and scales produce comprehensive visual stories communicating both specific details and broader contexts.
Establishing shots introduce viewers to locations providing environmental context and spatial orientation. Wide views of complete temples, valley landscapes, or architectural complexes set the stage for subsequent detail exploration. These establishing images work well as essay opening or section introduction photographs.
Detail photographs isolate specific elements—hieroglyphic inscriptions, relief carvings, architectural ornaments, statue faces—revealing craftsmanship and artistic sophistication invisible in wide shots. Alternating between wide environmental views and tight details creates visual rhythm maintaining viewer engagement through varied scales and perspectives.
Thematic Narrative Development
Organizing photo essays around themes creates conceptual coherence beyond simple location-based grouping. Themes might explore architectural evolution across dynasties, religious symbolism recurring across sites, construction techniques visible in different monuments, or daily life scenes depicted in tomb reliefs. Thematic organization requires more selective image editing than comprehensive coverage approaches but produces more focused narratives with stronger conceptual messages.
Human presence photographs—visitors exploring sites, guards resting in shade, tourists photographing monuments—add contemporary context showing how ancient sites function in modern times. These human elements create scale references, add narrative interest, and acknowledge ongoing site use beyond purely archaeological or artistic perspectives. Balancing human presence with architecture-focused imagery prevents overwhelming site photography with genre photography while recognizing the human dimension of heritage sites.
Ethical Considerations in Heritage Photography
Photographing UNESCO World Heritage sites carries ethical responsibilities beyond legal permissions and site regulations. Balancing personal artistic expression with preservation priorities, cultural sensitivity, and accurate representation requires thoughtful approaches to image creation and distribution.
Physical preservation concerns affect photography practices at sensitive sites. Flash lighting potentially damages ancient pigments through heat and UV exposure, justifying widespread flash prohibitions. Tripod restrictions prevent damage to floors and relieve congestion in crowded spaces. Touching walls or monuments for stability while photographing contributes to surface erosion from cumulative visitor impact. Respecting all restrictions, even when enforcement appears lax, demonstrates commitment to heritage preservation.
Cultural sensitivity considerations include respectful representation of religious sites still used for worship. The Abu Haggag Mosque at Luxor Temple, various tomb shrines, and active prayer spaces within archaeological sites deserve respectful photography avoiding sensationalism or intrusive shooting disturbing worshippers. Accurate captioning preventing misrepresentation of religious practices, historical events, or archaeological interpretations demonstrates research commitment and intellectual honesty.
Commercial Use and Copyright Considerations
Photographing Egyptian monuments for commercial publication or stock photography requires permits beyond standard entry tickets. The Supreme Council of Antiquities administers commercial photography permits with fees varying by publication type and image use. Editorial use typically receives simplified approval while advertising applications face stricter scrutiny and higher fees. Understanding these requirements before shooting for commercial purposes prevents legal complications.
Publishing or selling photographs should respect site management needs and archaeological community standards. Misrepresenting tomb locations to prevent looting, avoiding high-resolution publication of unstudied inscriptions preventing unauthorized scholarship, and consulting with site authorities regarding sensitive subjects demonstrates professional ethics. These considerations balance personal creative freedom with collective heritage preservation responsibilities.
FAQ: Photographing Luxor’s Ancient Monuments
Do I need special permission to photograph Luxor temples?
Standard entry tickets permit photography at most Luxor monuments for personal non-commercial use. Camera tickets cost an additional fee at some sites including Valley of the Kings, Medinet Habu, and certain tomb locations. Tripod use requires permission at some venues though many sites permit tripods without extra fees. Flash photography remains prohibited inside most enclosed spaces to protect ancient pigments. Commercial photography for publication or stock licensing requires advance permits from the Supreme Council of Antiquities with fees varying by usage type. Drone photography requires special approval rarely granted for archaeological sites due to safety and preservation concerns.
What time of day produces the best temple photography?
The first 90 minutes after sunrise and final 60-90 minutes before sunset provide optimal lighting conditions for most temple photography. Low sun angles during these golden hour periods create dramatic shadows emphasizing architectural relief, warm color temperatures enhance sandstone appearances, and lower light intensity produces manageable contrast ratios. Early morning shooting offers additional advantages including fewer crowds, cooler temperatures, and softer atmospheric conditions. Midday light (10 AM – 3 PM) creates harsh shadows and high contrast unsuitable for most architectural photography, though this period works well for detail shots where shadow elimination proves beneficial. Overcast conditions occur rarely but provide even lighting ideal for color-accurate relief documentation.
Can you use tripods at Karnak Temple and Valley of the Kings?
Karnak Temple permits tripod use in exterior courtyards, around the Sacred Lake, and in the Great Hypostyle Hall during regular visiting hours. Some interior chambers restrict tripods due to space limitations and visitor flow concerns. Valley of the Kings prohibits tripods inside all tombs but permits them in exterior valley areas for landscape photography. The restriction prevents damage to tomb floors and walls while managing visitor congestion in confined underground spaces. Monopods provide alternative stabilization permitted in most locations where tripod restrictions apply. Photographers requiring tripod access for specific projects should contact site management in advance to discuss special permission possibilities during off-peak hours.
What focal length lenses work best for Egyptian temple photography?
Three focal length ranges prove most useful for comprehensive temple coverage: ultra-wide angle (14-35mm) for complete temple facades, hypostyle hall perspectives, and architectural context; standard range (24-70mm or 24-105mm) for general architectural details, statue photography, and human-scale elements; telephoto (70-200mm or 100-400mm) for isolating architectural details, hieroglyphic documentation, and perspective compression in long corridors. A two-lens kit combining 16-35mm wide-angle with 24-70mm standard zoom covers most situations while minimizing dust-prone lens changes. Photographers prioritizing detail work benefit from adding 70-200mm telephoto capability. Single-lens solutions like 24-105mm or 24-240mm superzoom lenses reduce gear weight and lens changes though compromise optical quality compared to specialized lenses.
How do you photograph hieroglyphics and relief carvings effectively?
Successful relief photography requires side lighting creating shadows that reveal carved depth. Morning or afternoon sun angles grazing temple walls produce optimal conditions—position yourself so light strikes surfaces at 30-60 degree angles maximizing shadow definition. Use telephoto focal lengths (70-200mm) to isolate specific scenes from larger wall areas. Apertures of f/8-f/11 provide optimal sharpness while maintaining adequate depth of field for surface irregularities. Custom white balance from gray cards ensures accurate color representation of pigment traces. Focus carefully on primary inscription areas using single-point autofocus or manual focus confirmation. Avoid midday overhead lighting that flattens reliefs eliminating depth perception. When ambient light proves inadequate, supplemental LED lighting (where permitted) creates controlled illumination revealing surface detail invisible under natural light alone.
What camera settings handle bright sunlight and dark temple interiors?
Extreme contrast between bright exteriors and dim interiors requires different approaches depending on compositional intent. For scenes including both bright and dark areas simultaneously, exposure bracketing combined with HDR processing captures complete tonal range—shoot 3-7 exposures at ±1-2 EV steps then merge in post-processing. For single exposures in mixed conditions, expose for highlights and recover shadow detail in post-processing from RAW files—modern sensors permit 3-4 stops of shadow recovery. In dim temple interiors without exterior areas in frame, use high ISO (3200-6400), wide apertures (f/2.8-4), and slow shutter speeds (1/30-1/60 second) prioritizing sufficient exposure over minimal noise. Image stabilization or bracing against walls enables slower shutter speeds when tripods face restrictions. Matrix/evaluative metering handles most situations though spot metering helps in extremely high-contrast scenes.
Are there restrictions on publishing Luxor temple photographs?
Personal photography for non-commercial use faces no publication restrictions—sharing on social media, personal websites, or blogs proceeds freely. Commercial publication including stock photography, magazine articles, books, or advertising requires permits from the Supreme Council of Antiquities before shooting. Commercial permit fees vary by publication type ranging from minimal fees for educational publications to substantial amounts for advertising applications. Some sites prohibit photography entirely including certain tomb interiors where photography bans aim to prevent commercial image exploitation. Publishing photographs should include accurate captions respecting archaeological interpretations and cultural contexts. High-resolution images of unstudied inscriptions should avoid publication until proper academic documentation occurs. Consulting with site authorities regarding sensitive subjects demonstrates professional ethics and legal compliance.
How do you deal with crowds when photographing popular sites?
Arriving at opening time (typically 6-7 AM depending on season) provides 30-60 minutes before major tour groups arrive. This window enables crowd-free photography at popular locations like Karnak’s Great Hypostyle Hall or Valley of the Kings tombs. Using telephoto lenses isolates architectural details eliminating crowds from backgrounds even during busy periods. Long exposure techniques with neutral density filters blur moving people into ghostlike transparency while maintaining sharp architectural elements—this requires tripod stability and exposures of 1-5 seconds. Vertical compositions maximize architectural inclusion while minimizing crowd visibility in foreground areas. Including crowds as compositional elements rather than avoiding them entirely creates authentic contemporary context showing how ancient sites function in modern times. Off-season travel during May-September faces dramatically reduced visitor numbers enabling easier crowd avoidance though summer heat creates different challenges.
What post-processing software works best for temple photography?
Adobe Lightroom handles most post-processing needs for architectural photography including RAW file development, exposure optimization, color correction, and basic perspective adjustment. Its catalog system organizes large image collections from multi-day temple visits. Lightroom’s local adjustment tools (gradient filters, radial filters, brush masks) enable selective corrections essential for complex architectural scenes. Adobe Photoshop adds advanced capabilities including precise perspective correction, content-aware fill for removing unwanted elements, focus stacking for extreme depth of field, and sophisticated compositing for HDR and panoramic images. Specialized perspective correction software like DxO ViewPoint or PTLens provides more sophisticated architectural distortion correction than general-purpose tools. HDR software including Photomatix, Aurora HDR, or Lightroom’s built-in HDR merge processes bracketed exposures into single images with extended tonal range. Panoramic stitching through Photoshop, PTGui, or Lightroom creates wide-format images from multiple overlapping frames.
What makes Luxor different from other archaeological photography destinations?
Luxor concentrates exceptional quantities of monumental ancient architecture within small geographic areas enabling comprehensive coverage during multi-day visits versus dispersed sites requiring extensive travel between locations. The architectural scale at Luxor—massive pylon gates, hypostyle halls with 134 columns, kilometer-long temple axes—exceeds most other archaeological sites worldwide creating unique compositional challenges. Stone surface variation including cream sandstone, pink granite, and gray limestone provides color diversity rare in sites built from uniform materials. The dual-bank geography separating East Bank temples from West Bank tombs creates natural thematic divisions between above-ground monumental architecture and underground burial chambers. Excellent preservation of relief carving and occasional pigment traces enables detailed documentation of original decoration. The desert environment produces consistent weather patterns with reliable sunshine enabling predictable lighting condition planning. Active site use with functioning mosques and ongoing archaeological excavations adds contemporary layers to ancient monuments creating temporal depth opportunities for photo essays exploring continuity and change across millennia.