
Italy Photography Guide: Capturing Iconic & Regional Perspectives
Italy offers photographers an unmatched combination of dramatic landscapes, architectural masterpieces, vibrant street scenes, and coastal beauty spanning twenty distinct regions. From the jagged Dolomite peaks bathed in alpenglow to Sicily’s Greek temples silhouetted against Mediterranean sunsets, understanding regional photography opportunities, optimal lighting conditions, and technical approaches transforms casual snapshots into compelling visual narratives that capture Italy’s extraordinary diversity.
Key Takeaways: Photographing Italy’s Regions
- Golden Hour Dominates Italian Photography: Mediterranean light creates harsh midday conditions with blown highlights and deep shadows—shoot 30-60 minutes after sunrise and before sunset for warm, directional light that enhances architectural details, softens skin tones, and creates dimensional landscapes across all regions
- Regional Light Quality Varies Dramatically: Northern Alpine regions produce crisp, cool-toned light ideal for landscape photography, central Tuscan hills generate warm golden light perfect for pastoral scenes, while southern Mediterranean coasts create intense saturated light requiring exposure compensation and graduated filters
- Architectural Photography Demands Technical Precision: Italy’s Renaissance palaces, Roman ruins, and medieval towers challenge photographers with perspective distortion—tilt-shift lenses or perspective correction in post-processing prevent converging verticals, while polarizing filters reduce reflections on marble and enhance sky contrast
- Seasonal Changes Transform Photographic Opportunities: Spring wildflowers carpet Umbrian valleys, summer’s harsh light favors coastal scenes and architecture, autumn fog enhances Tuscan cypress landscapes, winter snow transforms Dolomite peaks—understanding seasonal patterns ensures optimal conditions for specific subjects and regions
- Crowd Management Requires Strategic Planning: Iconic locations like Venice’s Rialto Bridge, Rome’s Trevi Fountain, and Cinque Terre’s harbors swarm with tourists midday—shooting before 7 AM, during winter months, or from elevated perspectives eliminates crowds while capturing clean compositions
- Regional Cultural Sensitivity Enhances Access: Italian locals respond positively to photographers who greet respectfully, ask permission before shooting portraits, avoid intrusive equipment in sacred spaces, and patronize local businesses—cultural awareness opens doors to private courtyards, family workshops, and authentic moments unavailable to insensitive photographers
People Also Ask About Photographing Italy
What camera equipment do I need for photographing Italy?
A versatile zoom lens covering 24-70mm range handles most Italian photography situations—wide enough for architectural interiors and landscapes, long enough for street photography and detail shots. Full-frame mirrorless cameras excel in Italian light conditions through superior dynamic range capturing both bright Mediterranean skies and shadowed architectural details. Add a 70-200mm telephoto for compressing Tuscan landscapes and isolating architectural details, plus a wide-angle 16-35mm for cathedral interiors and mountain vistas. Essential accessories include circular polarizing filter for managing reflections on water and marble, neutral density filters for long-exposure shots of canals and crowds, sturdy tripod for blue hour city scenes and low-light interiors, and extra batteries since cold Alpine conditions and constant shooting drain power rapidly. Smartphone cameras produce excellent results for casual photography, particularly in good light, though they struggle with low-light situations and lack telephoto reach for distant subjects.
When is the best time of day to photograph Italian landmarks?
Shoot famous Italian landmarks during golden hour—30-60 minutes after sunrise and before sunset—when warm, angled light creates texture and dimension while avoiding harsh midday shadows and tourist crowds. Morning light favors east-facing subjects like Venice’s San Marco Square and Florence’s Duomo, while evening light illuminates west-facing locations including Rome’s St. Peter’s Basilica and Positano’s cliffside houses. Blue hour, the 20-30 minutes after sunset and before sunrise, provides magical twilight when artificial lights balance natural light, perfect for city scenes combining illuminated monuments with colorful sky. Midday works only for subjects under cloud cover, in shaded streets, or when deliberately using harsh light for dramatic architectural photography. Overcast days produce even, soft light ideal for street photography, portraits, and subjects where harsh shadows create problems. Night photography captures illuminated monuments, empty piazzas, and long-exposure light trails through cities, though requires tripod and careful exposure management balancing bright lights against dark surroundings.
How do I photograph the Dolomites for dramatic mountain landscapes?
Photograph the Dolomites during summer and autumn when hiking trails access prime viewpoints, or winter for snow-covered peaks and blue ice, avoiding spring when melting snow creates muddy conditions and limited access. Shoot alpenglow—the pink-orange light illuminating peaks at sunrise and sunset—positioning yourself 30-45 minutes before sunrise facing east, or evening facing west. Iconic Dolomite locations include Tre Cime di Lavaredo for dramatic triple peaks, Lago di Braies for mirror reflections with mountain backdrop, Alpe di Siusi for expansive Alpine meadows with Sassolungo massif, and Seceda for jagged ridgeline accessible via cable car. Use wide-angle lens capturing expansive mountain panoramas, or telephoto compressing distant peaks and isolating dramatic rock formations. Include foreground elements—wildflowers, weathered trees, alpine huts—creating depth and scale. Polarizing filter darkens blue sky enhancing contrast with pale limestone peaks, while graduated neutral density filter balances bright sky against darker foreground. Focus stack when shooting at small apertures to maintain sharpness throughout frame, or use hyperfocal distance technique ensuring everything from immediate foreground to distant peaks stays sharp.
What are the biggest mistakes photographers make in Italy?
Shooting only during midday represents the most common Italian photography mistake—harsh Mediterranean sun creates blown highlights in white marble, impenetrable shadows in narrow streets, and unflattering light for portraits, yet many photographers waste golden hour eating rather than shooting. Neglecting perspective correction when photographing architecture produces converging verticals where buildings lean backwards, easily fixed using tilt-shift lens, perspective correction in editing software, or shooting from elevated position. Over-relying on famous angles reproduces identical images countless other photographers capture—explore side streets, elevated viewpoints, and less-photographed regions for unique perspectives. Ignoring permission before photographing people creates confrontations and misses opportunities—Italians often enthusiastically participate when asked respectfully, but react negatively to invasive photography. Failing to scout locations wastes precious light—arrive at photography locations before ideal light begins, identifying composition, setting up tripod, and testing exposures rather than scrambling during brief optimal conditions. Underestimating Italian crowds during peak season ruins compositions—iconic locations like Trevi Fountain and Ponte Vecchio require early morning, winter visits, or elevated angles eliminating ground-level tourists from frame.
Extended multi-day tours – 5+ days
Featured Italy Multi-Day Tour Packages
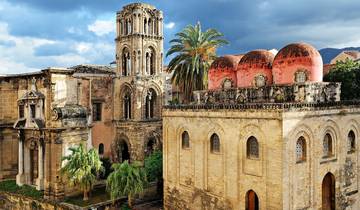
8 days
8 Days Small Group Sicily Highlights (Max 8 Guests)
- ✓ Comprehensive Italy tour
- ✓ Expert local guides included
- ✓ All accommodation arranged
- ✓ Transportation provided
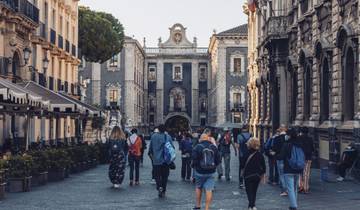
8 days
Sicilian Secrets – Tour of Sicily 8 days
- ✓ Comprehensive Italy tour
- ✓ Expert local guides included
- ✓ All accommodation arranged
- ✓ Transportation provided
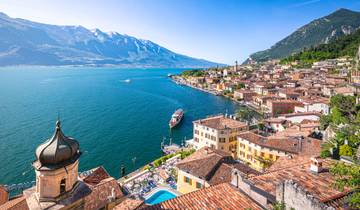
7 days
Taste of Italy
- ✓ Comprehensive Italy tour
- ✓ Expert local guides included
- ✓ All accommodation arranged
- ✓ Transportation provided
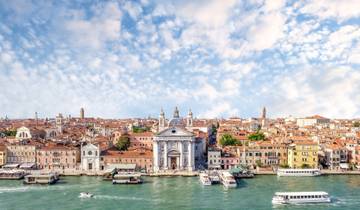
5 days
Italy City Break – 5 Days
- ✓ Comprehensive Italy tour
- ✓ Expert local guides included
- ✓ All accommodation arranged
- ✓ Transportation provided
Multi-day tour packages powered by TourRadar. Prices and availability subject to change.
Introduction: Italy’s Photographic Diversity Across Twenty Regions
Italy’s geographical span from Alpine peaks to Mediterranean shores creates extraordinary photographic variety within relatively compact territory. Each of twenty administrative regions offers distinct visual character shaped by topography, architecture, light quality, and cultural heritage. Northern regions present dramatic mountain landscapes, glacial lakes, and Austro-Hungarian influenced architecture demanding technical proficiency in landscape photography. Central regions provide rolling hills, Renaissance cities, and pastoral scenes requiring understanding of classical composition and golden light. Southern regions offer coastal drama, Greek ruins, and intense sunlight challenging photographers to manage harsh conditions while capturing Mediterranean character.
The nation’s architectural timeline spans three millennia, from Greek temples in Sicily through Roman amphitheaters, Romanesque churches, Gothic cathedrals, Renaissance palaces, Baroque fountains, to contemporary design. Photographing this architectural diversity requires technical skills managing perspective distortion, understanding how light interacts with various materials from marble to terracotta, and recognizing architectural styles that define regional character. Northern cities showcase Gothic and Austro-Hungarian influences, central regions display Renaissance perfection, southern areas preserve Greek and Norman structures, creating distinct visual vocabularies requiring different photographic approaches.
Light quality varies dramatically across Italian regions due to latitude, altitude, and maritime proximity. Northern Alpine light produces crisp, cool-toned illumination with defined shadows ideal for landscape photography. Central Italian light takes on warm, golden character particularly in Tuscany and Umbria, creating the pastoral scenes defining countless paintings and photographs. Southern Mediterranean light intensifies through atmospheric clarity and reflection from surrounding seas, producing saturated colors and high contrast requiring graduated filters and careful exposure management. Understanding regional light patterns enables photographers to anticipate optimal conditions for specific subjects.
Seasonal variations transform Italian photography opportunities beyond simple weather changes. Spring brings wildflowers to Alpine meadows and Umbrian valleys, manageable crowds, and fresh green landscapes. Summer offers extended daylight hours, accessible high-altitude locations, and vibrant coastal scenes, though intense heat and tourist masses challenge photographers. Autumn provides harvest colors in vineyards, morning fog enhancing Tuscan landscapes, and cultural festivals, with more comfortable temperatures and reduced crowds. Winter delivers snow-covered Dolomites, empty city streets perfect for architectural photography, and dramatic storm light, though shortened days and cold conditions require preparation.
Italy’s cultural landscape adds living dimension to photography beyond static architecture and landscape. Street photography captures daily rituals in piazzas, markets bursting with regional produce, artisans practicing traditional crafts, and festivals celebrating local patron saints. Regional differences extend to people’s appearance, dress, and behavior—northern Italians maintain more reserved demeanor while southern communities embrace exuberant social interaction visible in street scenes. Successful Italian photography balances iconic landmarks with authentic cultural moments revealing how Italians actually live.
Technical considerations specific to Italian conditions include managing high contrast between bright skies and shadowed streets, dealing with crowds at famous locations, respecting cultural sensitivities regarding photography in churches and private spaces, and understanding local regulations about commercial photography and drone usage. Equipment choices balance quality with practicality—extensive walking through medieval hill towns and climbing bell towers demands manageable kit weight, while diverse subjects from coastal landscapes to cathedral interiors requires versatile lens selection.
This guide organizes Italy’s photographic opportunities regionally, providing specific location recommendations, technical guidance for shooting various subjects, advice on timing and light conditions, and cultural context for meaningful photography. Each regional section operates independently, allowing photographers to understand photographic characteristics, identify prime locations, and develop technical strategies for specific areas they plan to visit. The approach emphasizes practical information enabling photographers to maximize limited time in each region while capturing images reflecting Italy’s authentic character rather than reproducing clichéd tourist snapshots.
Northern Italy Mountain and Lake Photography: Alpine Landscapes and Venetian Waters
Northern Italian photography encompasses dramatic Alpine peaks, glacial lakes reflecting mountains, Venetian waterways, and historic cities combining natural grandeur with architectural refinement. The region’s cooler, crisper light suits landscape and architectural photography, while varied elevations from sea level to 4000-meter peaks create diverse shooting conditions requiring technical versatility. Eight northern regions—Valle d’Aosta, Piedmont, Lombardy, Liguria, Trentino-Alto Adige, Veneto, Friuli-Venezia Giulia, and Emilia-Romagna—provide months of photographic opportunities without exhausting subjects.
Photographing the Dolomites and Trentino-Alto Adige Mountains
The Dolomites present Italy’s most dramatic mountain photography opportunities through distinctive pale limestone peaks, Alpine meadows, and accessible viewpoints via cable cars and hiking trails. Tre Cime di Lavaredo (Drei Zinnen) forms the region’s most iconic composition—three massive peaks rising vertically from scree slopes, best photographed at sunrise when alpenglow illuminates north faces pink-orange while foreground remains in shadow. Rifugio Auronzo provides vehicle access to within 30-minute walk of prime viewpoints, enabling pre-dawn arrival for optimal light. Shoot with wide-angle lens capturing all three peaks, or telephoto isolating individual towers and compressing visual distance.
Lago di Braies offers mirror-like reflections of Seekofel mountain in turquoise-green glacial water, requiring calm early morning conditions before wind ripples surface. Arrive before sunrise beating crowds and capturing optimal reflections, shooting from lakeside boathouse for classic composition. Use polarizing filter reducing surface glare while enhancing sky saturation, though rotate carefully to maintain rather than eliminate reflections. Seceda’s ridgeline, accessible via cable car from Ortisei, provides sweeping views across jagged peaks with Odle massif dominating foreground—shoot vertical panoramas capturing ridgeline’s dramatic drop.
Alpe di Siusi, Europe’s largest high Alpine meadow, creates expansive pastoral scenes with Sassolungo massif backdrop, best photographed in June-July when wildflowers carpet meadows. Position Sassolungo in background with flowers and traditional alpine huts in foreground, shooting early morning when side light creates texture. Val di Funes and Santa Maddalena church exemplify Dolomite valley photography—shoot from Ranui viewpoint with 70-200mm lens compressing distance between church spire and Odle peaks behind, timing visit for autumn when deciduous trees add warm colors.
Winter Dolomite photography transforms landscapes through snow cover and blue ice, though requires winter driving skills, proper clothing, and shorter daylight hours. Photograph frozen waterfalls, icicle formations, and snow-dusted peaks, using polarizing filter to deepen blue sky against white snow. Technical challenges include battery drain in cold (carry extras inside jacket), lens fogging when moving between cold exterior and warm interior (seal camera in plastic bag before entering), and exposure compensation to prevent underexposed snow (add +1 to +2 stops).
Lake Como, Lake Garda, and Lombardy Lake District Photography
Italian lake district photography captures dramatic mountain backdrops reflected in deep blue water, elegant villas with terraced gardens, and colorful lakeside villages. Lake Como provides sophisticated compositions combining Alpine scenery with belle époque architecture. Bellagio’s promontory position creates views down both lake branches—shoot from waterfront promenade at sunrise when light illuminates eastern shore villages. Villa del Balbianello’s terraced gardens and lakeside loggia require advance booking for photography access, rewarding with dramatic compositions of formal gardens framing lake views.
Varenna’s colorful waterfront creates vibrant reflections best captured early morning before boat traffic disturbs water. Shoot from Varenna’s walkway toward Fiumelatte, using telephoto lens compressing buildings and mountains into layered composition. Menaggio and Tremezzo offer views across to Bellagio with mountains behind, best photographed afternoon when sun illuminates eastern shore. Lake Como’s vertical mountains create challenging light—valleys remain shadowed until late morning while peaks catch early light, requiring graduated neutral density filters balancing exposure.
Lake Garda’s larger scale and varied shores provide diverse photography opportunities. Malcesino’s medieval castle and colorful harbor photograph beautifully from Monte Baldo cable car, which provides aerial perspective compressing harbor buildings against blue lake. Limone sul Garda’s lemon terraces and waterfront create Mediterranean atmosphere unusual for Alpine lake. Sirmione’s Scaliger Castle extends into lake on narrow peninsula, photographed from adjacent beach showing castle reflection in water. Shoot afternoon when western sun illuminates castle’s warm stone against blue water.
Venice and Venetian Lagoon Photography Techniques
Venice demands unique photographic approach managing crowds, narrow streets creating deep shadows, and water reflections dominating compositions. Successful Venice photography requires early mornings avoiding tourist masses, understanding tide schedules affecting water levels and reflections, and exploring beyond San Marco Square to quieter neighborhoods revealing authentic character. Shoot winter months when fog creates atmospheric conditions and crowds thin dramatically, or summer dawn when empty streets provide clean architectural photography.
Rialto Bridge photographs best from water level on Grand Canal showing bridge arch with gondolas passing beneath—shoot early morning before traffic intensifies or evening during blue hour when bridge lights illuminate. Avoid photographing from bridge itself where crowds prevent tripod use and perspective looks down rather than showcasing bridge’s architecture. San Marco Square requires pre-dawn arrival for crowd-free compositions—position at arcade corners shooting toward basilica with cafe tables as foreground, or climb Campanile for aerial view (open 9:30 AM requiring quick morning shoot after opening).
Burano Island’s brightly painted houses create vibrant color compositions enhanced by overcast light reducing harsh shadows between buildings. Photograph house reflections in narrow canals using polarizing filter partially rotated to maintain some reflection while reducing glare. Avoid midday when colors appear washed out, instead shooting morning or evening when angled light creates dimension. Compose carefully eliminating modern elements like satellite dishes and power lines that detract from timeless appearance.
Venice’s maze-like streets and bridges create compelling architectural photography emphasizing leading lines, symmetry, and framing. Shoot narrow calli (streets) using walls to frame distant views, bridges creating foreground elements, and doorways framing interior courtyards. Photograph canal intersections from bridges showing multiple waterways receding into distance, boats creating movement and scale. Use architectural elements like arches and columns to frame distant focal points, creating depth through layered composition.
Photographing Venice from water level reveals perspective impossible from streets—gondolas provide moving platform but challenge stability and direction control, while water taxis offer more stable platform with less control over position. Alternatively, shoot from canal-side fondamenta (walkways) at water level showing canal perspective with buildings rising above. Long exposure photography at night creates light trails from passing boats, smooth water surface, and illuminated buildings, requiring sturdy tripod and remote release for sharp architectural details.
Cinque Terre Coastal Photography
Cinque Terre’s five colorful villages clinging to dramatic Ligurian cliffs provide iconic Italian coastal photography combining architecture, landscape, and seascape. Manarola’s harbor photographed from Via Beccara viewpoint creates the region’s most recognizable composition—colorful houses stacked vertically above tiny harbor with Mediterranean backdrop. Shoot sunset when warm light illuminates west-facing buildings, or blue hour when village lights balance twilight sky. Arrive 45 minutes before sunset securing position at popular viewpoint.
Vernazza’s natural harbor and medieval architecture photograph beautifully from coastal hiking trail 200 meters toward Monterosso—elevated position shows entire village layout with castle and harbor. Shoot afternoon when sun illuminates north-facing village, or sunrise when harbor remains shadowed creating dramatic light contrast. Riomaggiore’s Via dell’Amore and harbor views require 70-200mm lens compressing stacked houses into dense composition. Corniglia, perched atop cliff without direct harbor access, photographs from vineyards showing terraces descending to sea.
Cinque Terre’s hiking trails provide varied perspectives unavailable from villages—photograph coastline from elevated positions showing dramatic cliffs and terraced vineyards. Trail between Vernazza and Monterosso offers best coastal views, though requires moderate hiking ability and appropriate footwear. Boat tours provide sea-level perspective showing villages rising vertically from water, though moving platform challenges sharp photography requiring fast shutter speeds and image stabilization.
Turin and Piedmont Architecture Photography
Turin presents elegant baroque and neoclassical architecture photographed through straight streets creating symmetrical compositions and unified building facades. Piazza San Carlo’s porticos create strong architectural leading lines photographed from either end showing symmetrical arcades converging toward central equestrian statue. Shoot early morning before crowds or evening when cafe lights illuminate porticos. Mole Antonelliana’s distinctive spire dominates Turin skyline—photograph from Parco del Valentino across river showing building rising above city with Alps backdrop.
Palazzo Reale and Palazzo Madama exemplify Piedmont baroque architecture requiring tripod for sharp detail and perspective correction preventing converging verticals. Interior photography challenges available light—most palaces prohibit tripods and flash, requiring high ISO settings and image stabilization. Shoot near windows where natural light illuminates frescoed ceilings and gilded details, using walls to steady camera for slower shutter speeds.
Bologna’s Porticos and Emilia-Romagna Architecture
Bologna’s 38 kilometers of porticos create unique architectural photography opportunities emphasizing repeating arches, shadow patterns, and perspective lines. Portico di San Luca, extending 3.8 kilometers uphill to sanctuary, creates seemingly endless archway compositions photographed from interior showing receding arches toward distant light. Shoot midday when light penetrates deep into porticos, or evening when artificial lights create pools of illumination separated by dark arches.
Piazza Maggiore’s asymmetric layout and varied architecture requires careful composition balancing Basilica di San Petronio’s incomplete facade with surrounding medieval buildings. Shoot from portico corners using columns to frame square, or climb Torre degli Asinelli for aerial perspective. Bologna’s terracotta buildings and red tile roofs create warm color palette enhanced by golden hour light—shoot late afternoon when sun illuminates building facades while sky retains blue color.
Central Italy Hill Country and Renaissance City Photography
Central Italian photography emphasizes rolling hills, cypress-lined roads, Renaissance architecture, and golden light defining visual imagery of Tuscany, Umbria, Marche, and Lazio. The region’s UNESCO World Heritage sites, medieval hill towns, and agricultural landscapes provide endless compositions combining natural beauty with human-scaled architecture. Central Italy’s moderate elevations, accessible year-round, and concentrated photographic opportunities within short distances make it ideal for photographers with limited time.
Tuscany’s Iconic Val d’Orcia and Hill Country Photography
Val d’Orcia’s rolling hills, cypress trees, and isolated farmhouses create quintessentially Tuscan compositions recognized worldwide through countless photographs. Chapel of Madonna di Vitaleta, isolated on hilltop near Pienza, provides the region’s most photographed subject—small Renaissance chapel surrounded by wheat fields and cypress-lined paths. Shoot from SR146 road between San Quirico d’Orcia and Pienza, parking at roadside viewpoint, walking to elevated position showing chapel with surrounding landscape. Morning light favors this location, though evening works when sun illuminates south-facing chapel.
Cypress-lined roads create leading lines drawing eye through frame toward distant focal points—Via di Terrapille near Pienza and Gladiator road (Strada dei Cipressi) near Monticchiello provide classic examples. Photograph these roads early morning when mist softens landscape and light creates atmospheric perspective, or sunset when golden light illuminates cypress silhouettes. Use telephoto lens (70-200mm) compressing visual distance making trees appear closer together and enhancing undulating hill patterns.
Sunrise and sunset conditions in Val d’Orcia require different approaches—sunrise brings fog settling in valleys creating layers of misty hillsides with cypress and farmhouses emerging as silhouettes, demanding elevated shooting positions and graduated neutral density filters managing bright sky against darker ground. Sunset produces warm golden light illuminating wheat fields and buildings, though landscape appears flatter without fog’s atmospheric depth. Autumn through spring provides best conditions for morning fog, while summer’s clear weather favors evening photography.
San Quirico d’Orcia and Pienza provide hill town photography combining Renaissance architecture with agricultural landscapes. Shoot from roads circling these towns showing urban profiles against rolling hills, using buildings as focal points within broader landscape compositions. Photograph Pienza’s Piazza Pio II at sunrise when eastern light illuminates travertine facades and shadows create architectural depth. Montalcino’s hilltop position offers views across vineyard landscapes toward Monte Amiata—shoot afternoon when light illuminates western valleys.
Florence Renaissance Architecture and Cityscape Photography
Florence photography centers on Renaissance architectural masterpieces requiring technical proficiency managing perspective, understanding how light reveals architectural details, and timing visits avoiding massive tourist crowds. Duomo’s polychrome marble facade photographs best from elevated positions preventing severe perspective distortion—shoot from Giotto’s Campanile (adjacent bell tower) showing dome and facade without extreme upward angle. Alternatively, photograph from Piazzale Michelangelo across river showing entire cityscape with Duomo, Palazzo Vecchio, and Ponte Vecchio visible.
Piazzale Michelangelo provides Florence’s most accessible elevated viewpoint, though popularity brings crowds during peak times—arrive before dawn for crowd-free cityscape photography and sunrise illuminating east-facing Duomo. Shoot panoramas capturing full skyline from Bellosguardo hills to San Miniato al Monte. Evening visits during blue hour balance artificial city lights with twilight sky, though crowds intensify during sunset. Alternatively, climb San Miniato al Monte steps above Piazzale Michelangelo for similar but quieter viewpoint.
Ponte Vecchio photographs from upstream Ponte Santa Trinita showing medieval bridge with buildings stacked above Arno River—shoot early morning when tour groups haven’t arrived or evening during blue hour when jewelry shop windows illuminate. Ponte alle Grazie downstream provides alternative view showing Ponte Vecchio’s south side. Photograph Arno’s reflections using slow shutter speeds smoothing water movement, or shoot during blue hour when building lights reflect in water balanced against sky.
Florence’s narrow medieval streets create challenging light conditions with deep shadows and bright highlights—shoot during overcast days when even light reveals architectural details without harsh contrast, or position subjects in consistent light either full shade or full sun avoiding mixed light. Via dei Calzaiuoli’s straight path from Duomo to Piazza della Signoria creates perspective composition with cathedral dome towering above street level. Photograph street scenes from elevated positions like building entrances showing patterns of people moving through space.
Siena Medieval Architecture and Piazza del Campo
Siena’s intact medieval character provides architectural photography emphasizing Gothic style, terracotta buildings, and vertical compositions within compact historic center. Piazza del Campo’s unique shell shape creates dynamic compositions photographed from upper edges showing scalloped paving pattern and Palazzo Pubblico. Climb Torre del Mangia for aerial views across terracotta rooftops toward surrounding hills. Shoot Palio horse race (July 2 and August 16) from elevated positions around square’s perimeter, though requires advance planning securing position hours before race.
Siena’s steep medieval streets create dramatic perspectives emphasizing vertical lines and shadow patterns. Via di Città’s gentle curve and uniform buildings create leading lines photographed from either end. Shoot late afternoon when low-angle light penetrates narrow streets illuminating building facades while creating defined shadows. Siena Duomo’s striped marble facade requires clear morning light revealing intricate architectural detail—photograph from adjacent steps showing facade’s full height and sculptural complexity.
San Gimignano’s Medieval Towers Photography
San Gimignano’s fourteen surviving medieval towers create distinctive skyline photographed from surrounding countryside showing towers rising above hill town silhouette. Shoot from roads approaching from north or south showing tower cluster against Tuscan hills. Climb Torre Grossa for elevated views across terracotta rooftops with remaining towers and Val d’Elsa views. Photograph dawn or sunset when warm light enhances towers’ golden stone against blue sky.
Interior town photography emphasizes narrow medieval streets, tower perspectives from ground level, and Piazza della Cisterna’s triangular layout. Shoot upward through tower tops framing sky between buildings, or photograph morning shadows creating strong geometric patterns across piazza paving. Position subjects in consistent light avoiding harsh sunlight patches characteristic of narrow medieval streets.
Assisi and Umbria Hill Town Photography
Assisi’s position on Monte Subasio provides elevated views across Umbrian valley photographed during golden hour when light illuminates valley floor while mountains remain in shadow creating atmospheric depth. Basilica of San Francesco’s double-church structure and frescoed interiors challenge photographers through restricted tripod use and mixed natural-artificial light—shoot exterior during morning when light illuminates pink stone facade, interior near windows where natural light reveals frescoes without flash.
Photograph Assisi from Santa Maria degli Angeli valley floor showing town rising vertically up mountainside with Rocca Maggiore castle crowning summit. Shoot afternoon when side light creates dimensional shadows revealing building volumes. Nearby Spello provides quieter hill town photography with flower-decorated streets in spring and medieval architecture without Assisi’s tourist masses.
Rome’s Ancient Ruins and Baroque Fountains
Rome photography balances ancient monuments, Renaissance churches, baroque fountains, and vibrant street life across sprawling historic center requiring strategic planning maximizing limited time. Colosseum’s exterior provides iconic composition requiring early morning arrival (before 8 AM) for crowd-free shots—photograph from Colle Oppio park’s elevated position showing northern facade, or ground level emphasizing arches and stonework. Shoot evening during blue hour when warm lights illuminate ancient stone against twilight sky. Interior photography emphasizes underground hypogeum areas and multiple arch levels creating geometric patterns.
Roman Forum and Palatine Hill create challenging compositions managing scattered ruins, harsh midday light, and crowds—shoot early morning (7:30 AM opening) when angle light creates shadows revealing architectural details and few tourists occupy spaces. Temple of Saturn, Arch of Septimius Severus, and Via Sacra provide strong compositional elements photographed from multiple angles. Climb Palatine Hill for elevated views across Forum toward Colosseum and Capitoline Hill.
Trevi Fountain requires pre-dawn visit (5-6 AM) for crowd-free photography—later arrivals face impossibly dense tourist masses preventing tripod use and clean compositions. Photograph from fountain’s left side showing full facade and Neptune sculpture, using wide-angle lens capturing architectural setting. Evening blue hour balances fountain lights with sky though crowds intensify. Use long exposure smoothing water movement while maintaining architectural sharpness.
Pantheon’s exterior and interior require different times—photograph exterior early morning before crowds fill Piazza della Rotonda, interior midday when sun streaming through oculus creates dramatic light beam revealing coffered ceiling and illuminating interior. Shoot from center floor position emphasizing oculus and circular design, or side positions showing light beam interacting with architecture. Spanish Steps photograph best morning when eastern light illuminates travertine stairs, or during azalea flowering (April-May) when flowers cascade down steps adding color.
Southern Italy Coastal and Ancient Site Photography
Southern Italian photography emphasizes dramatic coastlines, Greek and Roman ruins, whitewashed villages, and intense Mediterranean light requiring technical adjustments managing high contrast and saturated colors. Abruzzo, Molise, Campania, Puglia, Basilicata, and Calabria provide photographic variety from Adriatic cliffs to Tyrrhenian volcanic islands, ancient temples to baroque Lecce. The region’s less-developed character compared to northern tourism centers creates opportunities for authentic cultural photography and uncrowded locations.
Amalfi Coast Dramatic Cliffside Photography Techniques
Amalfi Coast photography captures colorful villages cascading down vertical cliffs into turquoise Mediterranean waters, requiring specialized techniques managing extreme vertical compositions, harsh summer light, and challenging access to optimal viewpoints. Positano’s pastel buildings stacked vertically provide the coast’s most iconic composition photographed from Via Cristoforo Colombo scenic overlook west of town center. Park at roadside pullout, shoot across bay showing entire village vertical layout from beach to mountain ridge. Afternoon light favors this western viewpoint, though morning provides softer light with fewer heat haze issues.
Photograph Positano from sea level showing vertical architecture and beach relationship—boat tours provide water perspective though moving platform challenges sharp photography requiring fast shutter speeds (1/500s minimum) and continuous autofocus. Alternatively, shoot from ferry between Amalfi and Positano when boats slow near shore providing more stable platform. Evening photography from Marina Grande beach shows town lights reflecting in water during blue hour, requiring tripod and careful exposure balancing bright lights against darker surroundings.
Amalfi town photographs from Sentiero degli Dei (Path of the Gods) hiking trail high above coastline showing town’s position between mountains and sea. Ravello’s elevated terraces at Villa Cimbrone and Villa Rufolo provide aerial perspectives across coast toward Amalfi and Positano—shoot afternoon when light illuminates western coastline. Gardens’ formal layouts and coastal views combine architectural and landscape photography. Praiano and Atrani provide less-touristed alternatives to Positano with authentic character and fewer crowds enabling clean compositions.
Amalfi Coast’s steep topography creates dramatic light conditions—coastal villages receive direct sun only few hours daily due to surrounding mountains, while mountains themselves remain illuminated longer. Plan photography timing considering each location’s light—eastern villages like Amalfi receive morning light but shade early afternoon, western locations like Positano receive afternoon-evening light but remain shadowed mornings. Summer’s high sun provides harsh top lighting midday creating deep shadows—shoot early morning or evening, or wait for cloud cover diffusing light.
Capri Island and Faraglioni Rocks Photography
Capri provides dramatic coastal photography combining limestone cliffs, azure waters, and iconic Faraglioni sea stacks. Gardens of Augustus terrace overlooking Faraglioni and Marina Piccola creates classic composition showing three limestone towers rising from sea with winding Via Krupp descending cliff below. Shoot morning when light illuminates east-facing viewpoint, using telephoto lens (70-200mm) compressing Faraglioni towers into layered composition. Alternatively, photograph Faraglioni from boat passing through natural arch in middle tower, requiring coordination with boat captain and fast shutter speeds for sharp results from moving platform.
Monte Solaro, reached via chairlift from Anacapri, provides 360-degree views across island, Bay of Naples, and surrounding coastline photographed during clear weather when visibility extends to mainland. Villa San Michele’s gardens and views create elegant architectural-landscape compositions combining formal gardens with coastal panoramas. Photograph Capri’s Marina Piccola beach from hillside roads showing colorful bathing establishments against blue water—shoot afternoon when sun illuminates beach.
Matera’s Ancient Sassi Cave Dwellings Photography
Matera’s Sassi districts—ancient cave dwellings carved into limestone ravine—provide unique architectural photography emphasizing earth-toned stone buildings stacked vertically up canyon walls. Belvedere viewpoint on Sasso Caveoso’s opposite rim shows Sassi’s eastern quarter spreading across hillside with cathedral dominating skyline. Shoot sunrise when golden light illuminates cave dwellings’ stone facades creating warm glow against blue sky. Evening photography captures artificial lights illuminating carved facades after dark creating magical atmosphere—use tripod for long exposures maintaining sharpness while gathering sufficient light.
Photograph within Sassi districts emphasizing narrow stone streets, arched passageways, and cave church frescoes requiring available light photography or subtle fill flash. Interior cave house photography challenges available light, narrow spaces, and cultural sensitivity—ask permission before photographing inhabited spaces, respect residents’ privacy, and avoid flash in churches. Strada Panoramica dei Sassi road provides elevated views across both Sassi quarters photographed morning or evening avoiding harsh midday light.
Puglia’s Trulli, Whitewashed Towns, and Coastal Photography
Alberobello’s trulli—conical limestone buildings unique to Puglia—create distinctive architectural photography best captured early morning or late afternoon avoiding tourist crowds and harsh midday light. Rione Monti district’s narrow streets lined with trulli photograph from various angles emphasizing repetitive cone shapes, stone construction details, and painted symbols on peaks. Climb to terrace viewpoints showing trulli rooftops spreading across hillside creating geometric pattern. Shoot individual trulli emphasizing architectural details—whitewashed walls, gray conical roofs, painted pinnacles.
Polignano a Mare’s dramatic seaside position with historic center perched on limestone cliff above turquoise Adriatic creates spectacular coastal compositions. Photograph from beach below showing town rising vertically from water with natural arch caves, or from Lungomare road showing Lama Monachile beach framed by cliff walls. Shoot morning when light illuminates east-facing coastal cliffs, or evening during blue hour when town lights illuminate against twilight sky. Summer crowds pack Lama Monachile beach midday—arrive early morning or late afternoon for cleaner compositions.
Ostuni’s whitewashed old town creates brilliant white architecture photographed against blue Mediterranean sky requiring exposure compensation preventing blown highlights in white walls. Shoot during golden hour when warm light prevents purely white appearance, adding golden tones to buildings. Photograph from surrounding olive groves showing town’s hilltop profile rising above agricultural landscape. Lecce’s baroque architecture demands detail photography emphasizing ornate limestone carving unique to Lecce baroque style—shoot early morning or late afternoon when angle light creates shadows revealing three-dimensional carving depth.
Sicily and Sardinia Island Photography: Mediterranean Light and Ancient Heritage
Sicily and Sardinia’s island locations create distinct photographic opportunities shaped by intense Mediterranean light, diverse landscapes from volcanic peaks to turquoise coasts, Greek and Roman ruins, and cultural elements reflecting centuries of foreign influences. Island photography requires managing high contrast lighting, understanding how to photograph archaeological sites emphasizing scale and historical significance, and capturing authentic local culture beyond resort tourism.
Sicily’s Valley of the Temples Photography
Valley of the Temples near Agrigento provides dramatic Greek temple photography requiring timing visits for optimal light revealing architectural details and managing tourist crowds. Temple of Concordia, Sicily’s best-preserved Greek temple, photographs best during golden hour when warm light illuminates honey-colored limestone against blue sky. Arrive 90 minutes before sunset entering through Porta V entrance nearest temples, allowing time reaching Concordia positioning for sunset. Shoot temple from southeast showing colonnade with surrounding landscape, using wide-angle lens capturing full structure or telephoto isolating architectural details.
Photograph temples using techniques emphasizing monumentality—include human figures for scale showing massive column height, shoot upward through columns framing sky emphasizing vertical dimensions, or capture entire temple profiles showing classical proportions. Overcast days provide even light revealing stone texture without harsh shadows, though eliminate dramatic sky contributing atmosphere to compositions. Dawn provides alternative to sunset with fewer visitors though requires staying overnight near site.
Other temples including Temple of Juno and Temple of Heracles offer varied perspectives—photograph multiple temples in single composition showing archaeological park’s extent, or focus individually on architectural details. Almond blossoming (late January-early March) adds foreground interest when trees surrounding temples bloom pink and white creating romantic Mediterranean atmosphere.
Mount Etna and Taormina Volcanic Landscape Photography
Mount Etna’s active volcanic status creates dramatic landscape photography opportunities combining snow-capped summit, black lava fields, and smoking craters. Photograph from multiple elevations showing volcano’s massive scale—distant views from Taormina showing coastal town with Etna backdrop, mid-elevation from lava fields emphasizing volcanic terrain, summit area showing craters and volcanic features. Safety restricts photography based on volcanic activity level—follow official guidance regarding accessible areas.
Taormina’s elevated position provides Mount Etna photography framing volcano through ancient Greek theater ruins combining natural and architectural elements. Shoot early morning when clear air provides Etna visibility before afternoon haze obscures mountain, positioning theater columns or arches framing volcano as backdrop. Theater’s excellent preservation enables architectural photography emphasizing semicircular layout, Ionic columns, and panoramic views across coast. Afternoon light illuminates theater’s western-facing structure though Etna photography suffers from haze.
Sardinia’s Costa Smeralda and Beach Photography
Sardinia’s northern Costa Smeralda provides quintessential Mediterranean beach photography with turquoise water, granite rock formations, and pristine white sand beaches requiring techniques managing intense summer light and water reflections. Spiaggia del Principe near Porto Cervo combines protected cove, crystal-clear water, and surrounding rock formations creating idyllic composition. Shoot morning or evening when low-angle light enhances water transparency and reduces surface glare. Use polarizing filter rotating to maximum effect reducing water surface reflections revealing underwater rocks and sandy bottom while deepening blue sky.
Cala Goloritze’s limestone arch and turquoise lagoon photograph best from beach level showing natural arch framing beach and sea, or elevated position from hiking trail showing cove’s protected setting between limestone cliffs. Access requires 90-minute hike from parking area or boat arrival—plan timing carrying necessary equipment while managing heat and sun exposure. La Maddalena archipelago’s granite islands provide dramatic coastal landscape photography combining sculptural rock formations weathered into organic shapes with Mediterranean scrub and azure waters.
Photograph Sardinian beaches emphasizing water color requiring polarizing filter and bright midday light showing maximum color saturation. Position sun behind photographer preventing lens flare while illuminating water. Include foreground elements—weathered driftwood, Mediterranean vegetation, granite boulders—creating depth and interest beyond simple beach scenes. Capo Testa’s granite rock formations sculpted by wind and water provide dramatic coastal compositions shot during golden hour when warm light enhances rock colors.
Technical Approaches for Italian Landscape and Architectural Photography
Successful Italian photography requires technical proficiency managing perspective distortion, high-contrast Mediterranean light, and compositional challenges inherent in architectural and landscape subjects. These technical considerations apply across regions, enabling photographers to produce compelling images reflecting Italy’s visual character while avoiding common technical pitfalls that compromise image quality.
Managing Perspective Distortion in Architectural Photography
Converging verticals—where buildings appear to lean backward when photographed from ground level pointing upward—represent the most common architectural photography problem requiring correction for professional results. Tilt-shift lenses provide optical solution maintaining parallel vertical lines regardless of camera angle, though expense and limited focal length options restrict practical use. Shoot from elevated positions at subject’s mid-height level enabling leveling camera horizontally while capturing building’s full height—climb adjacent buildings, photograph from hillsides, or use rooftops and terraces.
Post-processing perspective correction in Lightroom or Photoshop recovers skewed verticals though reduces image area requiring initial composition leaving space around subject. Activate lens profile correction automatically correcting distortion from specific lenses, then manually adjust vertical and horizontal perspective sliders straightening converging lines. Guided transformation tools in Photoshop enable drawing lines along architectural elements that should be vertical or horizontal, automatically adjusting perspective. Accept minor perspective distortion when extreme correction creates unnatural appearance or excessive cropping—slight convergence appears more natural than perfectly parallel lines achieved through over-correction.
Graduated Neutral Density Filters for Italian Landscapes
Italy’s bright Mediterranean skies often exceed camera sensor’s dynamic range particularly during midday and afternoon—without filtration, properly exposing landscape foreground overexposes sky to white, while properly exposing sky underexposes landscape to black. Graduated neutral density filters place dark glass over sky area transitioning to clear glass over landscape, balancing exposure across frame. Soft-edge graduated filters create gradual transition suitable for irregular horizons with trees, buildings, or mountains protruding into sky. Hard-edge filters create abrupt transition appropriate for flat horizons like seascapes.
Position graduated filter aligning transition zone with horizon line, rotating filter holder adjusting transition height matching composition. Avoid placing transition through important subjects creating unnatural darkening across buildings or mountains. Two-stop (0.6 ND) or three-stop (0.9 ND) graduated filters handle most Italian conditions balancing bright sky against darker foreground. Alternatively, exposure bracketing captures multiple exposures across dynamic range, blending in post-processing maintaining full detail in highlights and shadows—this technique provides more control than filters but requires stable tripod and static subjects.
Polarizing Filters for Water, Sky, and Architecture
Circular polarizing filters reduce reflections from non-metallic surfaces including water, glass, and painted surfaces while deepening blue sky and increasing overall contrast. Rotate filter while viewing through camera observing changing reflection intensity and sky saturation, positioning for desired effect. Maximum polarization occurs perpendicular to sun—with sun at photographer’s side rather than behind or in front. Photograph Italian lakes, Venetian canals, and coastal waters rotating polarizer to transparent water revealing rocks and marine life below surface, or maintain reflections for mirror-effect compositions.
Polarizing filters darken blue sky most effectively 90 degrees from sun, creating deeper blue against white clouds or architecture. Avoid over-polarization creating unnaturally dark sky appearing fake. Photograph polished marble architecture reducing surface glare revealing stone color and texture—particularly effective on white Carrara marble monuments and Renaissance church facades. Polarizers reduce light transmission by 1.5-2 stops requiring longer shutter speeds or wider apertures maintaining exposure—factor this reduction when handholding camera or working in low light.
Long Exposure Photography for Smooth Water and Empty Streets
Long exposure photography transforms Italian scenes through smoothing water movement, eliminating crowds through motion blur, and creating light trails from vehicles. Shoot during blue hour or night when ambient light levels enable multi-second exposures without overexposing—alternatively, use 6-10 stop neutral density filter enabling long exposures during daylight. Secure tripod preventing any camera movement during exposure, using cable release or self-timer avoiding vibration from pressing shutter.
Photograph Venetian canals with 15-30 second exposures smoothing gondola wakes and water ripples into glass-like surface while maintaining sharp architecture. Tourist crowds moving through frame during 30-60 second exposures create ghostly transparent figures or disappear entirely when continuously moving—this technique empties busy piazzas and streets during midday when normal photography shows overwhelming crowds. Balance exposure maintaining highlight detail in artificial lights while gathering sufficient shadow information—expose right checking histogram ensuring highlights don’t clip.
Optimal Timing, Light, and Seasonal Considerations for Italian Photography
Light quality and seasonal conditions transform Italian photography opportunities beyond simple weather differences. Understanding how light changes throughout day and year, recognizing optimal seasons for specific regions and subjects, and planning photography timing around light rather than convenience maximizes success and image quality. Mediterranean light characteristics, seasonal tourism patterns, and regional weather variations all factor into photography planning.
Golden Hour and Blue Hour Photography Timing
Golden hour—30-60 minutes after sunrise and before sunset—provides warm, directional light creating dimension in architecture and landscapes while avoiding harsh midday shadows. Light’s low angle during golden hour creates long shadows revealing texture and three-dimensional form in building facades, landscape undulations, and architectural details. Golden hour timing varies seasonally and by latitude—use smartphone apps calculating precise golden hour times for shooting locations accounting for seasonal changes. Northern Italy’s higher latitude creates longer golden hours and more extended twilight compared to southern regions.
Morning golden hour offers advantages including fewer tourists, calmer wind conditions for water reflections, and fresh light revealing clean atmosphere. Evening golden hour provides warmer color temperature, animated piazzas with Italians taking passeggiata, and transitions naturally into blue hour. Maximize golden hour productivity by scouting locations beforehand, arriving early positioning for optimal compositions, and working efficiently through brief optimal light period.
Blue hour—20-30 minutes before sunrise and after sunset—balances natural twilight with artificial lights creating magical conditions for city photography. Electric lights appear bright enough illuminating buildings, fountains, and streets, while sufficient ambient light remains in sky preventing black backgrounds and maintaining color. Shoot blue hour using tripod for sharp results with multi-second exposures, bracketing exposure finding optimal balance between highlight and shadow detail. Morning blue hour provides quieter conditions with fewer people, evening blue hour offers animated streets but increased crowds.
Managing Harsh Midday Mediterranean Light
Mediterranean summer sun creates high-contrast conditions challenging photographers—bright highlights blow out to white, deep shadows block to black, colors appear washed out, and landscape subjects lose dimension under flat overhead light. Avoid photography 11 AM-3 PM except when deliberately using harsh light for graphic architectural photography emphasizing geometric shadows and stark contrast. Alternatively, photograph subjects in consistent shade eliminating mixed light, or wait for cloud cover diffusing harsh sun into even light revealing detail.
When shooting midday proves unavoidable, manage harsh conditions through technical approaches: use graduated neutral density filters balancing sky and ground exposure, bracket exposures blending in post-processing, include shade in compositions positioning subjects under arcades or trees, photograph subjects with sun behind creating rim lighting rather than flat front lighting, or emphasize strong shadows as graphic elements rather than problems to eliminate. Architectural detail photography works well midday when strong directional light reveals carved ornamentation, textured stone surfaces, and three-dimensional architectural elements.
Seasonal Light and Weather Patterns Across Italian Regions
Spring (March-May) provides fresh green landscapes from recent rains, wildflowers in mountain meadows and agricultural areas, comfortable temperatures for hiking to remote locations, and moderate crowds. Light quality remains crisp without summer haze, though weather variability requires flexibility. Photograph spring blossoms in Umbrian valleys, Alpine wildflowers in Dolomites (late May-June), and agricultural landscapes showing plowed fields and fresh growth. Occasional rain creates dramatic storm light with dark clouds and sunbeams breaking through.
Summer (June-August) offers maximum daylight hours extending shooting times, accessible high-mountain locations after snow melts, vibrant coastal scenes with azure water, and cultural festivals. Heat haze reduces distant visibility particularly afternoon, intense sun creates harsh midday light requiring early and late shooting, tourist crowds peak July-August complicating compositions, and high temperatures challenge comfortable outdoor photography. Focus summer photography on coastal regions, dawn and dusk sessions, and elevated mountain locations escaping lowland heat.
Autumn (September-November) provides harvest landscapes with grape and olive harvesting, morning fog creating atmospheric Tuscan landscapes, comfortable temperatures, reduced tourist crowds, and dramatic storm light. Autumn color appears less dramatic than northern locations though vineyards turn golden-red October-November creating warm landscape tones. Fog formations require monitoring weather forecasts targeting mornings after cool clear nights following warm days—valleys fill with fog while hilltop towns emerge as islands above clouds creating ethereal conditions.
Winter (December-February) offers snow-covered mountain landscapes, empty streets and monuments enabling crowd-free architectural photography, dramatic storm light with dark clouds and spotlit architecture, and lowest tourist numbers. Shortened daylight hours compress shooting schedules, cold temperatures drain batteries requiring extras kept warm, rain and snow challenge equipment protection, and many mountain locations become inaccessible. Winter excels for city photography when sites empty of summer crowds, though landscape opportunities concentrate in accessible locations and lower elevations.
Equipment Recommendations and Practical Considerations
Equipment selection for Italian photography balances image quality requirements with practical considerations of weight, walking distances through hill towns and cities, security concerns, and varied shooting situations from mountain landscapes to cathedral interiors. Thoughtful equipment choices enable capturing quality images while maintaining mobility and managing expensive gear safely.
Camera Bodies and Lens Selection for Italian Photography
Full-frame mirrorless cameras provide optimal balance of image quality, size, and features for travel photography. Superior sensor dynamic range captures detail in bright Italian skies and shadowed architecture simultaneously, excellent high-ISO performance enables shooting in cathedral interiors without flash, and advanced autofocus tracks subjects for street photography. APS-C sensor cameras offer smaller size and weight with reduced cost, though sacrifice some low-light capability and dynamic range. Bring backup camera body preventing trip-ending equipment failure, or accept smartphone as emergency backup.
Primary lens covering 24-70mm or 24-105mm focal range handles majority of Italian photography situations—wide enough for architectural interiors, narrow streets, and establishing landscape shots, long enough for street photography, architectural details, and compressed landscape perspectives. Constant f/2.8 or f/4 maximum aperture enables shooting in variable light conditions including churches and evening street scenes. Add 16-35mm wide-angle zoom for cathedral interiors, mountain vistas, and situations requiring expansive perspective. Include 70-200mm telephoto for compressing Tuscan landscapes, isolating architectural details on distant buildings, and street photography from distance maintaining candid subjects.
Prime lenses offer superior optical quality and faster maximum apertures in lighter, smaller packages than zooms—35mm and 50mm f/1.8 primes provide excellent general-purpose focal lengths for street and architectural photography with low-light capability. Compromise includes fixed focal length requiring zoom-by-foot and potentially missing spontaneous moments while changing lenses. Consider travel photography style—planned landscape and architectural photography suits prime lenses and careful composition, spontaneous street photography benefits from versatile zooms enabling quick framing.
Essential Accessories for Italian Photography
Sturdy travel tripod enables sharp long exposures for night city scenes, blue hour photography, and low-light interiors while remaining portable for carrying through cities and hill towns. Carbon fiber construction minimizes weight though increases cost versus aluminum. Select tripod supporting camera’s weight with heaviest lens extended, reaching comfortable height without center column extension (which reduces stability), and collapsing small enough fitting in luggage. Ball head provides quick adjustment and secure locking, while geared head offers precise control for architectural photography.
Circular polarizing filter reduces reflections from water and architecture, deepens blue sky, and increases overall contrast improving image impact. Purchase filter matching largest lens diameter, using step-up rings adapting to smaller lenses—quality multi-coated filters prevent color casts and maintain image sharpness. Variable neutral density filter enables controlling exposure for long-exposure photography during daylight, smoothing water movement and eliminating crowds. Graduated neutral density filters balance bright sky against darker foreground, though exposure bracketing and post-processing HDR provides more flexible digital alternative.
Extra batteries prove essential when shooting all day, particularly cold weather when battery performance decreases and mirrorless cameras consume more power than DSLRs through electronic viewfinders. Carry 3-4 charged batteries rotating throughout day. High-capacity memory cards (64GB minimum) prevent running out of storage mid-shoot, with backup cards in case of corruption or loss. Lens cleaning kit including microfiber cloth, blower, and cleaning fluid maintains optical cleanliness essential for image quality—Mediterranean dust and sea spray require frequent lens cleaning.
Protecting Equipment and Managing Security
Italy’s crowded tourist areas attract pickpockets and opportunistic thieves targeting expensive camera equipment. Wear camera cross-body with strap around neck preventing grab-and-run theft, keep bag in front in crowded locations maintaining visual contact, and avoid displaying equipment unnecessarily—shoot then secure camera rather than wearing visibly when not photographing. Anti-theft camera bags with hidden zippers, slash-resistant straps, and locking mechanisms provide additional security though remain inconvenient for frequent access.
Photograph from secure positions preventing theft while equipment sits on tripod—avoid leaving bags unattended while composing shots, maintain physical contact with tripod legs preventing someone grabbing camera, and work with photography companion who watches equipment while you shoot. Purchase comprehensive photography insurance covering theft, damage, and loss—standard travel insurance typically provides inadequate coverage for expensive camera gear. Register equipment serial numbers enabling police reports and insurance claims if theft occurs.
Weather protection requires rain covers for camera and bag, lens hoods preventing rain drops on front elements, and plastic bags as emergency weather protection. Italian summer heat damages equipment left in direct sun or car interiors—keep gear shaded and ventilated, particularly avoiding leaving equipment in vehicle where temperatures exceed safe levels. Cold winter conditions require keeping spare batteries warm in interior pockets, allowing gradual temperature adjustment when moving between heated interiors and cold exteriors preventing condensation, and sealing camera in plastic bag before entering warm spaces from cold exterior preventing lens fogging.
Cultural Sensitivity and Photography Ethics in Italy
Successful Italian photography requires cultural awareness respecting local customs, understanding legal restrictions regarding photography, and maintaining ethical approach to photographing people and places. Culturally sensitive photography opens opportunities for authentic images while respecting subjects’ dignity and rights, whereas insensitive behavior closes doors and creates negative interactions damaging both immediate experience and photography community’s reputation.
Photographing People and Street Photography Ethics
Italian street photography culture differs from northern European and American contexts—Italians generally respond positively to photographers when approached respectfully, but react negatively to invasive photography without permission. Photograph public street scenes without individual permission under Italy’s broad interpretation of freedom of panorama, though commercial use of recognizable individuals requires model releases. Ethical practice suggests asking permission before photographing individuals even when legally permitted—approach subjects greeting in Italian, explain photography project or interest, and request permission photographing.
Children’s photography requires extra sensitivity—always obtain parent’s permission before photographing minors, even in public settings. Avoid photographing individuals in potentially embarrassing situations, homeless persons, or people who’ve declined permission. Respect “no photography” gestures or verbal requests immediately stopping without argument. Offer sharing images with subjects providing email or social media contact—this courtesy creates positive interactions and occasionally leads to deeper cultural exchanges.
Photograph cultural events, markets, and festivals maintaining unobtrusive presence—avoid blocking others’ views, shouting directions at subjects, or creating disturbance drawing negative attention. Long telephoto lenses enable candid street photography from distance though risk appearing predatory—balance photographic needs with subject comfort. Street performers and vendors depend on donations or sales—contribute if photographing their work rather than treating them as unpaid models.
Religious Sites and Sacred Spaces Photography
Catholic churches throughout Italy enforce varying photography policies—some prohibit all photography, others permit non-flash photography, and few allow tripod use. Observe posted signage, ask permission from church officials, and respect restrictions without attempting circumvention. Flash photography damages frescoes and disturbs worship—never use flash in churches regardless of policy. Dress appropriately covering shoulders and knees enabling access to churches that enforce modest dress codes.
Photograph religious services and ceremonies discreetly maintaining respectful distance—avoid positioning directly in front of worshippers, moving during solemn moments, or creating distraction with equipment sounds. Disable camera beep sounds and shutter sounds when possible, or muffle with hand. Some ceremonies including weddings and funerals prohibit photography except by official photographers—respect these restrictions absolutely. Vatican and major basilicas maintain strict photography policies—research requirements beforehand avoiding disappointment or confrontation.
Legal Restrictions and Commercial Photography Regulations
Italy permits photography of public spaces, buildings exteriors, and street scenes without restriction under freedom of panorama laws—photograph landmarks, architecture, and public areas without permission or fees for personal, editorial, and artistic use. Commercial photography (defined as work used in advertising or product promotion) may require permissions from property owners, though interpretation varies. Museums and archaeological sites enforce individual photography policies ranging from complete prohibition to permitted non-flash photography—comply with posted rules and staff instructions.
Drone photography faces strict regulations—register drones, maintain visual line of sight, fly below 120 meters altitude, avoid populated areas and emergency situations, and respect privacy. Many Italian cities and historical sites prohibit drone use entirely protecting heritage sites and public safety. Research specific location regulations before traveling with drone, accepting that many desired locations prohibit aerial photography.
Frequently Asked Questions About Italian Photography
What focal length lens works best for photographing Italian architecture?
A 24-70mm zoom lens handles most Italian architectural photography situations, providing wide-angle focal lengths (24-35mm) for capturing building facades and interior spaces while avoiding extreme perspective distortion, and moderate telephoto (50-70mm) for isolating architectural details and photographing from distance reducing converging verticals. The 24mm focal length captures cathedral interiors and narrow medieval streets without excessive distortion, while 50-70mm range photographs building facades from across piazzas maintaining natural perspective. Add 16-35mm wide-angle zoom when photographing expansive interiors like St. Peter’s Basilica or the Pantheon where 24mm proves insufficient capturing space, though accept increased perspective distortion requiring correction. Conversely, 70-200mm telephoto enables photographing architectural details on distant buildings—carved capitals, frescoed facades, tower sculptures—impossible to access closely. Prime lenses like 35mm f/1.4 or 50mm f/1.8 offer superior optical quality and low-light capability for architectural detail photography and evening city scenes, though fixed focal lengths require careful positioning and potentially missing shots when unable to reposition. Tilt-shift lenses like 24mm TS-E or 45mm TS-E provide optical perspective correction maintaining parallel vertical lines regardless of camera angle, invaluable for professional architectural photography though expensive and specialized limiting general travel photography usefulness.
How do I photograph the Cinque Terre without crowds ruining my shots?
Photograph Cinque Terre during shoulder seasons (April-May or September-October) when tourist numbers decrease significantly compared to summer peak, though weather becomes less predictable and some services reduce hours. Visit during winter months (November-March) when crowds virtually disappear and authentic local character emerges, accepting that some restaurants and accommodations close and rainy weather interrupts photography plans. Shoot early morning before 8 AM when most tourists remain in accommodations and dawn light creates optimal conditions—this strategy works even during peak season, requiring early wake-up but rewarding with empty streets and harbors. Access viewpoints before sunrise positioning for optimal light when it arrives, particularly Manarola’s Via Beccara viewpoint and Vernazza’s coastal trail overlook. Use long exposure photography during midday eliminating moving tourists through motion blur—30-60 second exposures with 10-stop neutral density filter turns crowds into ghostly transparent figures or removes them entirely when people continuously move through frame. Photograph from elevated positions on coastal hiking trails where crowds concentrate in villages below—trails provide perspectives showing villages’ dramatic positions impossible from ground level while separating photographer from tourist masses. Explore less-famous villages including Corniglia (least visited due to cliff-top position requiring stair climbing) and include neighboring towns like Porto Venere, Levanto, and Portovenere offering similar coastal character without Cinque Terre’s overwhelming tourism. Accept that some crowd presence adds authentic tourism culture element to images—photograph tourists interacting with landscape rather than treating them as problems to eliminate, creating environmental portraits showing how people experience these famous locations.
Should I bring a tripod to Italy or rely on handholding and image stabilization?
Bring a lightweight travel tripod for Italian photography despite added weight and bulk, enabling long exposure photography eliminating crowds, blue hour and night city scenes, HDR bracketing for high-contrast situations, and sharp architectural detail shots using base ISO. Long exposure photography proves impossible without tripod—smoothing water in canals and fountains, creating light trails from vehicles, and gathering sufficient light during blue hour require multi-second exposures that no image stabilization system manages handheld. Night photography of illuminated monuments, piazzas, and street scenes delivers substantially better image quality using tripod enabling base ISO (100-200) maintaining maximum detail and minimum noise, versus handholding requiring ISO 3200-6400 introducing visible noise and reduced sharpness. Architectural photography benefits from tripod enabling precise composition, focus stacking for extended depth of field, and using base ISO for maximum sharpness and dynamic range. Select carbon fiber tripod balancing stability with weight—carrying tripod through hill towns and climbing bell towers becomes problematic with heavy aluminum models, though lightweight tripods compromise stability in wind and with long telephoto lenses. Consider travel photography style and subjects before deciding—spontaneous street photography and documentary work benefit less from tripod than planned architectural and landscape photography emphasizing technical quality. Tripod alternatives include monopods providing partial stabilization in compact package, beanbags supporting camera on walls or railings, and simply bracing camera against stable surfaces when available. Many museums and some churches prohibit tripods regardless of equipment size—scout locations beforehand understanding restrictions, and maintain backup high-ISO handheld techniques for tripod-prohibited locations. Respect tripod restrictions absolutely rather than attempting circumvention creating confrontation and reinforcing negative perceptions of photographers among location management and other visitors.
What are the best camera settings for photographing inside Italian churches and cathedrals?
Photograph church interiors using aperture priority mode setting f/5.6-f/8 balancing depth of field against light-gathering capability, enabling auto-exposure adjusting for variable interior light while maintaining creative control over focus. Increase ISO to 1600-3200 or higher achieving shutter speeds preventing motion blur from camera shake—modern cameras handle these ISOs acceptably, prioritizing sharp images over minimal noise. Enable image stabilization reducing required shutter speed by 2-4 stops, allowing lower ISOs for cleaner images. Shoot RAW format capturing maximum dynamic range essential for recovering detail in extremely bright windows and deeply shadowed corners characteristic of church interiors. Use spot metering or exposure compensation preventing bright windows causing underexposure of interior—meter off mid-tone architectural elements like columns or floors rather than including windows in meter reading. Bracket exposures capturing highlights (windows) and shadows (interior details) for HDR processing or exposure blending, shooting three to five frames spanning 4-6 stops total range. Position near windows where natural light illuminates interior areas, using window light revealing frescoes, sculpture, and architectural details without requiring flash (typically prohibited). Shoot upward emphasizing soaring ceiling height and vaulted architecture—use wide-angle lens capturing full interior, though accept perspective distortion requiring correction. Include human figures providing scale showing cathedrals’ monumental dimensions—position subjects in doorways, beside columns, or walking through frame. Photograph when possible during services when candles illuminate interior and atmospheric smoke from incense creates light beams visible in camera, though maintain absolute discretion respecting worship. Alternatively, visit during midday when sun streaming through oculus or clerestory windows creates dramatic light effects impossible during overcast conditions or off-peak hours. Disable all camera sounds including shutter, beep, and focus confirmation preventing disturbance in quiet sacred spaces—use electronic shutter when available or muffle mechanical shutter with hand.
How do I photograph reflections in Venetian canals and Italian lakes?
Photograph water reflections during calm conditions without wind rippling surface—early morning typically provides calmest water before wind develops, while evening sometimes offers calm conditions though less reliably. Scout locations during scouting visits or previous days understanding how light and wind affect specific spots at different times, then return during optimal conditions for reflection photography. Use polarizing filter rotated to maintain maximum reflection rather than reducing it—polarizers eliminate reflections when rotated fully, but partial rotation reduces surface glare while maintaining reflection of buildings and sky, creating cleaner more vibrant mirrored image. Shoot from low angle near water surface emphasizing reflection size relative to actual subject—reflections appear more prominent when camera positions close to water level rather than elevated positions where reflections occupy smaller frame portion. Include actual subject and reflection in composition creating symmetry, or photograph reflection only creating abstract pattern less recognizable as reflection. Compose carefully eliminating distracting elements breaking reflection symmetry—boats, debris, ripples, bridges—that interrupt mirrored pattern, or deliberately include these elements creating dynamic tension between perfect reflection and real-world interruptions. Shoot during blue hour when artificial lights illuminate buildings while twilight sky maintains color rather than turning black—reflections of illuminated buildings in water create magical conditions where water appears to glow, particularly effective in Venice’s canals and around Italian lakes. Use long exposure (5-30 seconds) smoothing minor water ripples into glass-like surface while maintaining sharp architectural reflections—requires tripod and carefully balanced exposure preventing overexposed lights while maintaining shadow detail. Bracket exposures when reflecting scene contains both bright lights and dark shadows exceeding camera’s dynamic range, blending exposures in post-processing maintaining detail throughout tonal range. Symmetrical compositions work powerfully with reflections—position horizon at center splitting frame equally between reality and reflection, creating mirror effect where viewer must study image determining which half represents actual subject.
What photography apps help plan Italian photography timing and locations?
PhotoPills provides comprehensive photography planning tools including sun and moon position calculators showing exactly where sun rises and sets relative to landmarks, golden hour and blue hour timing calculated for specific dates and locations, exposure calculators for long exposure and depth of field, augmented reality visualizing sun/moon paths overlaid on camera view enabling precise composition planning, and location scouting features showing popular photography spots with example images. The app requires initial learning curve but rewards with powerful planning capabilities eliminating guesswork about optimal shooting times and sun positions. The Photographer’s Ephemeris (TPE) offers similar sun/moon planning specifically for landscape photographers, showing how light will fall on terrain at different times through 3D visualization. Google Earth enables virtual location scouting before traveling—explore areas around landmarks finding elevated viewpoints, identify foreground elements for compositions, and understand spatial relationships between subjects impossible to grasp from ground-level maps. Screenshot potential locations for reference during actual shooting. Weather apps including Windy.com and MeteoBlue provide hour-by-hour forecast crucial for planning photography around clouds, rain, fog, and storm light—check forecast morning of shoot adjusting plans based on predicted conditions, and monitor throughout day anticipating changing light. 500px and Instagram provide location-based photo browsing showing how other photographers have captured specific locations—search location tags discovering shooting angles, composition ideas, and understanding popular versus unique perspectives, though avoid simply copying existing images rather than developing personal vision. Offline maps including Maps.me enable navigation without data connection, particularly valuable in rural areas with limited cellular coverage—download Italian regions before traveling ensuring ability to navigate to remote locations.
How do I manage photography in Italy’s intense summer heat?
Schedule photography during cooler morning and evening hours avoiding midday heat while simultaneously capturing better light—shoot sunrise until 10 AM when temperatures remain comfortable and light stays optimal, rest during midday heat 11 AM-4 PM when harsh light creates poor conditions anyway, and resume shooting 5 PM through sunset and blue hour as temperatures drop. Carry minimal equipment reducing weight and heat burden—select one versatile zoom lens rather than multiple primes, eliminate non-essential accessories, and use lighter camera bag or minimal harness system instead of full backpack. Stay hydrated carrying sufficient water for extended shooting sessions—dehydration affects judgment and physical capability climbing stairs, navigating uneven terrain, and managing equipment safely. Wear technical clothing designed for hot weather including moisture-wicking fabrics, wide-brimmed hat protecting face and neck, light colors reflecting rather than absorbing heat, and comfortable footwear supporting extended walking on hot pavement. Apply and reapply sunscreen preventing sunburn that makes carrying camera bags painful and distracts from photography. Seek shade during rest periods allowing body to cool while protecting equipment from direct sun exposure damaging electronics and overheating sensors. Monitor equipment temperature—cameras and lenses in direct sun overheat affecting performance and potentially causing damage, particularly black camera bodies and lenses absorbing heat rapidly. Never leave equipment in vehicles where interior temperatures reach dangerous levels quickly. Adjust photography approach to heat conditions—photograph shaded subjects during midday avoiding harsh sun, explore indoor locations including museums and churches when outdoor heat becomes unbearable, or plan intensive photography days during cooler spring and autumn visits saving summer for different activities. Protect equipment from heat damage using light-colored camera bags reflecting rather than absorbing sun, avoiding leaving gear in direct sun longer than necessary, and allowing gradual temperature adjustment when moving between air-conditioned interiors and hot exteriors preventing condensation. Accept that summer heat may limit photography productivity compared to more comfortable seasons—prioritize most important subjects during brief optimal conditions rather than attempting exhaustive coverage causing heat exhaustion and producing poor results.
Can I fly a drone for aerial photography in Italy?
Italy permits drone photography under strict regulations requiring registration, pilot certification for drones over 250 grams, and compliance with airspace restrictions particularly around cities, airports, and cultural heritage sites. Register drones with ENAC (Italian Civil Aviation Authority) before flying, providing pilot and equipment information—registration applies to operators rather than individual drones. Obtain appropriate pilot license based on drone weight and operation type—drones under 250 grams require basic online training, while heavier drones demand more comprehensive certification. Research specific location restrictions before traveling with drone—many popular photography locations including historic city centers, archaeological sites, and certain coastal areas prohibit drone operations protecting heritage sites, privacy, and public safety. Rome’s entire historic center prohibits drones, Venice bans drone flights protecting tourists and preserving city character, and most UNESCO World Heritage Sites restrict aerial photography. Drone photography requires staying below 120 meters altitude, maintaining visual line of sight with drone, avoiding populated areas and crowds, respecting privacy, and operating only during daylight hours with good visibility. No-fly zones around airports extend several kilometers requiring careful checking before launching—online services show restricted airspace boundaries though regulations change requiring verification before each flight. Italian authorities actively enforce drone regulations through fines and equipment confiscation—comply strictly with all rules avoiding penalties and contributing to negative perception of drone photographers. Consider whether drone photography adds sufficient value justifying regulatory compliance, equipment weight, and potential complications—many Italian photography opportunities shoot effectively from ground level or accessible elevated viewpoints without requiring aerial perspectives. Alternative aerial photography approaches include climbing bell towers and mountains for elevated views, photographing from helicopters through commercial tour operators, or using long poles with mounted cameras for overhead perspectives below drone operation thresholds. Accept that drone photography limitations in Italy prevent capturing many desired aerial views—focus on ground-level photography where Italian landscape and architecture excel without requiring aerial perspective, saving drone photography for more permissive locations.
What are common mistakes beginner photographers make when photographing Italy?
Photographing only famous landmarks without exploring secondary locations creates portfolio identical to countless other photographers—supplement iconic shots of Colosseum and Duomo with lesser-known locations revealing authentic character, photograph side streets and local neighborhoods showing how Italians actually live, and seek unique perspectives on famous sites rather than reproducing standard postcard angles. Shooting exclusively during midday wastes optimal morning and evening light while struggling with harsh Mediterranean sun creating unflattering conditions—adjust daily schedule prioritizing photography during golden hours and blue hours, resting or conducting non-photography activities during midday when light quality suffers. Neglecting foreground elements in landscape photography produces flat compositions lacking depth—include cypress trees, wildflowers, architectural elements, or pathways in foreground creating layers leading eye toward distant subjects, providing scale, and adding three-dimensional quality to images. Failing to check horizon level creates tilted images particularly noticeable in architectural and seascape photography—enable camera’s electronic level or grid display ensuring straight horizons, or correct in post-processing though cropping reduces final image size. Over-editing images with excessive saturation, contrast, and sharpening produces unrealistic results that misrepresent Italy’s authentic beauty—process images enhancing rather than overwhelming natural character, maintain subtle adjustments preserving believability, and compare edited versions against originals ensuring enhancement doesn’t become distortion. Photographing from only eye level creates monotonous perspectives—climb stairs and viewpoints for elevated angles, crouch or lie prone for ground-level perspectives, and explore varied angles revealing subjects differently than typical tourist snapshots. Including too many subjects in single frame creates cluttered compositions lacking clear focal point—simplify compositions identifying single primary subject with supporting elements rather than trying to capture everything visible, use telephoto lens isolating subjects from busy surroundings, or reposition eliminating distracting background elements. Ignoring weather conditions and assuming photography requires sunny skies misses opportunities—overcast light works beautifully for street photography and architecture, storm light creates dramatic conditions with spotlit subjects against dark clouds, and rain-wet streets create reflections adding visual interest. Carrying excessive equipment causes fatigue affecting photography quality and limits spontaneous exploration—pare gear to essential items supporting planned photography rather than carrying everything owned, and accept that perfect equipment for every situation weighs too much for travel photography.
How do I create compelling Italian street photography while respecting privacy?
Street photography in Italy balances capturing authentic moments with respecting subjects’ dignity and privacy through ethical approach emphasizing permission, transparency, and cultural sensitivity. Photograph public street scenes showing Italian daily life—markets, cafes, piazzas, festivals—without requiring individual permission under freedom of panorama laws, though approach respectfully when subjects notice camera rather than hiding photography intention. Ask permission before photographing individuals particularly when they become primary subject rather than part of broader street scene—approach subjects with friendly greeting in Italian, explain interest in photographing daily life or cultural traditions, and request permission showing sample images. Italians generally respond positively to respectful requests, often enthusiastically participating when understanding photographer’s artistic rather than exploitative intention. Photograph from distance using telephoto lens when subjects naturally engage in activities without awareness of camera, maintaining candid character while respecting personal space—avoid intrusive close-range photography making subjects uncomfortable or creating confrontational situations. Wait for decisive moments when composition, gesture, expression, and light converge creating compelling images rather than photographing randomly hoping something works—patience produces better images while reducing number of shots exposed reducing invasive presence. Include environmental context showing subjects within Italian settings rather than isolated portraits removing cultural context—photograph people interacting with architecture, working in markets, dining in restaurants, or socializing in piazzas creating images revealing how Italians live within their environment. Disable camera beep sounds and use quiet shutter modes maintaining unobtrusive presence—loud camera sounds draw attention destroying candid moments and making subjects self-conscious. Respect “no” responses immediately without argument or continued photography—some individuals object to photography for personal, religious, or cultural reasons deserving absolute respect regardless of legal photography rights. Avoid photographing vulnerable populations including children without parent permission, homeless persons, and individuals in potentially embarrassing situations—maintain ethical standards considering how subjects might feel viewing published images. Share images with subjects when possible providing contact information or social media handles—this courtesy transforms anonymous photography into cultural exchange, often leading to invitations for additional photography or insights into Italian culture. Consider whether photography serves artistic or documentary purpose versus touristic curiosity—meaningful street photography reveals cultural insight, human character, and social dynamics rather than simply cataloging exotic differences for entertainment.