Machu Picchu is a dream spot for many photographers. The trail from Aguas Calientes to Machu Picchu offers amazing views and photo chances. It’s a top travel spot, so planning for great photos is key. Our guide will share expert tips for amazing photos on this trail.
The trail is a photographer’s dream with its history and landscapes. To get the best photos, know the best times, the right gear, and how to navigate. Our guide is for all photographers, helping you improve your skills and capture Machu Picchu’s beauty.
Remember, the secret to great photos is being ready and flexible. With the right gear, knowledge, and planning, you’ll capture the trail’s unique moments. From Andean mountains to Inca ruins, the trail offers something for every photographer.
Key Takeaways
- Plan your photography trip to Machu Picchu during the dry season for optimal light conditions.
- Book your tickets and hiking tours in advance to avoid crowds and ensure availability.
- Use a wide-angle lens to capture the expansive landscapes and ruins of Machu Picchu.
- Bring extra camera batteries, memory cards, and a sturdy tripod to ensure you’re prepared for any photography opportunity.
- Take advantage of the early morning and late afternoon light for the best photography conditions.
- Consider purchasing a separate ticket for the Huayna Picchu hike for unique and breathtaking views.
- Contact us for a comfortable and personalized itinerary (Free Service)
Understanding the Best Photography Viewing Spots Along the Aguas Calientes to Machu Picchu Trail
The trail from Aguas Calientes to Machu Picchu is full of amazing spots for photos. Each spot has its own charm and great photo opportunities. Knowing the best times and places is key to capturing stunning images.
Experts say the early morning and late afternoon are the best for photos. The light is softer, and there are fewer people around. This makes for more peaceful and intimate shots.
Overview of the Trail’s Photography Potential
The trail offers endless photo opportunities. You can capture the stunning scenery, historic sites, and vibrant culture. Top spots include the Sun Gate, the Inka Bridge, and the upper terraces of Machu Picchu.
Best Times of Day for Photography
The golden hour, in the early morning and late afternoon, is perfect for photos. The light is soft and warm, creating beautiful images.
Seasonal Considerations for Photos
When planning your Machu Picchu photo trip, consider the season. The dry season, from May to September, is best. The weather is clear and sunny, ideal for photos.
- Sun Gate: The Sun Gate is one of the most iconic photography viewing spots on the trail, offering breathtaking views of Machu Picchu and the surrounding landscape.
- Inka Bridge: The Inka Bridge is another popular photography spot, providing stunning views of the Urubamba River and the surrounding mountains.
- Upper Terraces: The upper terraces of Machu Picchu offer panoramic views of the historic site and the surrounding landscape, making them an ideal spot for photography.
| Location | Best Time | Photography Opportunities |
|---|---|---|
| Sun Gate | Early morning | Breathtaking views of Machu Picchu and the surrounding landscape |
| Inka Bridge | Late afternoon | Stunning views of the Urubamba River and the surrounding mountains |
| Upper Terraces | Golden hour | Panoramic views of the historic site and the surrounding landscape |
Essential Photography Gear for Mountain Photography
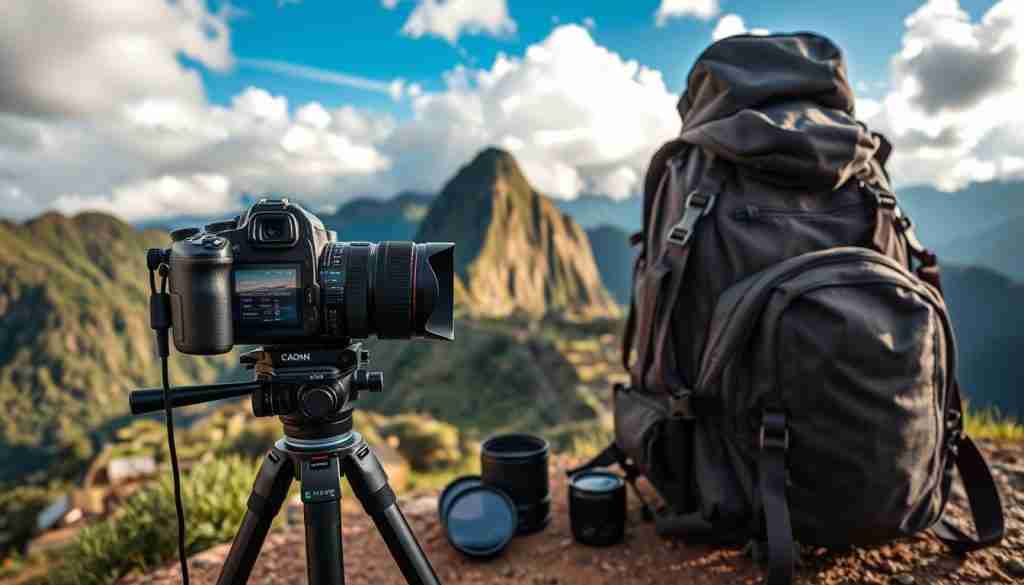
For amazing mountain photos, the right gear is key. You’ll need a good camera, lenses, and a tripod. A wide-angle lens, from 14mm to 24mm, is great for landscapes. A macro lens, starting at 60mm, is perfect for close-up shots.
A sturdy tripod is a must for mountain photos. It stops camera shake and keeps images sharp, even in the dark. Don’t forget extra batteries, memory cards, and a polarizing filter to cut down glare.
When you’re heading out for mountain photos, remember to pack:
- At least 2 extra batteries
- One additional memory card
- A waterproof camera bag or daypack cover
- A spare SD card
With the right gear, you can enjoy capturing the mountains’ beauty. The right equipment lets you focus on your photos, not your gear. This way, you can take amazing photos that will be cherished forever.
Planning Your Photography Timeline
Getting the best photos on the Aguas Calientes to Machu Picchu trail needs a good plan. The photography timeline should focus on the best light times. These are the dawn and early morning hours, and the golden hour before sunset.
A well-thought-out photography timeline helps you use your time wisely. It lets you take amazing photos. Here are some tips to plan your timeline:
- Begin your day at dawn to catch the sunrise and the soft morning light.
- Take a break at midday when the sun is strong and the light is harsh.
- Go back out during the golden hour for the warm light and long shadows.
By planning your photography timeline for these best light times, you can take stunning photos. You’ll also make unforgettable memories of your trip.
| Time of Day | Lighting Conditions | Photography Opportunities |
|---|---|---|
| Dawn | Soft, warm light | Sunrise, landscapes, and wildlife |
| Early Morning | Soft, warm light | Landscapes, wildlife, and portraits |
| Midday | Harsh, direct light | Rest and relaxation |
| Golden Hour | Warm, golden light | Landscapes, portraits, and still-life |


Starting Point: Capturing Aguas Calientes Town
Aguas Calientes, at the foot of Machu Picchu, is a mix of culture and nature. It’s perfect for photography lovers. The town has a lively market, hot springs, and beautiful views.
Exploring Aguas Calientes, you’ll find many photography subjects. From colorful buildings and busy streets to the landscapes and wildlife, there’s a lot to capture. Here are some tips to enhance your photography experience:
- Take a stroll along the river and capture the town’s scenic views
- Visit the local market and photograph the vibrant colors and textures
- Explore the town’s historic center and capture the architecture and street life

Starting your photography journey in Aguas Calientes lets you capture the town’s unique spirit. It’s a great way to begin your trip. Whether you love landscapes, street, or wildlife photography, Aguas Calientes has it all.
| Location | Photography Opportunities |
|---|---|
| Aguas Calientes Town | Street life, architecture, market scenes |
| Riverbank | Landscape, wildlife, scenic views |
| Hot Springs | Nature, relaxation, scenic views |
Riverside Photography Locations
Photographers seeking to capture the essence of the Aguas Calientes to Machu Picchu trail will find riverside photography unique. The water, plants, and animals create a lively scene for photos. Our guides suggest visiting in the early morning or late afternoon for the best light.
Here are some tips for riverside photography:
- Look for interesting flora and fauna to include in your shots, such as exotic birds or colorful flowers.
- Experiment with capturing water movement, using a slow shutter speed to convey the sense of flow.
- Take advantage of bridge viewpoints to gain a new perspective on the surrounding landscape.
By following these tips and visiting the right locations, you can create stunning riverside photography that showcases the beauty of the Aguas Calientes to Machu Picchu trail. Always respect the environment and local wildlife. Enjoy the experience of capturing the beauty of this incredible destination.
Technical Settings for Mountain Photography
For stunning mountain photos, knowing your camera’s technical settings is key. You’ll need to think about aperture, shutter speed, and ISO. Our experts suggest using a wide-angle lens for big views and a zoom lens for wildlife shots.
For clear images, keep your ISO low (100-400). A fast shutter speed (1/1000th of a second or faster) is best for sharp photos of moving things. Set your aperture between f/5.6 and f/11 to keep everything in focus.
| Setting | Recommended Value |
|---|---|
| ISO | 100-400 |
| Shutter Speed | 1/1000th of a second or faster |
| Aperture | f/5.6 to f/11 |
| Focal Length | 16-108mm (wide-angle) or 300mm (zoom) |
With these settings, you’re ready to take amazing mountain photos. Always check the light and adjust your settings for the best shots.
Mid-Trail Vantage Points
Hikers on the Aguas Calientes to Machu Picchu trail find many mid-trail spots. These offer amazing valley views and mountain panoramas. They are perfect for taking photos, with the scenery making a great backdrop for wildlife photography.
It’s important for hikers to stop and enjoy these views. They should also take photos of the landscape and wildlife. Some top spots include:
- Areas with steep drop-offs, offering unobstructed views of the valley below
- Spots with unique rock formations, providing interesting textures and patterns for photography
- Locations with an abundance of wildlife, such as birds, llamas, and other animals
By taking time to appreciate and capture these views, hikers can make unforgettable memories of their Machu Picchu journey.
| Location | View | Wildlife |
|---|---|---|
| Valley Viewpoint | Valley views | Birds, llamas |
| Mountain Overlook | Mountain panoramas | Condors, eagles |
Approaching Machu Picchu: First Vista Points
As travelers start approaching Machu Picchu, they see amazing views of the ancient city. The first vista points show the ruins against the mountains and greenery. Machu Picchu is now one of the seven wonders of the world, drawing thousands yearly.
Visitors see stunning views from spots like the Sun Gate and Inca Bridge. These spots are perfect for photos, capturing the beauty and history of Machu Picchu.
Some key facts to consider when planning a visit to Machu Picchu include:
- Book tickets in advance, as entry tickets are limited to four hours and are available in one-hour time slots.
- Approximately 200 permits are issued daily for the Inca Trail, which must be done with a certified guide.
- The hike to Machu Picchu from the Sun Gate takes about thirty minutes.
Knowing the history and best photography spots makes the visit to Machu Picchu unforgettable. Travelers can enjoy the views from the first vista points and create lasting memories.
| Location | Description |
|---|---|
| Sun Gate | Offers a stunning view of Machu Picchu at sunrise |
| Inca Bridge | Provides a unique perspective on the ruins and surrounding landscape |
Capturing the Sun Gate (Inti Punku)
The Sun Gate, also known as Inti Punku, is a breathtaking location for sunrise photography. It offers stunning scenery and golden light, perfect for memorable photos. To get the best shots, knowing the best times and how to compose is key.
At the Sun Gate, you have many options for landscape composition. The stone-paved trail and mountains around provide great subjects. Here are some tips to improve your sunrise photography:
- Arrive early to capture the golden light of sunrise
- Experiment with different angles and compositions
- Pay attention to the surrounding landscape and include interesting elements in your shots
By following these tips, you can take stunning photos of the Sun Gate. The landscape composition here, with its unique trail and mountains, is ideal for capturing memorable moments.
| Location | Elevation | Distance from Machu Picchu |
|---|---|---|
| Sun Gate (Inti Punku) | 2,720 m (8,924 ft) | 1.5 km (0.93 miles) one-way |
Advanced Composition Techniques for Iconic Shots
To capture iconic shots at Machu Picchu, you need advanced composition techniques. These methods can make your photos truly stand out. Visit Machu Picchu Photography Tips for top photography tips and tricks.
Key advanced composition techniques include leading lines, framing, and symmetry. These help make your images visually appealing. Also, the time of day and lighting can greatly affect your photos. The golden hour, just before sunset, is perfect for capturing iconic shots with its soft, warm light.
Here are some tips for composing your shot:
- Use leading lines to guide the viewer’s eye to the subject
- Frame your subject using natural features, such as archways or trees
- Experiment with symmetry to create visually appealing images
By using these advanced composition techniques, you can take iconic shots that show Machu Picchu’s beauty. Always think about lighting, time of day, and composition to make your photos stunning.
Conclusion: Making Your Machu Picchu Photography Journey Memorable
As you wrap up your Machu Picchu photography adventure, think back on all you’ve seen and captured. From Aguas Calientes’s lively streets to the Sun Gate’s breathtaking views, your photos bring this wonder to life. The real beauty of your photos isn’t just their quality, but how they show the wonder, history, and grandeur of this sacred place.
Looking through your photos and sharing them with others can make your journey even more special. You might go back to the trails to find new angles or learn more about the Inca Empire’s culture. No matter what, let your journey deepen your love for Peru’s natural and cultural treasures.
Your Machu Picchu photography journey doesn’t end here. It’s just the start of a lifelong bond with this incredible site. With your camera, you’ve captured a piece of history. Now, it’s your turn to share it with the world, keeping Machu Picchu’s magic alive for future generations.
