Angkor Wat Photography Guide 2026: Complete Technical Manual
Photographing Angkor Wat’s magnificent temples presents unique challenges and opportunities combining architectural documentation, cultural storytelling, and technical mastery across varied lighting conditions, crowded viewing spots, and diverse temple styles spanning five centuries of Khmer construction. Successful temple photography requires understanding optimal timing for different structures, managing harsh tropical lighting, composing compelling images amid tourist crowds, and employing appropriate technical settings capturing the scale, detail, and atmospheric qualities that make these UNESCO World Heritage monuments so photographically captivating.
Key Takeaways
- Golden hours 6:00-8:00 AM and 4:00-5:30 PM deliver optimal lighting with warm tones and directional shadows revealing architectural depth
- Wide-angle lenses 16-35mm capture full temple structures while 70-200mm telephoto lenses isolate bas-relief details and distant architectural elements
- Sunrise at Angkor Wat requires 5:00 AM arrival for western reflection pool positions with dramatic silhouettes appearing 5:30-6:00 AM year-round
- Monsoon season June-October provides dramatic cloud formations and rain-cleaned stones creating atmospheric conditions impossible during dry months
- Tripods enable low-light photography in dark temple interiors though bulk and weight challenge multi-temple days requiring 8-12 kilometers walking
- RAW format shooting enables extensive post-processing flexibility managing high-contrast scenes with bright tropical skies and shadowed stone structures
Introduction
The archaeological park’s 400-square-kilometer expanse with over 1,000 structures offers virtually unlimited photographic subjects from iconic Angkor Wat silhouettes reflected in morning pools to intimate bas-relief details, atmospheric tree-engulfed galleries at Ta Prohm, and dramatic sunset panoramas from elevated temple platforms. Each temple presents distinct photographic characteristics requiring adapted techniques, timing considerations, and compositional approaches maximizing visual impact while managing technical constraints imposed by tropical conditions and heritage site restrictions.
This comprehensive photography guide provides technical expertise, location-specific recommendations, timing strategies, equipment guidance, and creative approaches enabling photographers of all skill levels to capture stunning Angkor images documenting both grand architectural vistas and intimate cultural moments throughout their 2026 temple exploration. Whether shooting with smartphones, advanced mirrorless cameras, or professional DSLR systems, these proven techniques elevate photographic results creating memorable visual records of this extraordinary archaeological destination.
People Also Ask About Angkor Wat Photography 2026
What is the best time to photograph Angkor Wat?
The best time to photograph Angkor Wat is sunrise 5:30-6:30 AM when the temple silhouettes against colorful skies with reflections in western pools, followed by morning golden hour 6:00-8:00 AM providing warm directional lighting. Late afternoon 4:00-5:30 PM offers second golden hour with dramatic shadows and warm tones. Avoid midday 11 AM-2 PM when harsh overhead lighting creates extreme contrast.
What camera settings should I use at Angkor Wat?
Use aperture priority mode at f/8-f/11 for sharp architectural focus throughout frames, ISO 100-400 in bright conditions increasing to ISO 800-3200 in dark temple interiors, and shoot RAW format for post-processing flexibility. Enable exposure bracketing for high-contrast scenes. Use tripods for sunrise-sunset long exposures and dark interior photography when crowds and bulk permit.
Can I bring a tripod to Angkor Wat?
Bring tripods to Angkor Wat freely for sunrise photography, long exposures, and dark interior shots though bulk and weight challenge multi-temple days requiring extensive walking. Lightweight travel tripods balance stability with portability. Set up tripods considerately avoiding pathway blockage or crowd obstruction at popular viewing locations during peak hours.
Where is the best spot to photograph Angkor Wat sunrise?
The best Angkor Wat sunrise spot is the northern reflection pool’s western edge capturing the temple’s five towers silhouetted against dawn skies with mirror reflections in water. Arrive by 5:00-5:15 AM during peak season securing positions before 400-500 photographers fill limited space. The southern pool provides similar perspectives with slightly fewer crowds.
Extended multi-day tours – 5+ days
Featured Angkor Wat Multi-Day Tour Packages
3 days
Angkor Wat 3-Day Discovery Tour
- ✓ Comprehensive Angkor Wat experience
- ✓ Expert local guides included
- ✓ All accommodation included
- ✓ Transportation provided
5 days
Angkor Wat 5-Day Highlights Experience
- ✓ Comprehensive Angkor Wat experience
- ✓ Expert local guides included
- ✓ All accommodation included
- ✓ Transportation provided
7 days
Angkor Wat 7-Day Cultural Journey
- ✓ Comprehensive Angkor Wat experience
- ✓ Expert local guides included
- ✓ All accommodation included
- ✓ Transportation provided
10 days
Angkor Wat 10-Day Complete Adventure
- ✓ Comprehensive Angkor Wat experience
- ✓ Expert local guides included
- ✓ All accommodation included
- ✓ Transportation provided
Multi-day tour packages powered by TourRadar. Prices and availability subject to change.
Understanding Angkor’s Light and Weather
Mastering tropical light characteristics and seasonal weather patterns enables strategic photography timing maximizing image quality while avoiding conditions that diminish photographic potential across varied temple sites and architectural styles.
Tropical Light Characteristics
Cambodia’s tropical latitude 13 degrees north creates distinct lighting patterns with rapid dawn transitions from darkness to bright daylight within 30 minutes compared to gradual temperate zone sunrises extending over hours. The quick transition requires early positioning and readiness capturing fleeting optimal moments when light quality peaks briefly before harsh conditions develop. Similarly, sunset occurs rapidly with golden hour lasting just 45-60 minutes before darkness falls completely.
Midday tropical sun creates extreme contrast with brightness ratios exceeding modern camera sensor dynamic range capabilities. Shadows turn completely black while highlights blow out to pure white creating technically challenging exposure decisions. The harsh overhead lighting flattens architectural details eliminating shadows that reveal carved depth and structural complexity. Photographers should avoid midday temple photography between 11 AM-2 PM except when shooting in shaded galleries or interior spaces protected from direct sunlight.
Seasonal Photography Considerations
Dry season November-April delivers clear blue skies ideal for sunrise-sunset photography with minimal cloud interference though creating stark high-contrast conditions during midday hours. The consistent weather enables reliable photography planning without rain concerns though atmospheric haze increases as dry season progresses particularly during March-April when agricultural burning creates regional smoke affecting air clarity and reducing distant visibility.
Monsoon season May-October introduces dramatic cloud formations adding atmospheric depth to temple photography impossible during cloudless dry season months. Morning hours typically remain dry enabling quality photography before afternoon storms develop. The rain-cleaned stone surfaces appear more vibrant with enhanced color saturation and reduced dust coating diminishing during dry months. Photographers accepting weather uncertainty find monsoon season rewards with unique atmospheric conditions and completely empty temples creating solitary photographic experiences.
Golden Hour Optimization
Morning golden hour 6:00-8:00 AM provides warm directional lighting from the east illuminating temple western facades beautifully while creating long dramatic shadows enhancing architectural relief. The comfortable temperatures and moderate crowds during early morning enable relaxed photography without heat stress or excessive tourist interference. Temple stones retain overnight cooling appearing darker and more saturated compared to heat-bleached midday appearance.
Evening golden hour 4:00-5:30 PM delivers warm western light illuminating eastern temple facades with similar quality to morning conditions though facing opposite directions. The afternoon crowds thin after tour groups depart creating better photography opportunities at normally busy structures. Sunset timing 5:30-6:00 PM year-round requires positioning at elevated viewpoints 30-45 minutes early securing spots before optimal light develops.
Essential Photography Equipment
Strategic equipment selection balances image quality aspirations with practical portability constraints during intensive multi-temple days requiring 8-12 kilometers of walking while carrying camera gear through tropical heat and humidity.
Camera Body Recommendations
Full-frame DSLR or mirrorless cameras deliver superior image quality with better low-light performance, greater dynamic range managing high-contrast temple scenes, and professional-grade weather sealing protecting against Cambodia’s humidity and occasional rain. Bodies like Canon R5, Sony A7R V, or Nikon Z8 provide 45+ megapixel resolution capturing intricate architectural details and enabling extensive cropping maintaining image quality.
APS-C sensor cameras including Canon R7, Sony A6700, or Nikon Z50 offer excellent image quality with smaller, lighter bodies and lenses reducing carried weight during long temple days. The crop factor 1.5-1.6x extends telephoto reach useful for isolating distant details though reduces wide-angle coverage requiring ultra-wide lenses for full architectural shots. These cameras suit enthusiast photographers balancing quality and portability effectively.
Smartphone cameras on modern flagship devices capture impressive temple images for casual documentation and social media sharing. Computational photography features including HDR, night mode, and panorama stitching overcome some hardware limitations though cannot match dedicated camera systems for image quality, manual control, or challenging lighting situations. Smartphones excel as secondary backup cameras or primary devices for travelers prioritizing minimal gear.
Lens Selection Strategy
Wide-angle zoom lenses 16-35mm full-frame or 10-24mm APS-C provide essential coverage for capturing full temple structures and sweeping architectural vistas in confined spaces where backing up proves impossible. Ultra-wide perspectives emphasize scale and grandeur while enabling interior photography in narrow galleries. These lenses serve as primary temple photography tools used 60-70% of shooting time.
Standard zoom lenses 24-70mm or 24-105mm deliver versatile coverage handling architectural details, environmental portraits, and general documentation without constant lens changes risking sensor dust contamination. The flexible focal range adapts to varied photographic situations making standard zooms valuable single-lens solutions for photographers minimizing gear weight.
Telephoto zoom lenses 70-200mm or 100-400mm isolate bas-relief details, compress distant architectural elements, and capture candid cultural moments without intrusive close approach. The reach enables photographing upper temple levels from ground positions and isolating specific carved panels from complex gallery walls. Telephoto lenses add significant weight though deliver unique perspectives impossible with shorter focal lengths.
Support and Accessories
Lightweight travel tripods balance portability with stability enabling sunrise long exposures, sunset photography, and dark interior shots requiring slow shutter speeds. Carbon fiber construction reduces weight though costs premium prices compared to aluminum alternatives. Choose tripods extending to eye level avoiding awkward bending while accommodating ground-level perspectives when needed. Quick-release plates enable rapid camera mounting and removal when alternating between tripod and handheld shooting.
Polarizing filters reduce atmospheric haze, increase color saturation, and manage reflections in water features though require careful rotation avoiding unnatural darkening of blue skies at wide angles. Neutral density filters enable long exposures during bright conditions creating motion blur in moving clouds or smoothing water surfaces. Variable ND filters provide flexible density adjustment though sometimes introduce color casts requiring post-processing correction.
Lens cleaning kits including microfiber cloths, air blowers, and cleaning solution address dust and moisture accumulation degrading optical performance in Cambodia’s environment. Carry cleaning supplies in easily accessible pockets for frequent use throughout dusty temple days. Camera rain covers protect equipment during monsoon season when afternoon storms threaten electronics though high-quality weather-sealed modern cameras handle brief rain exposure adequately.
Iconic Angkor Wat Sunrise Photography
Photographing Angkor Wat sunrise represents many photographers’ primary motivation visiting Cambodia, requiring careful planning, early positioning, and technical expertise capturing this iconic scene effectively amid crowds and challenging lighting conditions.
Location and Positioning
The northern reflection pool’s western edge provides the classic Angkor Wat sunrise viewpoint with the temple’s five towers silhouetted against dawn skies reflecting in still water creating mirror-image symmetry. Arrive by 5:00-5:15 AM during peak November-February season before 400-500 photographers fill the small viewing area. The southern reflection pool offers similar perspectives with 30-40% fewer crowds though slightly less ideal architectural alignment.
Position near the pool’s western edge avoiding the easternmost areas where perspective foreshortens the central tower diminishing its prominence. The best positions occupy limited space creating intense competition during peak season requiring very early arrival and patience holding secured spots. Bring flashlights for navigating dark paths and arranging equipment before dawn light develops.
Timing and Light Progression
Sunrise at Angkor Wat begins developing 30 minutes before actual sunrise when eastern sky colors appear behind the temple creating subtle pre-dawn atmosphere. The 15 minutes before sunrise deliver peak color intensity with oranges, pinks, and purples reflected in western pools. Sunrise itself occurs 5:30-6:00 AM year-round varying just 15 minutes seasonally. Post-sunrise golden hour continues 30-45 minutes with warm light illuminating the temple’s western facade and galleries.
Shoot continuously throughout the light progression capturing varied atmospheric conditions and color transitions. Pre-dawn blue hour creates moody silhouettes while sunrise peak delivers dramatic color and post-sunrise golden hour illuminates architectural details invisible in silhouette shots. The complete progression generates diverse images suitable for different presentations and aesthetic preferences.
Technical Settings and Approach
Use tripods for sharp multi-second exposures required in pre-dawn darkness and enable HDR bracketing capturing detail in both dark temple silhouettes and bright sky areas. Shoot at ISO 100-400 maintaining low noise though increase to ISO 800-1600 if necessary capturing earlier blue hour scenes. Use aperture f/8-f/11 ensuring sharp focus throughout the frame from foreground pool to distant temple towers.
Compose with the temple positioned off-center following rule-of-thirds guidelines rather than centering the structure creating more dynamic compositions. Include reflection pool foreground adding depth and interest to images while showcasing the iconic mirrored symmetry. Bracket exposures ±2 stops ensuring proper exposure across challenging high-contrast scenes with dark temples and bright skies exceeding sensor dynamic range.
Alternative Sunrise Locations
Srah Srang reservoir provides excellent sunrise alternatives with 90% fewer crowds than Angkor Wat’s reflection pools. The eastern temple location creates sunrise viewing across water toward eastern horizon with temple ruins silhouetted. Pre Rup temple’s elevated platform offers panoramic sunrise views across surrounding landscape showing sunrise light progression affecting multiple temples and countryside simultaneously.
Temple-Specific Photography Strategies
Each major temple presents unique photographic characteristics requiring adapted techniques, optimal timing, and specific compositional approaches maximizing visual impact while managing individual site constraints.
Angkor Wat Architecture Photography
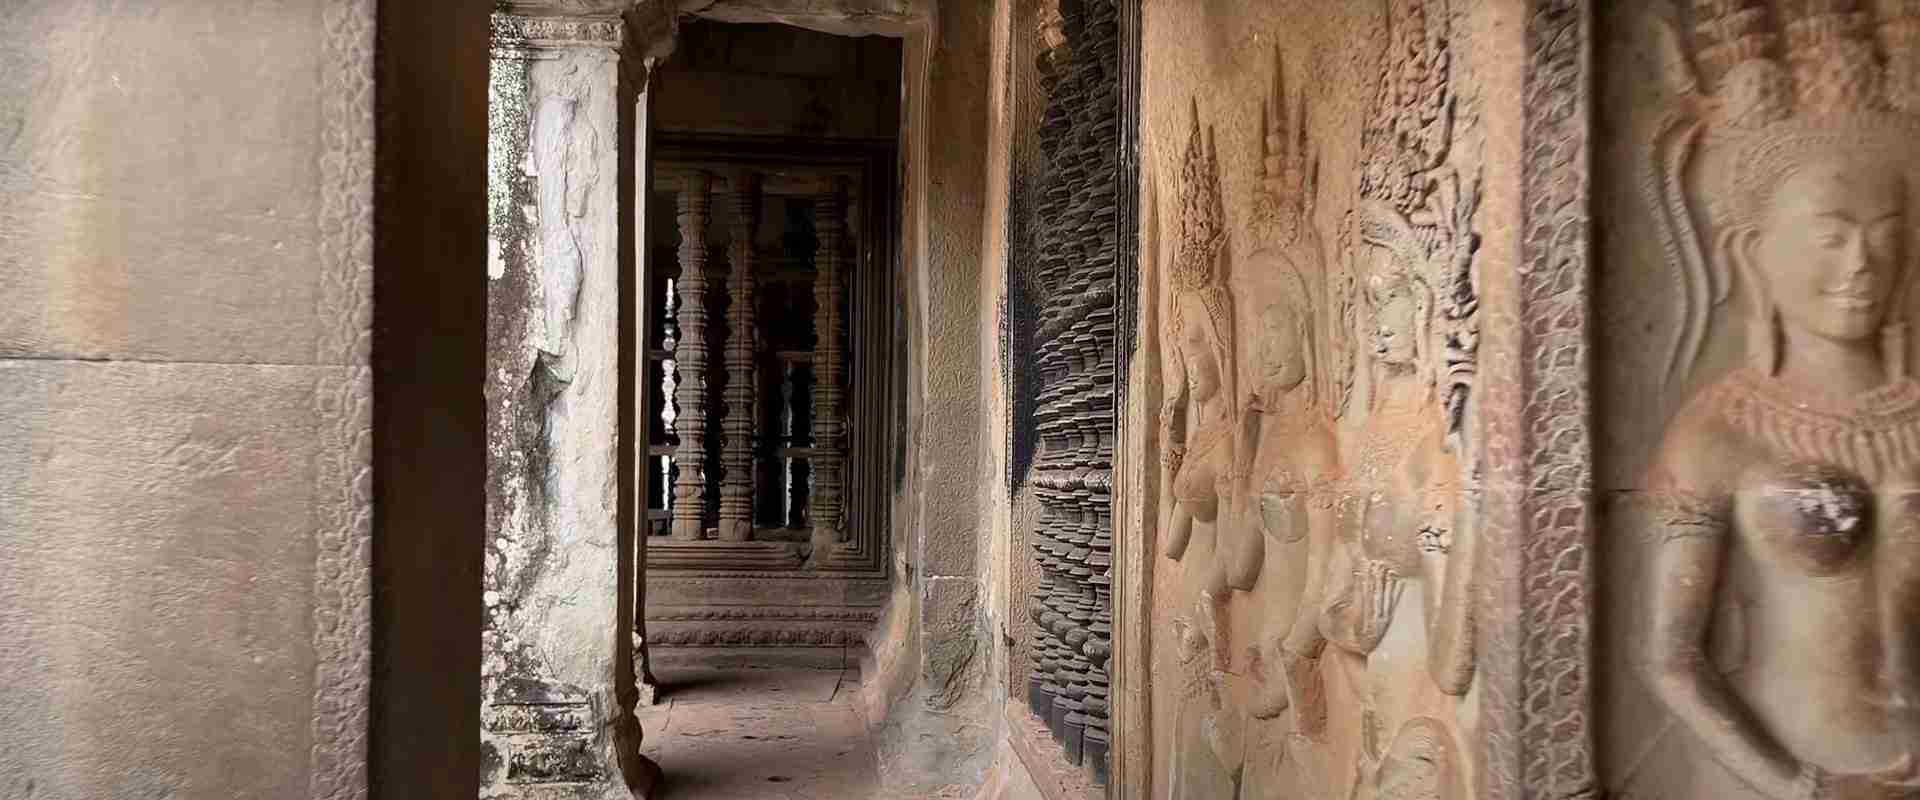
Beyond sunrise, photograph Angkor Wat during morning golden hour 6:30-8:30 AM when warm light illuminates western facade galleries revealing carved apsaras dancers and intricate bas-relief narratives. Use wide-angle lenses capturing the massive scale and three-tiered pyramid structure. Interior galleries photograph best during 9-11 AM when sun angles illuminate specific sections through doorway openings creating dramatic light beams cutting through darkness.
Ascend to the third level central sanctuary photographing outward views across lower levels, libraries, and surrounding moat creating layered architectural compositions. The elevated perspective shows Angkor Wat’s cruciform plan and symmetrical layout invisible from ground level. Photograph early morning 6:30-8:00 AM avoiding midday crowds when hundreds queue for upper level access.
Bayon Temple’s 216 Faces
Photograph Bayon’s iconic stone faces during morning 7:00-9:00 AM or late afternoon 3:00-5:00 PM when directional light creates shadows defining facial features and bringing weathered carvings to life. Midday overhead lighting flattens faces eliminating defining shadows making them photographically less compelling. Use telephoto lenses 70-200mm isolating individual faces or face groups from complex multi-tower compositions.
Explore all four levels capturing varied facial expressions, different tower heights, and changing perspectives as you ascend narrow staircases. Close-up details reveal stone weathering patterns, lichen growth, and subtle carving variations across the 54 towers. Wide shots from surrounding galleries show the forest of towers creating the overwhelming facial presence dominating this unique temple.
Ta Prohm’s Tree-Temple Integration
Ta Prohm photographs best during morning 7:00-9:00 AM or afternoon 3:00-5:00 PM when angled light penetrates the jungle canopy illuminating selected gallery sections while leaving others in shadow creating dramatic contrast. The famous Tomb Raider tree location receives harsh midday light poorly suited for photography though photographs adequately during shoulder hours when directional lighting adds dimension.
Shoot wide-angle compositions showing entire trees engulfing gallery walls and doorways emphasizing nature’s power reclaiming human structures. Close-up details capture root patterns flowing across carved stones and through window openings. Include people in shots providing scale references revealing the massive root systems and tree trunks dwarfing human visitors. The atmospheric galleries with filtered green light create moody environmental portraits and cultural documentation.
Banteay Srei Pink Sandstone Details
Banteay Srei’s intricate pink sandstone carvings photograph best during afternoon 2:00-4:00 PM when warm light enhances the stone’s natural pink tones while creating shadows defining carved depth. Morning light produces cooler color temperatures diminishing the characteristic pink appearance. Use macro or telephoto lenses 100-200mm isolating exquisite decorative panels showcasing Angkor’s finest stone carving artistry.
The smaller temple scale enables comprehensive coverage photographing complete buildings rather than isolated sections of massive structures like Angkor Wat. Shoot both wide establishing shots showing overall temple layout and intimate details revealing individual panel narratives and decorative motifs. The manageable size rewards thorough photographic documentation capturing this artistic masterpiece comprehensively.
Advanced Composition Techniques
Sophisticated compositional approaches elevate temple photography beyond simple documentation creating compelling visual narratives that engage viewers and communicate the cultural significance, architectural sophistication, and atmospheric qualities of Angkor’s heritage sites.
Foreground-Background Relationship
Include strong foreground elements creating depth in temple compositions rather than shooting flat architectural elevations lacking dimensional interest. Frame temples through doorways, windows, or gallery openings using architectural elements as natural frames directing viewer attention toward distant subjects. Position foreground stones, tree roots, or water features adding layered depth showing spatial relationships between temple components.
Use wide apertures f/2.8-f/4 creating selective focus emphasizing specific subjects while softening backgrounds and foregrounds. Alternatively, use narrow apertures f/11-f/16 maintaining sharp focus throughout the frame from immediate foreground to distant temple towers creating comprehensive environmental context. Vary depth of field approaches producing diverse aesthetic treatments of similar subjects.
Human Scale and Cultural Context
Include people in architectural shots providing scale references revealing temple proportions impossible to judge from pure architectural documentation. Position subjects thoughtfully creating visual interest rather than random tourist placement detracting from compositions. Capture monks in orange robes walking through galleries, local vendors arranging goods, or tourists climbing stairs showing contemporary temple use alongside historical significance.
Photograph cultural moments including worship activities, traditional dress, local interactions, and daily life around temples connecting ancient heritage with living culture. Request permission before photographing individuals close-up showing respect for personal privacy and cultural sensitivity. The human element transforms static architectural documentation into dynamic cultural storytelling engaging viewers emotionally beyond pure visual aesthetics.
Pattern and Repetition
Identify repeating patterns in temple architecture including colonnade galleries, repeated window openings, uniform tower arrangements, and bas-relief panel sequences creating graphic compositions emphasizing Khmer design principles and construction symmetry. Use telephoto compression 70-200mm stacking repeating elements creating powerful graphic impact through pattern emphasis.
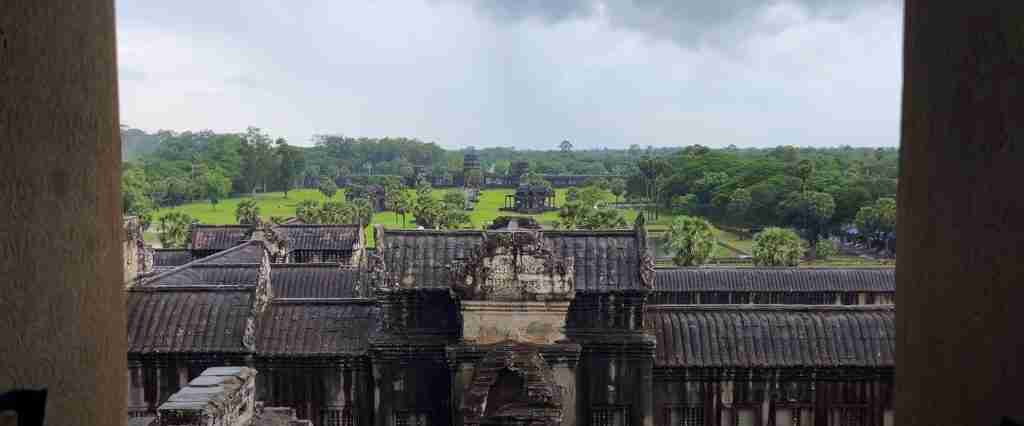
Photograph from elevated perspectives showing roof tile patterns, courtyard paving layouts, and overall temple plan symmetries invisible from ground level. Close-up details reveal carved pattern repetitions in decorative borders, apsara dancer rows, and narrative bas-relief sequences. The pattern-focused approach creates abstract architectural interpretations complementing representational documentation.
Light and Shadow Drama
Emphasize dramatic light and shadow interplay created by directional golden hour illumination penetrating temple doorways, highlighting gallery sections, and creating pronounced shadows defining architectural relief. Expose for highlights allowing shadows to fall dark creating high-contrast dramatic interpretations. Alternatively, use HDR techniques maintaining detail throughout the tonal range producing technically precise documentation.
Photograph shafts of light penetrating dark interiors through high windows and doorway openings creating divine light beam effects when atmospheric conditions including dust or mist make light visible. These atmospheric moments occur unpredictably requiring constant awareness and readiness capturing fleeting opportunities. The dramatic lighting elevates ordinary architectural documentation into compelling atmospheric imagery.
Managing Common Photography Challenges
Anticipating and addressing technical and logistical challenges enables consistent photographic success despite obstacles inherent to tropical heritage site photography with crowds, extreme light, and environmental factors affecting equipment and image quality.
Crowd Management Strategies
Photograph major temples during 7-8 AM or 4:30-5:30 PM shoulder hours avoiding peak 9 AM-4 PM tour group concentrations creating constant human traffic and background tourist presence. Use long exposures 1-4 seconds with neutral density filters blurring moving people into ghostly transparencies or eliminating them entirely from scenes when they keep moving. The technique requires tripods and experimentation determining effective shutter speeds for specific crowd densities and movement patterns.
Frame shots through less obvious angles and perspectives avoiding popular viewpoints where tourists concentrate. Explore side galleries, secondary entrances, and elevated positions showing familiar temples from fresh perspectives naturally avoiding crowds gravitating toward ground-level primary approaches. Patience rewards photographers waiting for temporary crowd gaps enabling clean shots during brief clear moments.
Harsh Light Mitigation
Shoot during golden hours avoiding midday harsh conditions when possible. When midday photography proves necessary, seek shaded galleries, interior spaces, and north-facing walls protected from direct sunlight enabling quality photography despite poor exterior lighting. Use HDR bracketing capturing multiple exposures merged in post-processing maintaining detail in both highlights and shadows exceeding single exposure capabilities.
Embrace harsh conditions creating dramatic high-contrast black and white conversions where extreme contrast becomes artistic strength rather than technical limitation. Shoot silhouettes reducing complex three-dimensional structures to graphic shapes when lighting prevents detailed architectural documentation. The creative adaptation transforms limitations into opportunities producing diverse aesthetic treatments beyond optimal lighting standardization.
Humidity and Dust Protection
Store camera equipment in sealed bags with silica gel desiccant packets absorbing moisture when not actively shooting. Allow cold equipment to acclimate to ambient temperature before removing from bags preventing condensation forming on lenses and sensors when transitioning from air-conditioned spaces to humid outdoor environments. Minimize lens changes in dusty outdoor areas preferring zoom lenses reducing change frequency.
Clean sensors regularly using blowers removing dust accumulation showing as dark spots in images particularly visible in clear sky areas. Professional sensor cleaning may require travel to Bangkok given limited specialized services in Siem Reap. Use UV or clear protective filters on lenses protecting front elements from dust and moisture while enabling easy filter cleaning versus delicate lens surface cleaning.
Post-Processing Workflow
Strategic post-processing transforms raw captures into polished final images managing technical challenges including harsh lighting, color casts, and architectural perspective corrections enhancing visual impact while maintaining authentic representation of temple subjects.
RAW Processing Fundamentals
Shoot RAW format providing maximum post-processing flexibility with 12-14 bit color depth versus 8-bit JPEGs enabling extensive adjustment without quality degradation. Use Adobe Lightroom, Capture One, or similar professional RAW processors providing comprehensive adjustment tools. Apply lens correction profiles automatically correcting distortion, vignetting, and chromatic aberration inherent to specific lens models.
Adjust exposure recovering shadow detail and taming highlight clipping in high-contrast temple scenes. Use graduated filters brightening foreground shadows or darkening bright skies creating balanced exposures throughout frames. Apply clarity and texture adjustments enhancing architectural detail definition in midtone areas revealing carved stone surface character and weathering patterns.
Color and Tone Management
Correct white balance addressing warm orange tropical light or cool blue shade color casts creating neutral renditions or emphasizing warm golden hour tones enhancing atmospheric qualities. Adjust vibrance increasing color intensity moderately avoiding over-saturation creating unnatural appearances. Split toning adds subtle color casts to shadows and highlights creating cohesive color palettes across image series.
Apply selective color adjustments enhancing specific hues including temple sandstone oranges, jungle greens, or sunrise blues without affecting complete color spectrum. Use HSL sliders fine-tuning individual color channels optimizing saturation, luminance, and hue for specific tones dominant in temple photography. The targeted approach creates refined color palettes more sophisticated than global saturation adjustments.
Perspective and Geometry Corrections
Apply perspective corrections straightening vertical lines converging when photographing tall temple towers from ground level using wide-angle lenses. The correction creates architecturally accurate representations matching human perception though crops image edges reducing resolution. Balance correction strength against resolution loss determining acceptable compromise for specific images.
Use geometry tools correcting horizon tilt, vertical alignment, and horizontal levelness creating visually stable compositions avoiding distracting misalignment drawing attention from subjects. Apply rotation, scale, and warp transformations refining geometric accuracy. The technical precision creates professional architectural documentation respecting temple design integrity.
Planning Your 2026 Photography Trip
Strategic photography trip planning coordinates optimal timing, equipment preparation, and location scouting maximizing photographic productivity while maintaining realistic expectations about achievable coverage during multi-day temple visits.
Equipment Preparation
Test all camera equipment before travel confirming proper operation and identifying issues requiring repair or replacement before departure. Format memory cards and fully charge batteries ensuring adequate supplies for intensive multi-day shooting without access to specialized replacements. Pack adequate backup equipment including spare camera bodies, extra batteries, multiple memory cards, and backup data storage preventing catastrophic failures ruining photography trips.
Location Research and Scouting
Study existing Angkor photography identifying desired perspectives, optimal timing, and compositional approaches informing your shooting plans. Download offline maps showing temple locations, sunrise-sunset positions, and access paths supporting navigation and timing planning. Review technical articles and location guides providing specific recommendations for individual temples helping prioritize limited time across hundreds of potential subjects.
FAQ Section
What lens is best for Angkor Wat photography?
A 16-35mm wide-angle zoom lens works best for Angkor Wat photography capturing full temple structures and architectural vistas. Add a 24-70mm standard zoom for versatile coverage and 70-200mm telephoto for bas-relief details and distant elements. This three-lens kit covers 90% of temple photography situations though single travelers might prefer a 24-105mm all-in-one lens minimizing weight and complexity.
Do I need a tripod for Angkor Wat?
Tripods significantly improve Angkor Wat photography for sunrise long exposures, sunset shots, and dark interior photography though add weight and bulk during multi-temple days requiring extensive walking. Lightweight carbon fiber travel tripods balance portability with stability. Hand-held shooting works adequately for most daylight situations using modern image stabilization though tripods enable superior technical quality and creative techniques.
Can I use a drone at Angkor Wat?
Drone use requires special permits from Cambodia’s Apsara Authority and remains prohibited for casual visitors protecting the archaeological site and maintaining peaceful atmosphere. Unauthorized drone flights violate strict regulations risking equipment confiscation, fines, and potential legal consequences. Respect these restrictions preserving Angkor’s heritage and visitor experience rather than pursuing aerial perspectives through illegal means.
What camera settings work best for temple photography?
Use aperture priority mode at f/8-f/11 for architectural sharpness, ISO 100-400 in bright conditions increasing to ISO 800-3200 in dark interiors, and shoot RAW format for post-processing flexibility. Enable exposure bracketing for high-contrast scenes and use matrix metering for balanced exposures. Apply manual focus for precise control when autofocus struggles in low contrast or low light situations.
How do I photograph Angkor Wat without crowds?
Photograph during early morning 6:00-8:00 AM or late afternoon 4:30-5:30 PM avoiding peak tour group hours. Visit during shoulder season March-April or October when tourist numbers drop 30-40%. Use long exposure techniques blurring moving people or frame shots through alternative angles avoiding popular viewpoints where crowds concentrate. Travel during monsoon season June-September for virtually empty temples.
What time is golden hour at Angkor Wat?
Morning golden hour occurs 6:00-8:00 AM shortly after sunrise providing warm directional lighting from the east. Evening golden hour runs 4:00-5:30 PM before sunset delivering warm western light. These windows create optimal photography conditions with dramatic shadows and warm tones enhancing architectural details and creating atmospheric temple images superior to harsh midday lighting.
Should I shoot JPEG or RAW at Angkor Wat?
Shoot RAW format at Angkor Wat providing maximum post-processing flexibility with 12-14 bit color depth managing high-contrast scenes, color correction, and exposure recovery impossible with 8-bit JPEGs. RAW files require post-processing though deliver superior image quality justifying the additional workflow investment. Shoot RAW+JPEG if desiring immediate preview images alongside RAW master files.
How do I photograph in dark temple interiors?
Increase ISO to 1600-6400 maintaining reasonable shutter speeds for hand-held shooting in dark temple interiors. Use wide apertures f/2.8-f/4 maximizing light gathering though reducing depth of field. Enable image stabilization helping stabilize longer exposures. Use tripods for optimal quality with base ISO and long exposures when crowds and space permit setup. Embrace silhouettes and high contrast when light proves insufficient for detailed capture.
What’s the best weather for Angkor photography?
Partly cloudy conditions provide the best photography weather adding atmospheric interest while maintaining adequate light levels. Clear dry season skies work well for sunrise-sunset though create harsh midday conditions. Monsoon season dramatic clouds and atmospheric conditions create unique opportunities for photographers accepting weather unpredictability. Avoid completely overcast days producing flat lighting lacking directional definition revealing architectural details.
How many memory cards do I need for Angkor Wat?
Bring 128-256GB total memory card capacity for multi-day intensive Angkor photography depending on RAW file sizes and shooting volume. Carry multiple smaller cards 32-64GB rather than single large cards spreading risk if card failures occur. Back up images daily to laptop, portable hard drive, or cloud storage preventing catastrophic loss if cards fail or get stolen.