
Yosemite National Park Photography Guide
Yosemite National Park has inspired photographers for over 160 years, from Carleton Watkins’ pioneering mammoth plates to Ansel Adams’ masterful black-and-white prints to millions of contemporary images captured annually.
Key Takeaways
- Tunnel View provides the most iconic Yosemite composition, photographed by millions but offering infinite variations through light, weather, and seasons
- Golden hour light transforms granite formations, with warm tones on El Capitan and Half Dome creating dramatic contrast with shadowed areas
- Waterfall photography requires varying shutter speeds based on desired effect—fast to freeze motion, slow to create silky flows
- Valley View at sunset captures the Merced River reflecting Cathedral Rocks and El Capitan with exceptional clarity during calm conditions
- Glacier Point offers comprehensive views of the valley, Half Dome, and high country accessible without strenuous hiking
- Winter photography presents unique opportunities with snow-covered landscapes, ice formations, and dramatic storm clearings
Introduction
The park’s combination of granite monoliths, thundering waterfalls, ancient forests, and dramatic light creates photography opportunities rivaling anywhere on Earth. This comprehensive guide explores techniques, locations, and creative approaches for capturing Yosemite’s beauty while developing your unique photographic vision.
Successful Yosemite photography requires technical knowledge, understanding of light and composition, and patience waiting for optimal conditions. The valley’s north-south orientation creates distinctive lighting patterns, with different formations illuminated spectacularly at specific times. Weather transforms scenes dramatically, with storms, fog, and clearing conditions creating ephemeral moments impossible to predict or repeat. Learning to see photographically in Yosemite means understanding how your camera interprets the landscape differently than human vision and using technical tools to achieve your creative intent.
People Also Ask About Yosemite Photography
What Is the Most Photographed Location in Yosemite?
Tunnel View, located on Highway 41 just as you exit the Wawona Tunnel, provides Yosemite’s most iconic vista. This overlook presents El Capitan on the left, Bridalveil Fall on the right, and Half Dome in the distance, with the valley floor stretching between these landmarks. The composition, though photographed countless times, offers infinite variations through changing light, seasons, and weather. Spring brings powerful waterfalls and lush vegetation. Summer delivers dramatic thunderstorm buildups. Fall contributes colorful foliage. Winter creates snow-covered scenes with occasional fog filling the valley.
Tunnel View photography benefits from arriving well before sunset to claim prime positions during popular times. The overlook fills with photographers and tourists during golden hour, though the expansive view accommodates multiple compositions avoiding crowd inclusion. Wide-angle lenses capture the complete scene, while telephoto perspectives isolate specific elements including Half Dome or Bridalveil Fall. Neutral density graduated filters or exposure blending help manage the scene’s dynamic range, preventing blown highlights in the sky while maintaining detail in shadowed areas.
When Is the Best Light for Yosemite Photography?
Golden hour, the period shortly after sunrise and before sunset, provides the warmest, most dramatic light for Yosemite photography. Low sun angle creates long shadows emphasizing topography while warm color temperatures enhance granite’s natural tones. El Capitan glows brilliantly during late afternoon, with golden light illuminating the face while surrounding areas fall into shadow. Half Dome receives beautiful sidelight during afternoon, revealing texture and dimension. Valley floor locations benefit from soft, directional light during golden hour rather than harsh overhead midday sun.
Blue hour, occurring before sunrise and after sunset, offers different creative possibilities. The sky’s deep blue color contrasts beautifully with illuminated elements including moonlit granite or city lights from the valley. Extended exposures during blue hour create smooth water effects in streams and rivers while clouds streak across the sky. Winter blue hour sometimes captures alpenglow, when peaks glow pink or orange from indirect sunlight after sunset, creating magical light quality lasting only minutes.
What Camera Settings Work Best for Waterfalls?
Waterfall photography technique depends on desired aesthetic effect. Fast shutter speeds of 1/500 second or faster freeze water motion, showing individual droplets and spray patterns. This approach works well for emphasizing power and drama during peak spring flows. Moderate speeds around 1/60 to 1/125 second create partial motion blur while retaining some detail and texture. Slow shutter speeds from 1 second to several seconds produce the classic silky water effect, smoothing flows into ethereal curtains.
Achieving slow shutter speeds in bright daylight requires neutral density filters reducing light entering the lens. ND filters rated at 3-10 stops enable multi-second exposures even in relatively bright conditions. Polarizing filters also reduce light by 1-2 stops while cutting glare from wet rocks and enhancing color saturation. Tripods become essential for any shutter speed slower than 1/60 second, with sturdy support crucial for sharpness. Apertures of f/11 to f/16 provide depth of field keeping foreground and background elements sharp while requiring appropriately slow shutter speeds.
How Do You Photograph Half Dome?
Half Dome’s distinctive shape creates endless compositional possibilities from various locations and perspectives. Glacier Point provides the classic view, with Half Dome appearing across Yosemite Valley at similar elevation. This perspective emphasizes the formation’s northwest face and rounded dome, best photographed during afternoon when sunlight illuminates the granite. Telephoto lenses compress the scene, making Half Dome appear larger relative to other elements. Foreground elements including trees or rocks add depth and context to compositions.
Olmsted Point on Tioga Road offers a contrasting perspective, viewing Half Dome from the northeast with its backside visible. This unusual angle reveals the dome’s true shape rather than the iconic profile seen from the valley. The location includes interesting glacially polished granite in the foreground, useful for creating leading lines toward Half Dome. Mirror Lake historically provided reflections of Half Dome, though the lake has filled with sediment and now exists as a lake only during spring runoff. When water levels suffice, calm conditions create spectacular reflection opportunities.
Extended multi-day tours – 5+ days
Featured Park Yosemite National Park Multi-Day Tour Packages

3 days
Park Yosemite National Park 3-Day Discovery Tour
- ✓ Comprehensive Park Yosemite National Park experience
- ✓ Expert local guides included
- ✓ All accommodation included
- ✓ Transportation provided
5 days
Park Yosemite National Park 5-Day Highlights Experience
- ✓ Comprehensive Park Yosemite National Park experience
- ✓ Expert local guides included
- ✓ All accommodation included
- ✓ Transportation provided

7 days
Park Yosemite National Park 7-Day Cultural Journey
- ✓ Comprehensive Park Yosemite National Park experience
- ✓ Expert local guides included
- ✓ All accommodation included
- ✓ Transportation provided

10 days
Park Yosemite National Park 10-Day Complete Adventure
- ✓ Comprehensive Park Yosemite National Park experience
- ✓ Expert local guides included
- ✓ All accommodation included
- ✓ Transportation provided
Multi-day tour packages powered by TourRadar. Prices and availability subject to change.
Essential Photography Locations in Yosemite Valley
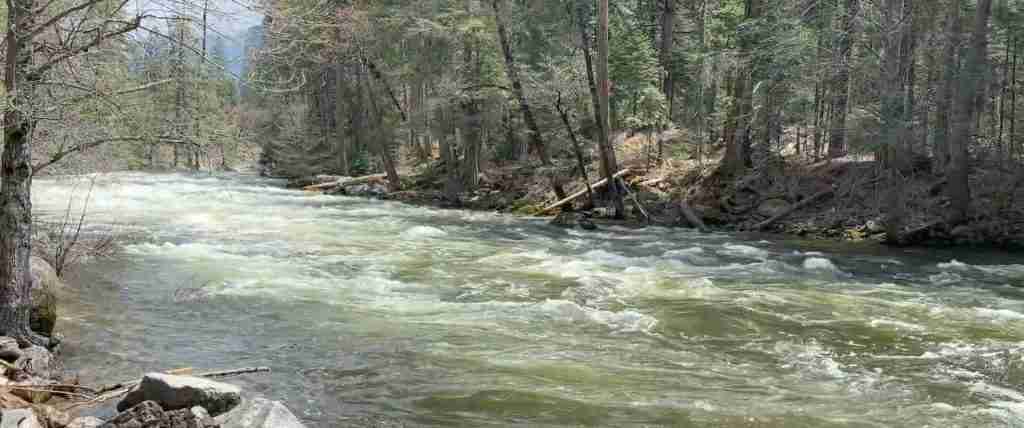
Valley View, located on Northside Drive shortly past the intersection with Southside Drive, provides exceptional views of El Capitan, Cathedral Rocks, and Bridalveil Fall reflected in the Merced River. This location works brilliantly during calm mornings or evenings when the river’s surface creates mirror-like reflections. Spring and early summer offer the most reliable water flows, while late summer and fall may present reduced reflections as water levels drop. The foreground river creates leading lines toward background formations, with rocks in the water adding compositional interest.
Cathedral Beach provides intimate access to the Merced River with Cathedral Rocks rising dramatically above. The beach’s position enables capturing reflections while including the river’s sandy or rocky edges as foreground elements. This location works throughout the day, with different light angles creating varied moods. Morning light illuminates Cathedral Rocks directly, while afternoon light creates dramatic sidelight emphasizing the formation’s vertical structure. The less-visited location compared to Tunnel View or El Capitan meadows offers relative solitude for contemplative photography.
El Capitan Meadow presents multiple perspectives on this massive granite monolith. Walking through the meadow reveals constantly changing relationships between foreground vegetation and the distant cliff. Spring wildflowers including lupine create colorful foregrounds, while fall brings golden grasses and colorful oak leaves. Afternoon light illuminates El Capitan’s face brilliantly, creating optimal conditions for dramatic images. The meadow’s expansive character enables compositions isolating El Capitan against sky or incorporating clouds, trees, or other contextual elements.
Sentinel Bridge offers the classic Half Dome reflection shot, with the Merced River creating mirror images during calm conditions. This location attracts photographers during sunrise when soft light gradually illuminates Half Dome while the valley remains in shadow. The composition works best during spring’s higher water levels, with reduced flows in late summer sometimes limiting reflection quality. Using wide-angle lenses incorporates bridge structures as foreground elements, while telephoto lenses isolate Half Dome and its reflection. Neutral density graduated filters balance the sky’s brightness with darker foreground areas.
Cook’s Meadow provides 360-degree views incorporating multiple valley landmarks. Walking trails through the meadow reveal varied compositions including Half Dome, Sentinel Rock, and Yosemite Falls visible simultaneously or isolated individually. The meadow’s vegetation creates foreground interest, with seasonal changes dramatically altering available colors and textures. Late afternoon light produces long shadows across the meadow while illuminating valley walls. The relatively flat terrain enables easy movement exploring different compositions without strenuous hiking.
Waterfall Photography Techniques and Locations
Yosemite Falls, North America’s tallest waterfall, demands wide-angle lenses to capture the complete 2,425-foot drop. The base provides dramatic perspectives looking upward, with spray creating rainbows during sunny conditions. Photographing from the base requires weather sealing or protection for camera equipment, as spray saturates surrounding areas during peak flow. The Falls Trail’s lower section reaches viewpoints featuring the lower fall with Cathedral Rocks visible behind, creating compelling compositions combining multiple elements.
Bridalveil Fall offers year-round photography opportunities, with the 620-foot drop flowing even during drought years. The short trail to the fall’s base provides close access, though wind often blows spray sideways rather than straight down, creating the “bridal veil” effect. Spring flows prove most dramatic, with massive water volume and spray visible from great distances. Summer and fall present more delicate flows, creating different aesthetic qualities. Including trees in foreground or background adds scale and context to waterfall compositions.
Vernal Fall, accessible via the Mist Trail, creates opportunities for both distance views and intimate close-ups. The trail ascends alongside the fall, with viewpoints at various elevations revealing different perspectives. Nevada Fall, further upstream, drops 594 feet as a more unified curtain during peak flow. The John Muir Trail reaches viewpoints presenting both falls visible simultaneously, with the Merced River’s descent down the “Giant Staircase” creating comprehensive scenes. The strenuous hike limits visitor numbers compared to valley locations, rewarding photographers willing to make the effort.
Horsetail Fall, dropping from El Capitan’s eastern edge, becomes famous during mid-to-late February when sunset light creates the “firefall” effect. The waterfall’s trajectory and setting sun’s angle must align precisely, creating orange and red illumination making water appear to be flowing fire. This ephemeral event lasts only minutes on a few days each year, requiring clear western skies and sufficient water flow. Hundreds of photographers gather during prime conditions, with popular viewpoints filling hours before sunset. Success requires scouting locations, arriving early, and accepting that weather may prevent the effect.
High Country Photography
Glacier Point provides comprehensive valley views from 3,200 feet above the valley floor, accessible via road from late May through November. The perspective encompasses Half Dome, Nevada and Vernal Falls, the valley floor, and high peaks including Clouds Rest and the Cathedral Range. Sunset creates spectacular light, with alpenglow sometimes coloring Half Dome after direct sunlight leaves the valley. The developed viewpoint offers accessibility for photographers with limited mobility, though crowds gather during peak visitation periods.
Olmsted Point on Tioga Road presents views east toward Half Dome’s unusual backside angle, with Tenaya Lake visible below and Clouds Rest rising behind. The location’s glacially polished granite foregrounds create leading lines and textural interest, with the smooth rock contrasting with distant peaks. Storms moving across the high country create dramatic cloud formations and lighting effects. The roadside location enables quick access when conditions look promising, with photographers able to photograph opportunistically rather than committing to long hikes.
Tenaya Lake’s azure water reflects surrounding peaks during calm conditions, creating mirror images rivaling valley floor reflections. The lake’s accessible shoreline enables exploring varied compositions incorporating sandy beaches, granite slabs, or forested areas as foregrounds. Sunrise and sunset provide optimal light, with the lake’s east-west orientation creating different effects depending on time of day. Occasional storms clearing over the lake produce dramatic cloud formations and lighting effects including rainbows, shafts of light, and moody atmospheres.
Tuolumne Meadows’ expansive subalpine landscape creates opportunities for grand vistas and intimate details. The Tuolumne River meanders through the meadows, creating serpentine curves visible from elevated viewpoints. Lembert Dome rises above the meadows, accessible via trail to summit viewpoints. Cathedral Peak, Unicorn Peak, and surrounding granite formations create dramatic backdrops for meadow photography. Wildflower displays peak in July and August, with fields of lupine, paintbrush, and numerous other species creating colorful foregrounds.
Specialized Photography Techniques
Long exposure photography transforms waterfalls, streams, and clouds through extended shutter speeds. Neutral density filters enable multi-second or even multi-minute exposures in daylight, smoothing water into silky flows while clouds streak across skies. Ten-stop ND filters allow 30-second exposures at f/16 in moderate daylight, creating dramatic motion effects. Stacking multiple ND filters increases light reduction, though excessive stacking may cause vignetting or image quality degradation. Calculate exposure times by taking meter readings without filters, then adjusting for filter density.
Panoramic photography captures Yosemite’s grand scale exceeding single frame capabilities. Shoot series of overlapping images, maintaining consistent exposure and white balance across the sequence. Overlap by 30-50% ensures sufficient content for stitching software to blend images seamlessly. Use manual exposure mode to prevent brightness variations between frames. Level the camera carefully, as tilting causes parallax issues complicating stitching. Rotate around the lens’s nodal point to minimize parallax, particularly important when foreground elements appear close to the camera.
Focus stacking extends depth of field beyond single-exposure capabilities, useful for compositions with close foregrounds and distant backgrounds. Photograph multiple images, adjusting focus incrementally from foreground to background. Specialized software blends the sharp areas from each frame, creating comprehensive sharpness impossible even at small apertures like f/22. This technique proves valuable for including sharp wildflowers in foreground while maintaining sharp distant mountains. Ensure camera remains perfectly still between frames using sturdy tripod and remote release.
HDR (High Dynamic Range) photography addresses scenes exceeding camera sensors’ brightness range. Photograph multiple exposures capturing highlight detail, midtone detail, and shadow detail separately. Software merges these exposures, creating images with expanded dynamic range. Natural-looking HDR requires subtle processing avoiding the over-saturated, over-processed appearance characterizing poor HDR work. Alternatively, exposure bracket and blend images manually in post-processing, selecting appropriate exposure for different areas of the frame. This hands-on approach provides greater control than automated HDR software.
Composition Strategies
Foreground elements add depth and scale to landscape photography, preventing flat, dimensionless images. Include rocks, flowers, trees, or water in the foreground, using wide-angle lenses and small apertures to maintain sharpness from near to far. The three-dimensional illusion created by near foreground elements contrasting with distant subjects makes images more engaging. Look for interesting shapes, textures, or colors serving compositional purposes while directing attention toward primary subjects.
Leading lines guide viewers’ eyes through images toward intended subjects. Rivers, roads, trails, fallen trees, or natural features create pathways through compositions. The Merced River provides natural leading lines in numerous valley locations, directing attention toward background formations. Granite crack systems in the foreground create linear elements directing attention through frames. Curved lines prove particularly effective, creating graceful movement through compositions rather than stark directness of straight lines.
Framing techniques use natural elements to create frames within photographic frames, adding depth and focus. Tree branches framing Half Dome, rock formations framing waterfalls, or tunnel openings framing valley views create layered compositions directing attention. These frames add context and foreground interest while emphasizing intended subjects. Look for natural frames while exploring locations, considering how they might enhance compositions. Sometimes moving just a few feet reveals framing opportunities invisible from initial positions.
Rule of thirds placement creates balanced, visually pleasing compositions avoiding centered subjects that may appear static. Placing horizon lines on upper or lower third rather than center creates more dynamic compositions. Positioning primary subjects at third-line intersections naturally draws attention while maintaining balance. However, rules exist to be broken thoughtfully—centered compositions work brilliantly for subjects with strong symmetry, mirror reflections, or when emphasizing singular dominance. Develop compositional intuition by studying both successful images and understanding why specific placements work.
Seasonal Photography Considerations
Spring photography centers on waterfalls at peak flow and meadows greening after winter dormancy. Yosemite Falls, Bridalveil Fall, and countless seasonal falls cascade with tremendous volume and power. Dogwood blooms create white displays throughout forests, while wildflowers including lupine begin appearing in meadows. Spring storms create dramatic cloud formations and clearing conditions, with fresh snow often covering higher elevations while valley floor transitions to green. The season’s dynamic character produces rapidly changing conditions requiring flexibility and willingness to photograph unexpected opportunities.
Summer brings high country access as Tioga Road opens, extending photography opportunities beyond the valley. Alpine wildflowers peak in July and August, with meadows displaying spectacular color. Thunderstorms build during afternoons, creating dramatic skies and occasional lightning. Waterfall flows diminish from spring peaks, with some falls disappearing entirely during drought years. Extended daylight hours enable photographing during golden hour without extremely early mornings or late evenings. Crowds increase significantly, particularly in the valley, requiring early arrival for popular locations.
Fall transforms deciduous trees and shrubs into colorful displays of yellow, orange, and red. Black oaks in the valley turn golden-yellow, creating foreground color contrasting with granite cliffs. Dogwood leaves develop deep red hues, providing color accents throughout forests. Big-leaf maples in side canyons turn brilliant yellow and orange. Fall colors peak during late October through early November, with exact timing varying yearly based on weather. Reduced waterfall flows during fall focus attention on forests, reflections, and autumn color rather than cascading water.
Winter photography presents unique challenges and opportunities. Snow covers the valley floor, Half Dome, and surrounding cliffs, creating high-contrast scenes. Storms clearing reveal fresh snow on formations, with clouds parting to reveal blue sky and dramatic light. Frazil ice forms in the Merced River, creating pancake ice formations. Yosemite Falls sometimes forms massive ice cone at its base, visible from valley viewpoints. Winter light quality proves exceptional, with low sun angles and clear air creating brilliant illumination. However, chains become required on roads during storms, and some areas close due to avalanche danger.
Technical Considerations and Equipment
Wide-angle lenses ranging from 14mm to 35mm capture Yosemite’s grand scale, including complete formations and expansive vistas in single frames. Ultra-wide lenses like 14-24mm create dramatic perspectives emphasizing foreground elements while incorporating distant subjects. Standard wide-angles around 24-35mm provide more natural perspective with less distortion. These lenses work brilliantly for valley views, waterfall bases, and any situation requiring comprehensive coverage. Extremely wide lenses require careful composition avoiding empty or uninteresting foregrounds drawing attention from intended subjects.
Telephoto lenses from 70mm to 400mm isolate distant elements, compress perspective, and reveal details invisible to wide-angle views. Moderate telephotos around 70-200mm capture Half Dome from Glacier Point, isolate Cathedral Rocks from valley locations, or photograph distant peaks. Longer lenses exceeding 300mm prove useful for wildlife photography or extreme compression effects. Telephoto lenses require faster shutter speeds to avoid camera shake, with image stabilization technology helping when handholding. Tripods become increasingly important as focal length increases.
Tripods provide essential stability for long exposures, HDR brackets, panoramic sequences, and any low-light situation. Sturdy tripods resist wind better than lightweight alternatives, though weight considerations matter for backpacking trips. Carbon fiber tripods balance strength and reasonable weight, while aluminum alternatives save money at weight cost. Ball heads enable quick adjustments, while geared heads provide precise control for fine-tuning composition. Always secure tripod legs firmly, extending thicker upper sections before thinner lower sections for maximum stability.
Filters modify light entering the camera, solving problems difficult or impossible to address in post-processing. Polarizing filters reduce reflections from water and foliage, darken skies, and increase color saturation. These filters rotate to adjust effect strength, with maximum polarization occurring at 90 degrees to the sun. Neutral density filters reduce light uniformly across the spectrum, enabling long exposures in bright conditions. Graduated neutral density filters transition from dark to clear, balancing bright skies with darker foregrounds. Square filter systems provide flexibility using different filter types on various lenses.
Post-Processing Approaches
RAW format capture preserves maximum information for post-processing flexibility, recording unprocessed sensor data rather than processed JPEGs. RAW files enable adjusting white balance, recovering highlight and shadow detail, and applying corrections impossible with JPEGs. The extra flexibility proves invaluable for high-contrast scenes common in Yosemite, where granite reflects intense light while shadowed areas receive minimal illumination. While RAW files require processing before viewing, the additional control justifies the extra workflow step for serious photography.
Global adjustments affect entire images, addressing overall brightness, contrast, color balance, and saturation. Start with exposure correction if needed, then adjust highlights and shadows recovering detail in bright and dark areas. Whites and blacks adjustments set the brightest and darkest points, establishing overall tonal range. Clarity adjustment adds midtone contrast, enhancing detail perception. Vibrance increases color intensity in muted colors while protecting already saturated colors from over-saturation. These adjustments establish the image’s overall character before making localized corrections.
Local adjustments target specific image areas, addressing problems or enhancing particular elements. Gradient filters darken bright skies without affecting foregrounds, replicating physical graduated ND filter effects. Radial filters adjust circular or elliptical areas, useful for vignetting or drawing attention to specific elements. Adjustment brushes paint corrections on specific areas including dodging shadows, burning highlights, or adjusting local color. These localized adjustments require subtlety, as obvious corrections draw attention to processing rather than image content.
Black-and-white conversion emphasizes form, texture, and tonal relationships rather than color. Yosemite’s dramatic contrasts between white granite and dark forests create natural opportunities for monochrome interpretation. Ansel Adams’ Zone System approach controlled exposure and development maximizing tonal range, applicable digitally through careful exposure and processing. Convert to black-and-white using channel mixer or HSL adjustments rather than simple desaturation, controlling how different colors translate to grayscale. Add contrast through curves adjustments or contrast sliders, creating dramatic tonal separation characteristic of fine black-and-white landscape photography.
Creative Approaches and Personal Vision
Developing personal photographic vision requires moving beyond technical proficiency to artistic expression. Study master photographers including Adams, understanding not just their technical methods but their interpretive approaches. Adams photographed Yosemite for decades, creating iconic images through patient observation, technical mastery, and artistic vision. However, rather than merely copying Adams or other masters, use their work as inspiration for developing your own voice. Contemporary photography offers different tools and possibilities than available historically, enabling new interpretations of classic subjects.
Abstract photography isolates patterns, textures, and forms from broader context, creating images emphasizing visual qualities over documentary representation. Granite’s swirls and patterns, water’s textures, tree bark details, and ice formations provide endless abstract subjects. Close-up photography reveals worlds invisible at normal viewing distances, with macro lenses enabling extreme magnification. Abstract approaches require seeing differently, looking past obvious subjects to underlying visual elements. This practice develops observational skills improving all photography, even when working with traditional landscape compositions.
Minimalist photography reduces compositions to essential elements, eliminating distractions and emphasizing simplicity. A single tree against granite, lone photographer on Half Dome’s summit, or isolated rock in meadow creates powerful images through what’s excluded rather than included. Minimalism requires disciplined composition, carefully evaluating whether each element serves the image or merely clutters it. This approach contrasts with grand vista photography emphasizing comprehensive coverage, offering alternative interpretations of Yosemite’s character.
Storytelling through photography sequences creates narratives beyond single image capabilities. Document a day in Yosemite from predawn preparation through locations visited to post-sunset return, creating photographic story of the experience. Photograph seasonal progression, returning to identical locations throughout the year documenting transformation. These projects require planning and commitment but produce bodies of work with greater impact than isolated images. Consider how images relate to each other, creating flow and building narrative through careful sequencing.
Ethics and Responsibility
Leave No Trace principles apply to photography, requiring consideration of environmental impacts. Avoid trampling vegetation to reach compositions, staying on established trails and paths. Don’t rearrange natural elements, moving rocks, branches, or other features to improve compositions. Respect wildlife by maintaining appropriate distances, never approaching animals for closer shots. Use long lenses rather than close approach, avoiding stress or behavioral modification. Don’t bait or harass wildlife, even inadvertently through excessive proximity or time spent near sensitive species.
Respect other visitors’ experiences by sharing popular locations rather than monopolizing them. During crowded conditions at places like Tunnel View or Glacier Point, be willing to share space and allow others to enjoy views. Avoid placing tripods where they block pathways or create hazards. Keep noise levels reasonable, as many visitors seek quiet nature experiences. Clean up any trash, even trash you didn’t create, helping maintain Yosemite’s pristine character. Remember that while you’re creating art, others are creating memories deserving equal consideration.
Consider social media impact when sharing location information. Geotagging photographs with precise locations sometimes leads to overuse of sensitive areas, as people seek to recreate popular images. Lesser-known locations experiencing sudden popularity from viral photographs can suffer environmental damage from increased visitation. Balance desire to share beautiful places against potential for that sharing to harm those places. Consider describing general areas rather than providing precise GPS coordinates for particularly sensitive or pristine locations.
Frequently Asked Questions
What is the best time of year to photograph Yosemite?
Each season offers unique opportunities, making “best” dependent on photographic interests. Spring provides peak waterfall flows and green meadows. Summer enables high country access and alpine wildflowers. Fall delivers autumn colors and dramatic storm systems. Winter presents snow-covered landscapes and exceptional light quality. Rather than one universally “best” season, consider what subjects interest you most and visit accordingly. Many photographers return across multiple seasons, documenting Yosemite’s year-round transformations.
Do I need special permits to photograph in Yosemite?
Personal photography requires no permits, allowing visitors to photograph freely for personal use. Commercial photography, defined as photography intended for commercial sale, requires permits and fees. Wedding photography in popular locations requires special permits and sometimes incurs fees. Drone photography remains prohibited throughout the park without special authorization, which is rarely granted. Group photography sessions sometimes require permits depending on group size and activities. Check current regulations, as policies evolve addressing new technologies and photography practices.
What focal lengths work best for Yosemite photography?
Wide-angle lenses from 14-35mm capture grand vistas and comprehensive valley views. Standard zoom lenses like 24-70mm or 24-105mm provide versatility for varied compositions. Telephoto zooms around 70-200mm isolate distant elements and compress perspective. Many photographers find 24-70mm and 70-200mm lenses cover most needs, with the two lenses providing focal length range from moderate wide-angle through telephoto. Ultra-wide lenses like 14-24mm prove valuable for dramatic perspectives, while longer telephotos serve specialized purposes including wildlife photography.
How do I photograph the Milky Way in Yosemite?
Milky Way photography requires dark skies away from light pollution, fast wide-angle lenses, and clear weather. Use fast apertures like f/2.8 or wider, high ISO settings around 3200-6400, and shutter speeds of 15-30 seconds depending on focal length. The 500 Rule provides rough guidance: divide 500 by focal length to determine maximum shutter speed before star trailing becomes noticeable. Photograph during new moon periods for darkest skies. Use manual focus, focusing on bright star and checking results by zooming in on LCD. Include foreground elements like silhouetted trees or illuminated formations for context.
What camera settings should I use for wildlife photography?
Wildlife photography requires fast shutter speeds freezing motion, with speeds of 1/500 to 1/2000 second capturing birds and active mammals. Use aperture priority or shutter priority modes, selecting appropriate shutter speed or aperture while camera adjusts the other parameter. Continuous autofocus tracks moving subjects, with predictive algorithms anticipating movement. Burst mode shoots multiple frames rapidly, increasing chances of capturing peak moments. Higher ISO settings enable faster shutter speeds in lower light, accepting some noise to avoid motion blur. Long telephoto lenses provide necessary reach for photographing animals at respectful distances.
How do I deal with crowds at popular photography locations?
Arrive early to claim positions at popular locations, particularly during sunrise, sunset, and special events like Horsetail Fall firefall. Consider visiting during shoulder seasons or weekdays when crowds decrease. Explore lesser-known alternatives providing similar subjects without crowds. Use long exposures to blur moving people, effectively removing them from images. Crop compositions tightly, eliminating edges where people congregate. Accept crowds as part of popular locations, focusing on your photographic goals rather than perfect solitude. Remember that everyone deserves to enjoy Yosemite, practicing patience and courtesy.
What neutral density filter strength do I need for waterfall photography?
Three to six-stop ND filters work well for most waterfall situations, enabling 1-4 second exposures in moderate light. Ten-stop ND filters allow extremely long exposures even in bright daylight, creating very smooth water effects. Variable ND filters adjust between different densities, though they may show color casts or “X” patterns at wide angles and extreme settings. Many photographers carry both moderate (3-6 stop) and strong (10-stop) ND filters, selecting appropriate density based on light conditions and desired shutter speed. Calculate exposure changes using filter factor, doubling exposure time for each stop of light reduction.
Should I shoot in RAW or JPEG format?
RAW format preserves maximum information for post-processing, enabling white balance adjustment, highlight recovery, and other corrections impossible with JPEGs. The flexibility proves particularly valuable for challenging high-contrast scenes common in Yosemite. RAW files require processing before viewing and consume more storage, but modern computers and storage make these concerns minimal. Most serious photographers shoot RAW exclusively, accepting workflow complexity for enhanced image quality and processing flexibility. Some cameras offer RAW+JPEG options, creating both file types simultaneously, though this doubles storage requirements.
How can I create unique images of such a photographed place?
Develop personal vision by experimenting with unusual perspectives, creative techniques, and unique interpretations. Visit during unusual conditions including storms, fog, or unusual light. Photograph details and abstracts rather than grand vistas. Use creative techniques including intentional camera movement, multiple exposures, or alternative processing approaches. Return repeatedly to specific locations, developing intimate knowledge enabling you to recognize and capture special moments. Study other photographers’ work for inspiration but avoid mere copying, instead using their work as springboard for your own creative exploration.
What weather conditions create the best photography opportunities?
Storms clearing provide dramatic light, with breaks in clouds creating shafts of light illuminating specific formations while others remain shadowed. Fresh snow transforms the landscape, covering familiar scenes with pristine white coats. Fog filling the valley creates mystical conditions, with formations appearing and disappearing through shifting mist. Dawn and dusk during clear weather provide classic golden light, with warm tones enhancing granite. Even “bad” weather including rain, snow, or overcast skies creates mood and atmosphere impossible during perfect conditions. Embrace all weather, recognizing that diverse conditions produce varied photographic opportunities.