
Venice Photography Guide 2026: Complete Camera Manual
Venice ranks among the world’s most photographed cities, offering endless visual opportunities from iconic landmarks to intimate neighborhood scenes. The UNESCO World Heritage site’s unique architecture, perpetual water reflections, and dramatic light conditions create photographer paradise. However, capturing Venice’s magic requires understanding optimal timing, locations, and technical approaches that differentiate memorable images from standard tourist snapshots.
Key Takeaways
- Shoot during golden hours (6:30-8:30 AM and 6:00-8:00 PM in summer) when warm light illuminates architecture without harsh shadows
- Arrive at iconic locations 45-60 minutes before sunrise to secure prime positions before crowds and tour boats
- Bring wide-angle lenses (16-35mm) for architectural photography and narrow canal compositions capturing Venice’s scale
- Use polarizing filters to reduce water reflections and enhance saturated colors in Venice’s lagoon environment
- Explore lesser-known Cannaregio and Castello neighborhoods for authentic street photography without tourist congestion
- Shoot from vaporetto Line 1 front positions for dynamic Grand Canal perspectives impossible from land
Introduction
This comprehensive photography guide reveals insider locations, technical strategies, and timing wisdom developed through years of Venice shooting experience. Whether you’re wielding professional gear or smartphone cameras, these proven techniques help you capture Venice’s essence while avoiding common pitfalls that diminish photographic impact. From sunrise at San Marco to twilight along Zattere waterfront, discover how to transform Venice’s visual richness into portfolio-quality images.
People Also Ask About Venice Photography 2026
What is the best time of day to photograph Venice?
Golden hours provide optimal light conditions – sunrise (6:30-8:30 AM summer, 7:30-9:00 AM spring/fall) offers calm water reflections and empty landmarks, while sunset (6:00-8:00 PM summer, 4:30-6:00 PM spring/fall) delivers warm architectural illumination. Blue hour immediately after sunset creates magical atmospheric shots with artificial lighting activating across the city.
Where are the best photo spots in Venice?
Top locations include Rialto Bridge views from Riva del Vin, St. Mark’s Square from Correr Museum terrace, Grand Canal from Accademia Bridge, Burano’s colorful houses along Via Galuppi, San Giorgio Maggiore campanile for panoramic views, and quiet canals throughout Dorsoduro and Cannaregio neighborhoods offering authentic Venetian scenes.
Can I use a tripod in Venice?
Tripods are prohibited in St. Mark’s Square and major tourist areas but permitted in neighborhood streets and most bridges. Carry lightweight travel tripods for dawn and twilight shooting when handheld photography becomes challenging. Gorilla pods work on bridge railings and ledges for stabilization without formal tripod setups.
What camera settings work best for Venice photography?
Use aperture priority (f/8-f/11) for architecture ensuring sharp focus across depth. Increase ISO to 800-1600 for dawn/dusk shooting maintaining sharp images. Enable image stabilization for handheld canal photography. Shoot RAW format for maximum post-processing flexibility with Venice’s challenging contrast and reflections.
Extended multi-day tours – 5+ days
Featured Venice Multi-Day Tour Packages
3 days
Venice 3-Day Discovery Tour
- ✓ Comprehensive Venice experience
- ✓ Expert local guides included
- ✓ All accommodation included
- ✓ Transportation provided
5 days
Venice 5-Day Highlights Experience
- ✓ Comprehensive Venice experience
- ✓ Expert local guides included
- ✓ All accommodation included
- ✓ Transportation provided

7 days
Venice 7-Day Cultural Journey
- ✓ Comprehensive Venice experience
- ✓ Expert local guides included
- ✓ All accommodation included
- ✓ Transportation provided
10 days
Venice 10-Day Complete Adventure
- ✓ Comprehensive Venice experience
- ✓ Expert local guides included
- ✓ All accommodation included
- ✓ Transportation provided
Multi-day tour packages powered by TourRadar. Prices and availability subject to change.
Essential Photography Gear
Camera Equipment
Camera Bodies: Full-frame sensors capture more detail in challenging light conditions common in Venice. APS-C and Micro Four Thirds cameras work excellently for travel photography with lighter weight advantages. Modern smartphones produce impressive results for casual photographers prioritizing portability over technical flexibility.
Essential Lenses:
Wide-Angle (16-35mm): Your workhorse lens for Venice capturing grand architecture, narrow canal perspectives, and sweeping lagoon views. Essential for interior photography in churches and palazzos where space is limited.
Standard Zoom (24-70mm): Versatile all-purpose lens covering most situations from architecture to street photography. Ideal for travelers wanting minimal gear while maintaining flexibility.
Telephoto (70-200mm): Captures architectural details, campanile tower close-ups, and compressed perspectives along waterways. Heavy for all-day carrying but delivers unique compositions impossible with wider lenses.
Prime Lenses (35mm, 50mm): Compact, sharp, and fast apertures for low-light photography and selective focus effects. Street photographers favor 35mm for environmental context, while 50mm creates intimate portraits and detail shots.
Support and Filters
Tripod Considerations: Bring lightweight carbon fiber travel tripods for dawn and twilight photography when long exposures require stabilization. Compact tripods fit in daypacks without adding excessive weight. Gorilla pods grip bridge railings and architectural elements for improvised stabilization.
Polarizing Filters: Essential for Venice photography reducing water reflections and enhancing color saturation. Circular polarizers screw onto lens fronts rotating to control reflection intensity. Most effective at 90-degree angles to the sun creating dramatic sky contrast.
Neutral Density Filters: Enable long exposures smoothing water surfaces and removing tourists from busy scenes. 6-stop ND filters allow 30-60 second exposures during daylight hours. Variable ND filters provide adjustment flexibility without carrying multiple filter strengths.
Lens Hoods: Protect front elements while reducing lens flare from bright reflections off water surfaces. Essential accessories often overlooked until shooting into low sun angles.
Accessories
Spare Batteries: Cold weather and extensive shooting drain batteries quickly. Carry 2-3 charged spares for full-day photography sessions. Hotels provide charging overnight between shooting days.
Memory Cards: Bring multiple high-capacity cards (64GB+) rather than relying on single large cards. Distributing images across cards prevents catastrophic loss if one fails. Fast write speeds (90MB/s+) prevent buffering during burst shooting.
Cleaning Kit: Venice’s water environment creates spots on lenses and sensors. Pack microfiber cloths, lens tissues, and air blowers for daily equipment cleaning. Camera shops near major squares sell cleaning supplies if needed.
Weather Protection: Bring rain covers or plastic bags protecting gear during unexpected showers. Venice’s humidity and occasional rain threaten electronic equipment. Ziplock bags provide emergency waterproofing for cameras and lenses.
Smartphone Photography
Modern Capabilities: Current smartphones capture excellent Venice images with computational photography compensating for smaller sensors. Wide-angle and telephoto multiple lens systems provide compositional flexibility approaching interchangeable lens cameras.
Accessories: Mobile tripod mounts enable stable long exposures. Clip-on lenses add ultra-wide or macro capabilities. Waterproof cases protect phones during vaporetto shooting or light rain.
Apps: Adobe Lightroom Mobile, Snapseed, and VSCO provide professional editing capabilities. Camera replacement apps like Halide and ProCamera offer manual control over exposure, focus, and RAW capture.
Best Photography Locations
Iconic Venice Views
St. Mark’s Square (Piazza San Marco)
Optimal Time: Sunrise (6:30-8:00 AM) delivers empty square with warm light illuminating basilica facades. Evening blue hour (8:00-9:00 PM summer) captures illuminated architecture with arcade lighting creating atmosphere.
Vantage Points: Shoot from Correr Museum terrace (€25 admission) for elevated square overview. Ground-level wide-angle captures basilica facade with arcades framing composition. Campanile observation deck (€10) provides 360-degree panoramic views but glass windows complicate photography.
Composition Tips: Include foreground elements like cafe chairs, pigeons, or arcades adding depth. Shoot vertical orientations emphasizing campanile tower height. Wait for interesting human elements like flowing dresses or gesturing figures adding scale and story.
Rialto Bridge
Classic Viewpoints: Riva del Vin waterfront south of the bridge offers postcard-perfect symmetrical views. Arrive 30 minutes before sunrise securing front positions at railings. North side Riva del Carbon provides alternative perspectives with morning light illuminating bridge facades.
Bridge Photography: Shoot from Rialto Bridge top capturing Grand Canal traffic and palazzo reflections. Use telephoto lenses compressing perspective along canal curves. Dawn light illuminates eastern facades while sunset favors western palace walls.
Technical Approach: Use f/8-f/11 ensuring sharp focus across depth from foreground gondolas to distant palazzos. Polarizing filters reduce water glare emphasizing architectural details. Long exposures (2-4 seconds) smooth water creating glass-like canal surfaces.
Accademia Bridge
Sunset Icon: This wooden bridge provides Venice’s most famous sunset photography location overlooking Grand Canal toward Santa Maria della Salute dome. Arrive 45-60 minutes before sunset claiming center bridge positions.
Timing Strategy: Best colors appear 15-30 minutes after sunset during blue hour when sky and artificial lights balance exposure. Shoot bracketed exposures blending in post-processing for balanced sky and architecture.
Composition Variables: Gondolas moored at right add foreground interest. Vertical orientation emphasizes dome and sky relationship. Horizontal format includes palazzo facades lining canal creating depth.
Hidden Venice Gems
Cannaregio Neighborhood
Authentic Atmosphere: This residential sestiere north of Rialto offers quiet canals, local life scenes, and fewer tourists. Explore morning hours (8:00-10:00 AM) when residents shop at markets and children walk to school.
Key Locations: Fondamenta degli Ormesini canal lined with restaurants and bars creates vibrant evening scenes. Canals around Campo Ghetto Novo feature intimate bridges and laundry lines representing authentic Venice. Jewish quarter architecture provides unique photographic perspectives.
Street Photography: Capture daily life at neighborhood bakeries, produce shops, and campo squares. Respectfully photograph from distance using telephoto lenses rather than intrusive close approaches. Wait for gesture and expression rather than posed portraits.
Dorsoduro District
Canal Scenes: Quiet waterways around Campo Santa Margherita feature classic Venice architecture without San Marco crowds. Reflections photograph beautifully in still morning water before vaporetto traffic disturbs surfaces.
Zattere Promenade: This waterfront path facing Giudecca Canal offers sunset photography with islands silhouetted against colorful skies. Wide walkway accommodates tripods and patient composition development.
University Quarter: Students gathering at campo cafes create authentic contemporary Venice scenes contrasting with tourist-focused areas. Evening aperitivo hours (6:00-8:00 PM) provide animated social photography.
Castello Exploration
Eastern Venice: Walk beyond San Marco tourist concentration into residential Castello discovering empty bridges, quiet canals, and authentic neighborhood rhythms. Morning market activity at Via Garibaldi creates documentary opportunities.
Arsenal Area: Historic shipyard walls and bridges near Biennale gardens offer interesting architectural photography. Less crowded than western Venice allowing patient composition work.
Garden Views: Giardini della Biennale public gardens provide green spaces rare in Venice. Spring blossoms and autumn colors create seasonal variation from constant stone architecture.
Lagoon Island Photography
Burano Color Paradise
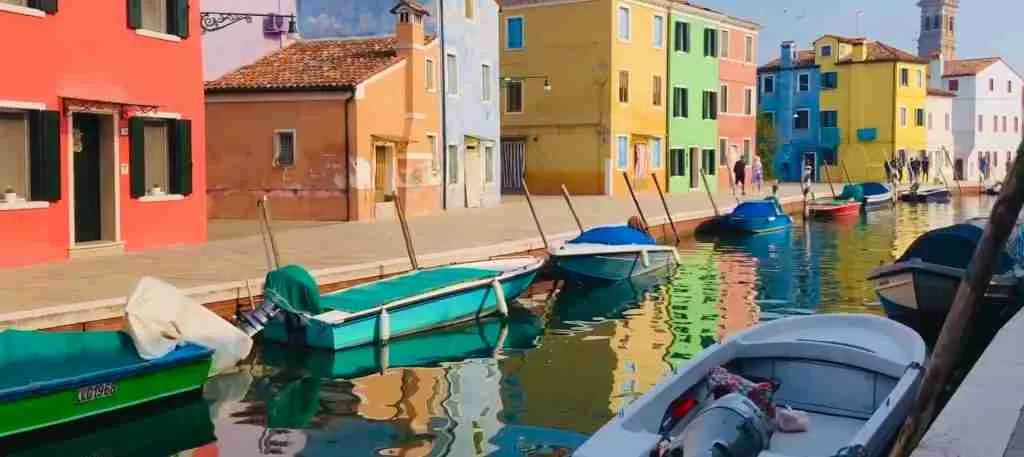
Colorful Houses: This fishing island features brightly painted houses creating photographer paradise. Via Galuppi main street and backstreets away from tour groups offer endless composition opportunities.
Best Light: Overcast conditions provide even illumination preventing harsh shadows on multicolor facades. Midday overhead light works surprisingly well on Burano unlike mainland Venice. Late afternoon side-lighting adds dimension to painted surfaces.
Composition Strategy: Frame colorful house clusters through canal foregrounds. Include laundry lines, boats, and architectural details adding authentic character. Shoot both wide environmental shots and tight detail compositions.
Murano Glass Island
Industrial Heritage: Glass factory architecture and canal scenes offer grittier industrial photography contrasting with Venice’s palace grandeur. Explore backstreets away from main tourist routes for authentic island atmosphere.
Factory Photography: Some factories permit photography of glassblowing demonstrations. Shoot through windows avoiding flash that disturbs craftsmen. High ISO (1600-3200) enables available light photography of dramatic furnace scenes.
Torcello Historical Atmosphere
Peaceful Marshland: This nearly abandoned island offers quiet photography without tourist crowds. The cathedral and surrounding marshland create atmospheric historical scenes.
Landscape Photography: Wide-angle shots capture lagoon landscape relationship between land and water. Campanile climb provides elevated marshland views stretching to Venice mainland skyline.
Technical Photography Strategies
Optimal Camera Settings
Architecture Photography
Aperture Priority: Shoot at f/8-f/11 ensuring sharp focus across depth from foreground elements to distant buildings. This aperture range delivers optimal lens sharpness while maintaining depth of field.
ISO Management: Use base ISO (100-200) during daylight for maximum image quality. Increase to 400-800 during dawn/dusk maintaining sharp handheld images. Push to 1600-3200 for night photography accepting increased noise for proper exposure.
Exposure Compensation: Venice’s bright reflective surfaces fool camera meters. Add +0.3 to +1.0 exposure compensation preventing underexposed darker subjects against bright water backgrounds.
White Balance: Shoot RAW format with auto white balance adjusting during post-processing. Daylight preset (5500K) provides neutral starting point. Shade preset (7000K) adds warmth to cool morning light.
Water Photography
Shutter Speed Choices: Fast speeds (1/500s+) freeze gondola motion and splashing water. Moderate speeds (1/60-1/125s) provide motion blur suggesting movement. Slow speeds (2-8s) create smooth glass-like water surfaces removing boats and ripples.
Reflection Technique: Calm morning water before 8:00 AM creates mirror-like reflections. Position camera low including maximum water surface in frame. Expose for architecture allowing water to slightly underexpose enhancing reflection saturation.
Moving Water: Vaporetto wakes and canal traffic create dynamic foreground interest. Shoot at 1/250-1/500s freezing motion while maintaining background sharpness. Panning techniques follow boats through frame creating motion streaks in backgrounds.
Low Light Photography
Dawn and Twilight: Arrive locations 45 minutes before sunrise capturing evolving light from blue hour through golden hour. Bracket exposures (±1 stop) ensuring perfect exposure across changing conditions. Use tripods enabling base ISO for maximum quality.
Night Photography: Illuminated architecture after dark creates dramatic scenes. Shoot at f/8-f/11 with 2-30 second exposures depending on ambient light levels. ISO 400-800 balances exposure time with noise control. Include foreground lighting for depth and context.
Interior Photography: Churches and palazzos feature dim interiors challenging cameras. Use available light rather than flash respecting sacred spaces and avoiding disturbing others. ISO 1600-6400 enables handheld photography though tripods deliver optimal quality when permitted.
Composition Techniques
Leading Lines
Canal Perspectives: Use canal edges as leading lines drawing viewers into compositions. Shoot from bridges looking down canal lengths creating strong diagonal lines through frames. Position subjects at line intersections creating dynamic focal points.
Bridge Lines: Bridge railings, steps, and arches create natural leading lines toward backgrounds. Position yourself centering bridges in frames emphasizing symmetry, or shoot at angles creating diagonal energy.
Architectural Elements: Porticos, arcades, and colonnades form repetitive leading lines toward vanishing points. Use these architectural features creating depth and guiding viewer attention through images.
Framing Within Frames
Architectural Frames: Shoot through doorways, windows, and arches framing distant subjects. This technique adds depth while establishing environmental context. Bridge openings frame canals and distant architecture creating layered compositions.
Natural Frames: Overhanging trees, laundry lines, and boat masts create natural framing elements adding foreground interest to compositions. Position these elements at frame edges directing attention toward central subjects.
Reflections and Symmetry
Mirror Images: Calm water creates perfect reflections doubling architectural impact. Position horizon lines centrally for symmetrical mirror compositions. Slightly low angles maximize water surface area in frames.
Breaking Symmetry: Add gondolas, birds, or people breaking perfect symmetry creating visual tension and interest. These elements provide scale reference and prevent overly static compositions.
Human Elements
Scale Reference: Include people in architectural photography establishing building scale. Distant figures work well avoiding portrait releases while adding life to scenes. Wait for interesting poses, gestures, or clothing colors enhancing compositions.
Street Photography: Capture authentic Venetian life respecting subject privacy. Shoot candidly from distance rather than intrusive close approaches. Wait for moments of gesture, interaction, or expression revealing character and story.
Seasonal Photography Considerations
Spring Photography (April-May)
Light Quality: Clear mornings with occasional clouds create dynamic skies. Sunrise occurs 6:30-7:00 AM with civil twilight beginning 30 minutes earlier. Sunset occurs 8:00-8:30 PM with extended blue hour through 9:15 PM.
Weather Variables: Mix of sunny and rainy days requires flexibility. Carry weather protection for unexpected showers. Overcast conditions provide soft even light ideal for colorful Burano photography and street scenes avoiding harsh shadows.
Garden Colors: Wisteria blooms drape buildings throughout May creating purple cascades. Small gardens and window boxes add floral elements to architecture. Giardini gardens feature spring blooms offering color variation from constant stone.
Summer Photography (June-August)
Extended Light: Sunrise occurs 5:30 AM with pre-dawn blue hour beginning 4:45 AM. Sunset occurs 8:45 PM with twilight extending until 9:45 PM. Long days provide extensive shooting windows though harsh midday light challenges photographers noon-3:00 PM.
Heat Management: Temperatures reach 30-35°C (86-95°F) requiring early morning and evening shooting sessions. Retreat to air-conditioned museums during intense midday hours. Carry extra water protecting yourself and equipment from heat stress.
Crowd Challenges: Peak tourism fills major locations requiring patience and creativity finding unique perspectives. Shoot early mornings or late evenings avoiding maximum crowd periods. Focus on details and intimate scenes rather than impossible wide-angle crowd-free shots.
Autumn Photography (September-November)
Ideal Conditions: September offers summer light with reduced crowds creating optimal photography conditions. October brings increasing rain and earlier sunsets (6:00-7:00 PM). November features shortest days with 7:00 AM sunrise and 4:30 PM sunset.
Atmospheric Weather: Fog creates mysterious atmospheric conditions photographing beautifully in soft diffused light. Rain-slicked streets reflect lights creating glossy surfaces adding interest. Overcast skies provide even lighting for architecture and street photography.
Acqua Alta Photography: High water events create unique reflection opportunities with flooded squares mirroring architecture. Elevated walkways add unusual foreground elements. Venetians wearing boots and navigating floods create documentary opportunities.
Winter Photography (December-February)
Low Angle Light: Short days (8:00 AM sunrise, 5:00 PM sunset) limit shooting windows but provide beautiful low-angle light throughout day. Golden hour extends across entire afternoon from 2:00-5:00 PM.
Minimal Crowds: Quietest period outside Carnival (February) allows patient composition work and tripod usage in normally congested areas. Authentic local atmosphere provides documentary photography opportunities.
Dramatic Weather: Fog, rain, and occasional snow create moody atmospheric photography. Cold temperatures preserve morning mist effects later into mornings. Storm clouds add dramatic skies to architectural photography.
Advanced Photography Techniques
Long Exposure Magic
Smooth Water Effects: 2-8 second exposures smooth canal surfaces creating glass-like reflections. Neutral density filters enable long exposures during daylight hours. Tripod stabilization proves essential for sharp architecture with blurred water.
Crowd Removal: 30-60 second exposures using 6-10 stop ND filters blur moving people into ghosts or complete invisibility. Stationary elements remain sharp while transient tourists disappear. This technique works best at moderately busy locations where people continuously move through frame.
Light Trails: Evening vaporetto traffic creates light trails through long exposures (15-30s). Shoot from bridges perpendicular to traffic flow capturing streaking navigation lights along canals. Blue hour provides ideal ambient light balance with artificial lighting.
Panoramic Photography
Sweeping Views: Multi-image panoramas capture Venice’s grand scale impossible in single frames. Shoot overlapping vertical orientation images (30-40% overlap) stitching during post-processing. Elevated viewpoints from campanili provide ideal panoramic perspectives.
Technical Settings: Use manual mode maintaining consistent exposure across all frames. Lock focus at hyperfocal distance ensuring sharp focus throughout. Shoot RAW format providing maximum post-processing flexibility for seamless stitching.
Processing Panoramas: Adobe Lightroom and Photoshop offer automated stitching tools. PTGui provides advanced control for complex panoramas. Crop final images removing irregular edges from stitching process.
Bracketing and HDR
High Dynamic Range: Venice’s contrast between bright skies and shadowed architecture exceeds camera dynamic range. Shoot bracketed exposures (-2, 0, +2 stops) blending during post-processing for balanced tonality throughout frames.
Processing Approach: Use subtle HDR processing maintaining natural appearance rather than exaggerated unrealistic results. Lightroom’s built-in HDR merge or dedicated software like Photomatix produces natural results when applied moderately.
Black and White Conversion
Architectural Drama: Black and white photography emphasizes Venice’s architectural forms, textures, and lighting patterns without color distraction. Convert color RAW files during post-processing rather than shooting JPEG black and white mode.
Contrast Control: Adjust channel mixing emphasizing architectural details and texture. Increase clarity and texture sliders moderately revealing surface detail. Dodge and burn selectively controlling tonal relationships throughout images.
Subject Selection: Architectural details, dramatic weather, strong shadows, and reflections work particularly well in monochrome. Colorful scenes like Burano lose impact without color information.
Post-Processing Workflow
Essential Adjustments
Lens Corrections: Enable automatic lens corrections removing distortion and vignetting. Correct perspective distortion keeping vertical lines parallel using transform tools. These corrections prove particularly important for architectural photography.
Exposure Refinement: Adjust overall exposure and contrast establishing foundation tonality. Use graduated filters balancing bright skies with darker architecture. Highlight and shadow sliders recover detail in extreme tones.
Color Enhancement: Increase vibrance subtly (10-20) enhancing color saturation naturally. Adjust individual color channels emphasizing Venice’s characteristic ochre facades and blue-green lagoon water. Avoid oversaturation creating unrealistic candy colors.
Sharpening: Apply moderate output sharpening for screen display or printing. Mask sharpening to edges preventing noise enhancement in smooth areas. Use amount 60-80, radius 1.0, detail 25 as starting points adjusting to taste.
Advanced Techniques
Local Adjustments: Use adjustment brushes and graduated filters enhancing specific areas. Brighten shadowed architecture, darken bright skies, enhance reflections, and add directional lighting effects. Subtle adjustments maintain natural appearance.
Noise Reduction: High ISO images require careful noise reduction balancing detail preservation with smoothness. Apply moderate luminance noise reduction (30-40) with minimal color noise reduction (25). Over-processing creates plastic artificial appearance.
Dehaze Tool: Venice’s humid atmosphere creates haze reducing contrast and color saturation. Moderate dehaze application (10-25) restores clarity without overdoing effects. This tool proves particularly effective for distant island and lagoon photography.
Practical Photography Tips
Location Scouting
Pre-Trip Research: Study successful Venice photography identifying desired locations and compositions. Google Earth Street View allows virtual location scouting. Instagram location tags reveal current scene appearances and crowd levels.
On-Site Exploration: Walk locations during midday scouting for sunrise/sunset shooting. Note sun angles, foreground elements, and potential compositions. Mark locations on offline Google Maps for easy return during optimal light.
Alternative Angles: Overshot locations require creative approaches finding unique perspectives. Shoot details, reflections, or silhouettes rather than attempting standard compositions from crowded vantage points.
Crowd Management
Early Rising: Sunrise shooting provides 60-90 minute window before tourist crowds arrive. This golden period delivers empty locations and optimal light simultaneously.
Patient Composition: Wait for brief crowd gaps at busy locations rather than accepting perpetually busy frames. Patience rewards photographers with cleaner compositions even at tourist hotspots.
Embrace Humanity: Include people as compositional elements adding scale and life rather than viewing them as obstacles. Candid figures enhance authenticity and storytelling.
Respectful Photography
Privacy Consideration: Avoid intrusive close-up photography of unwilling subjects. Shoot candids from distance or ask permission for portraits. Respect posted no-photography signs in churches and private spaces.
Quiet Operation: Use silent shutter modes in churches and museums preventing disruptive shutter sounds. Disable camera sounds completely respecting sacred spaces and fellow visitors.
Tripod Etiquette: Set up tripods away from pedestrian flow preventing obstacles. Never block vaporetto boarding or major walkways. Respond politely to requests moving equipment accommodating others.
Photography Workshops and Tours
Guided Photo Tours
Local Expertise: Professional photography tours provide insider location knowledge, optimal timing strategies, and technical guidance. Tours range from 3-hour sunrise sessions to full-day comprehensive workshops costing €150-400 per person.
Small Group Advantage: Workshops limited to 4-8 participants provide personalized instruction and location access. Guides navigate efficiently between spots maximizing shooting time during optimal light.
Solo Exploration: Independent photographers enjoy complete creative freedom and flexible pacing. However, local knowledge from workshops accelerates learning curve and reveals hidden locations requiring years to discover independently.
Frequently Asked Questions
Can I fly a drone in Venice?
Drone flights are prohibited throughout Venice’s historic center and immediate lagoon areas due to UNESCO World Heritage protection and no-fly zones. Violations result in substantial fines. Legal drone photography requires permits granted only for professional commercial productions with legitimate purposes. Capture aerial perspectives from campanile towers instead.
What is the best lens for Venice photography?
A versatile 24-70mm zoom covers most situations from architecture to street photography. Add a 16-35mm wide-angle for narrow canals and grand interiors. Travel light prioritizing one quality zoom over multiple lenses. Smartphone cameras with multiple lens systems work excellently for travelers prioritizing weight savings over technical flexibility.
How do I photograph Venice without crowds?
Wake for sunrise shooting (5:30-7:00 AM summer, 6:30-8:00 AM spring/fall) when locations sit empty. Explore Cannaregio, eastern Castello, and Santa Croce neighborhoods seeing minimal tourist traffic. Visit during off-season (November-March excluding Carnival) experiencing authentic Venice with dramatic crowd reductions. Focus on intimate details rather than wide-angle crowd scenes.
Do I need permission to photograph in Venice?
Street and architectural photography from public spaces requires no permissions. Churches may prohibit photography – watch for posted signs. Museums typically allow photography without flash though special exhibitions may restrict images. Commercial photography requiring tripods, lighting equipment, or models requires permits from city authorities. Respect privacy photographing from distance rather than intrusive close approaches.
What’s the best weather for Venice photography?
Partly cloudy conditions create dynamic skies with directional lighting more interesting than clear blue skies. Overcast days provide even soft light ideal for colorful subjects and street photography. Light rain creates reflective surfaces and atmospheric conditions. Fog adds mystery and mood. Each weather condition offers unique photographic opportunities rather than obstacles.
Should I shoot RAW or JPEG in Venice?
Shoot RAW format for maximum post-processing flexibility managing Venice’s challenging contrast and color balance. RAW files preserve complete sensor data enabling exposure adjustment, white balance correction, and shadow/highlight recovery impossible with JPEG. The storage and processing requirements justify results for serious photographers. Casual photographers find JPEG adequate with in-camera processing delivering good results.
How do I photograph from a vaporetto?
Board vaporetto Line 1 sitting at front exterior positions for unobstructed Grand Canal views. Use fast shutter speeds (1/500s+) freezing motion from moving boats. Continuous shooting mode captures sequences selecting best frames later. Image stabilization helps but can’t eliminate all movement. Gopros or action cameras mounted on rails capture smooth stabilized footage from moving vaporetti.
What are the best free photography spots in Venice?
Rialto Bridge views from Riva del Vin, Accademia Bridge sunset perspectives, quiet Cannaregio canals, Zattere waterfront promenade, Campo Santa Margherita neighborhood life, and elevated views from Fondaco dei Tedeschi rooftop terrace (free advance reservations) all provide excellent photography without admission costs. Venice’s UNESCO heritage ensures most iconic views remain publicly accessible.
Can I bring a tripod on a vaporetto?
Compact tripods fit in bags or daypacks boarding vaporetti without issues. Large tripods may face boarding challenges during crowded rush hours but aren’t prohibited. Photographers successfully transport tripods system-wide. Consider leaving tripods at hotels during non-shooting hours reducing unnecessary carrying.
How do I protect my camera from Venice’s humidity?
Store cameras in hotel rooms between shooting sessions allowing equipment to acclimate to ambient humidity. Avoid sealed bags creating condensation when moving between air-conditioned interiors and humid exteriors. Silica gel packets in camera bags absorb excess moisture. Bring microfiber cloths wiping lenses and viewfinders throughout humid days. Modern weather-sealed cameras handle Venice’s environment well with basic precautions.