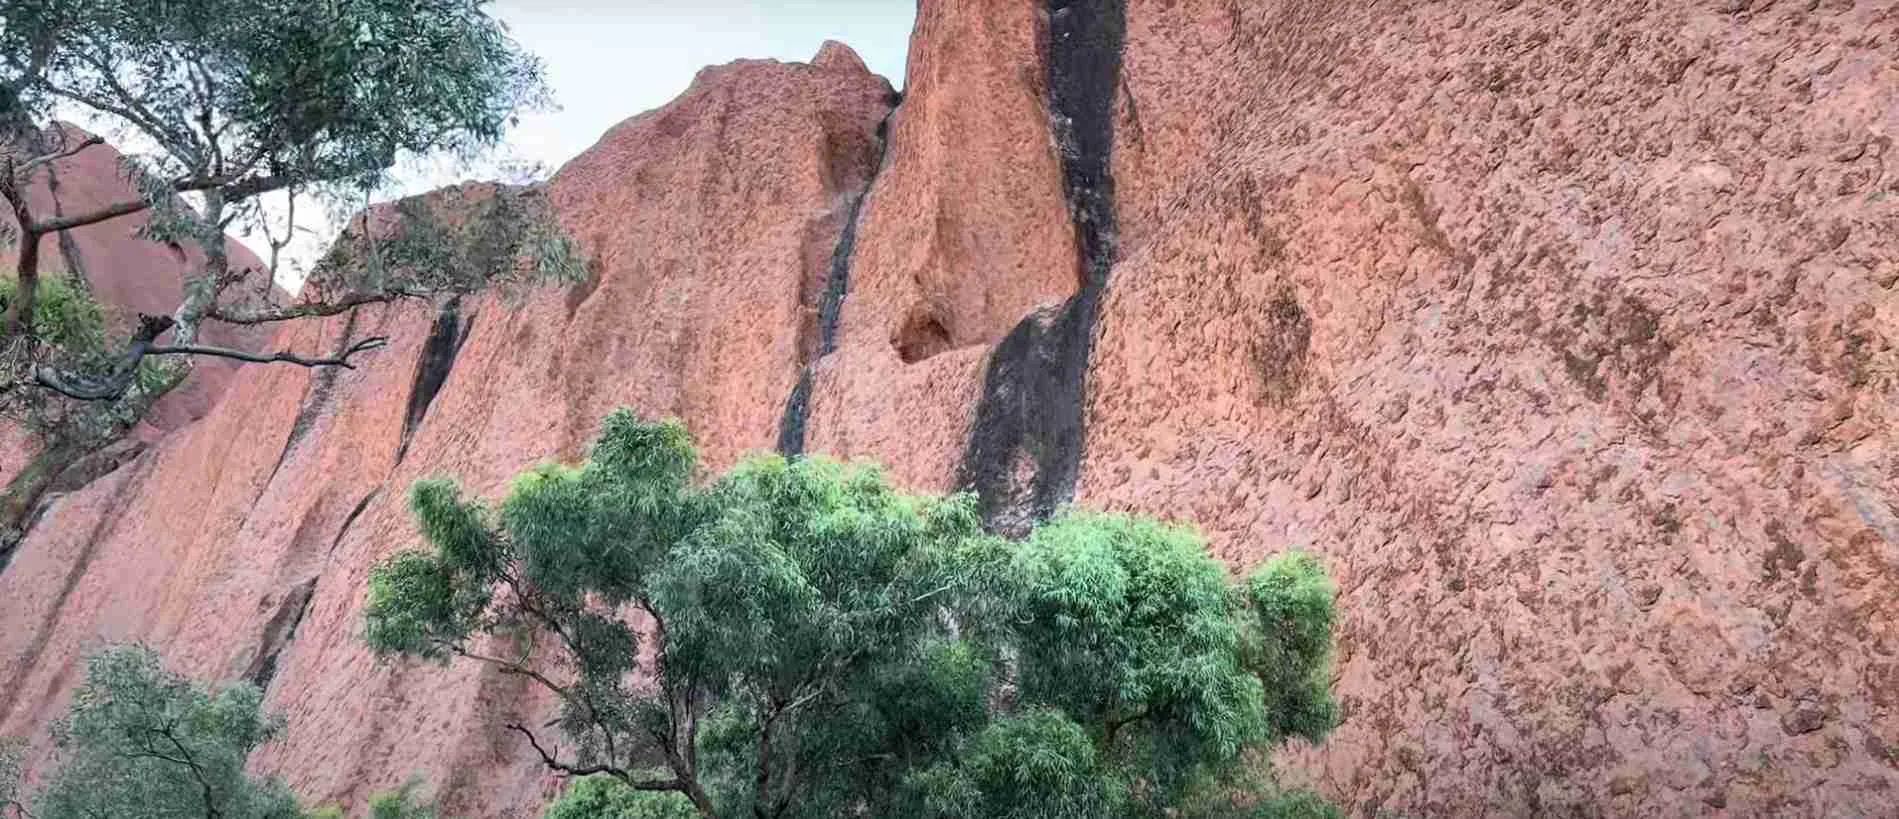
Uluru Sunrise & Sunset 2026: Best Viewing Spots & Photo Tips
Key Takeaways
- Color Transformation: Uluru undergoes dramatic color changes during golden hour, transitioning from grey to orange, red, burgundy, and deep purple over 90 minutes before sunrise and after sunset
- Best Viewing Platforms: Talinguru Nyakunytjaku provides premier sunset viewing with elevated position and Uluru-Kata Tjuta dual views, while sunrise viewing areas offer intimate foreground compositions
- Optimal Timing: Arrive 90 minutes before sunset and 45 minutes before sunrise for setup and witnessing complete color transitions – peak colors occur 20-40 minutes before/after sun touches horizon
- Camera Settings: Use tripod-mounted cameras with ISO 100-400, f/8-f/16 aperture, and bracketed exposures capturing desert landscape’s extreme dynamic range from bright sky to shadowed rock
- Seasonal Variations: Winter months (May-September) offer clearer skies and cooler temperatures ideal for extended photography sessions, while summer brings dramatic storm clouds and unique lighting effects
- Transportation Planning: Self-drive provides maximum flexibility for changing locations during golden hour, while shuttle services ($35-50 round-trip) handle logistics for visitors without rental cars
Introduction to Uluru’s Changing Colors in 2026
Uluru’s transformation during sunrise and sunset represents one of nature’s most spectacular light shows, as the massive sandstone monolith shifts through a palette of colors impossible to capture in photographs yet etched permanently in viewer memories. The rock’s unique mineral composition – arkose sandstone rich in iron oxide – reacts to changing light angles creating the famous color transitions that have made Uluru Australia’s most photographed natural landmark and a bucket-list destination for millions of visitors worldwide.
Understanding the science behind Uluru’s colors enhances appreciation for the phenomenon you’ll witness in 2026. The rock’s surface oxidized iron minerals reflect specific wavelengths of light depending on sun angle and atmospheric conditions. During midday when the sun sits directly overhead, Uluru appears dull red-brown as full-spectrum light reveals the rock’s true color. As the sun approaches the horizon during golden hour, light travels through more atmosphere, scattering blue wavelengths while allowing red, orange, and burgundy wavelengths to reach and reflect from the rock surface.
The transformation begins subtly approximately 90 minutes before sunset as the rock shifts from midday red-brown to brighter orange. Colors intensify over the next hour, with the rock glowing brilliant orange 30-40 minutes before sunset. As the sun touches the horizon, Uluru deepens to blood red and burgundy, then transitions to purple and finally dark grey as Earth’s shadow climbs the rock face. Sunrise reverses this sequence, with the rock emerging from predawn grey through purple, burgundy, red, and orange before settling into midday tones as the sun climbs.
Capturing these color transitions in 2026 requires more than simply pointing a camera at the rock – successful photography demands understanding optimal viewing locations, timing your arrival, selecting appropriate camera settings, and positioning yourself for compositions that showcase both Uluru’s colors and the surrounding desert landscape. This comprehensive guide provides all the technical and logistical information needed to photograph Uluru’s most spectacular moments during your 2026 visit.
People Also Ask About Uluru Sunrise & Sunset 2026
What time is sunrise and sunset at Uluru in 2026?
Sunrise and sunset times at Uluru vary significantly throughout 2026 due to Australia’s southern hemisphere location and distance from the equator. Summer months (December-February) bring sunrise around 6:00-6:15 AM and sunset 7:45-8:00 PM, providing nearly 14 hours of daylight and warm evening temperatures. Winter months (June-August) shift sunrise to 7:15-7:30 AM and sunset to 5:45-6:00 PM, reducing daylight to under 11 hours but offering comfortable temperatures for extended photography sessions. Equinox periods (March, September) bring moderate timing around 6:30 AM sunrise and 6:30 PM sunset with 12 hours of daylight. Check Parks Australia website or Yulara visitor center for exact times during your specific travel dates to plan photography sessions accurately.
Which is better at Uluru – sunrise or sunset?
Both sunrise and sunset offer spectacular viewing, with choice depending on personal preferences and photographic goals. Sunset at Talinguru Nyakunytjaku viewing platform provides elevated position showcasing both Uluru and Kata Tjuta simultaneously, with the rock glowing brilliant colors while the sun sets behind you illuminating the monolith’s west and north faces. However, sunset attracts larger crowds (200-400 people during peak season) and organized tour groups that can detract from the experience’s tranquility. Sunrise offers more intimate viewing at dedicated sunrise platforms with smaller crowds (typically 50-150 people), cooler temperatures, and soft morning light revealing different rock textures and desert vegetation details. Photographers often prefer sunrise for clearer air quality and dramatic foreground compositions, while casual viewers favor sunset’s convenient timing and dual Uluru-Kata Tjuta views. Experiencing both during a multi-day visit provides complete perspective on Uluru’s color transformations.
How long does Uluru sunset last in 2026?
The complete color transformation at Uluru sunset spans approximately 90 minutes from initial color intensification to complete darkness. Visible color changes begin 60-75 minutes before sunset as the rock shifts from midday red-brown to brighter orange. Peak colors occur 20-40 minutes before sunset through 10-15 minutes after sunset, with the rock glowing brilliant orange, red, and burgundy during this spectacular 30-minute window. After sunset, colors transition to purple and grey over 20-30 minutes as Earth’s shadow climbs the rock face. The entire sequence from first color intensification through final grey takes 90-110 minutes depending on atmospheric conditions and cloud cover. Arrive at viewing platforms at least 90 minutes before official sunset time to witness the complete transformation and allow time for camera setup and composition planning.
Can you photograph Uluru at sunrise and sunset?
Yes, photography is permitted and encouraged at designated sunrise and sunset viewing platforms, with no restrictions on camera types, tripods, or photographic equipment. However, certain sacred sites around Uluru base are permanently restricted from photography, marked clearly with signage – these restrictions do not apply to viewing platforms but must be strictly observed on base walk sections. Sunrise and sunset viewing areas provide open access for setting up tripods, using telephoto lenses, and capturing long exposures during golden hour. The only photography limitations relate to sacred sites around the rock’s base and respectful behavior toward other visitors at crowded sunset platforms where excessive equipment setups can obstruct views. Drones are completely prohibited throughout Uluru-Kata Tjuta National Park without special permits issued only for commercial and scientific purposes.
Extended multi-day tours – 5+ days
Featured Uluru Multi-Day Tour Packages

3 days
Uluru 3-Day Discovery Tour
- ✓ Comprehensive Uluru experience
- ✓ Expert local guides included
- ✓ All accommodation included
- ✓ Transportation provided

5 days
Uluru 5-Day Highlights Experience
- ✓ Comprehensive Uluru experience
- ✓ Expert local guides included
- ✓ All accommodation included
- ✓ Transportation provided

7 days
Uluru 7-Day Cultural Journey
- ✓ Comprehensive Uluru experience
- ✓ Expert local guides included
- ✓ All accommodation included
- ✓ Transportation provided

10 days
Uluru 10-Day Complete Adventure
- ✓ Comprehensive Uluru experience
- ✓ Expert local guides included
- ✓ All accommodation included
- ✓ Transportation provided
Multi-day tour packages powered by TourRadar. Prices and availability subject to change.
Best Viewing Locations for Sunset in 2026
Talinguru Nyakunytjaku Sunset Viewing Platform
Talinguru Nyakunytjaku (meaning “to look from the sand dune” in Pitjantjatjara language) serves as the premier sunset viewing location, elevated on a sand dune 20 kilometers from Yulara Resort and 15 kilometers from Uluru base. The platform provides unobstructed 180-degree views capturing both Uluru to the east and Kata Tjuta’s 36 domes to the west, allowing photographers to capture the monolith glowing in evening light while the sun sets behind their position.
The platform accommodates 300-400 people during peak season but fills quickly, with prime front-row positions claimed by visitors arriving 90-120 minutes before sunset. Arrive early for optimal viewing spots at the platform’s northern end providing clearest Uluru views without crowds blocking foreground. The platform includes wheelchair-accessible paved pathways, covered shelters with seating, restroom facilities, and interpretive signage explaining Anangu cultural connections to the landscape.
Photography advantages at Talinguru Nyakunytjaku include elevated position reducing heat haze, distant vantage showing Uluru’s complete profile, and dual-subject opportunities capturing both geological formations in single frames. The 15-kilometer distance from Uluru provides optimal perspective for wide-angle and standard focal lengths (24-70mm), though telephoto lenses (200-400mm) allow isolating specific rock features and compressed compositions emphasizing the monolith’s massive scale.
Access requires driving 12 kilometers from Yulara toward Kata Tjuta, then turning onto sealed access road leading 8 kilometers to the viewing area. Free parking accommodates 100+ vehicles plus tour buses. The site operates 24 hours, though sunset represents peak usage with 90% of visitors arriving for evening viewing. Shuttle bus services from Yulara hotels cost $35-50 round-trip per person, departing 90 minutes before sunset and returning 30 minutes after sunset.
Uluru Sunset Viewing Area
Uluru Sunset Viewing Area sits closer to the rock than Talinguru Nyakunytjaku, located 10 kilometers west of Uluru base along the sealed road connecting Yulara to Kata Tjuta. This official car park provides closer perspective on the monolith with foreground opportunities including desert vegetation, natural rock formations, and sand patterns creating layered compositions unavailable from more distant platforms.
The location attracts smaller crowds than Talinguru Nyakunytjaku (typically 100-200 people during peak season) due to lack of formal platform structures and interpretive facilities. Visitors park vehicles and position themselves around the car park perimeter, sitting on the ground or standing against their cars while watching colors change. The informal atmosphere appeals to photographers seeking flexibility to move during golden hour, experimenting with different angles and compositions without platform constraints.
Photography advantages include closer proximity revealing Uluru’s detailed surface textures, striations, and cave formations invisible from distant platforms. Wide-angle lenses (16-35mm) capture foreground interest including desert plants, burnt trees, and rock patterns leading the eye toward the monolith. The western position provides side-lighting that reveals three-dimensional rock contours and shadows unavailable from southern viewing platforms.
Alternative Sunset Locations
Several unofficial viewing spots along roads surrounding Uluru provide unique perspectives for photographers willing to explore beyond designated platforms. The sealed road circling Uluru offers multiple pullout areas where visitors park and walk short distances to vantage points capturing specific rock features or compositional opportunities.
The base walk’s western sections provide intimate ground-level sunset viewing with the monolith towering directly overhead, creating dramatic upward perspectives impossible from distant platforms. However, walking trails officially close 30 minutes after sunset for visitor safety, requiring hikers to complete the base walk circuit or major sections before darkness prevents safe navigation.
Photographers seeking solitude occasionally drive the sealed road toward Kata Tjuta, stopping at pullouts 15-25 kilometers from Uluru for distant compositions including foreground elements and dramatic desert skies. These informal locations lack facilities and see minimal crowds, though increased distance reduces the monolith to smaller elements within broader landscape photographs rather than dominant subjects.
Best Viewing Locations for Sunrise in 2026
Uluru Sunrise Viewing Area
The designated Uluru Sunrise Viewing Area sits along the sealed road approaching Uluru from Yulara, positioned to capture the rock’s western and northern faces as they receive first morning light while the sun rises behind your viewing position to the east. This official car park accommodates 50-100 vehicles with ample space for tripod setups and photography equipment away from crowded platforms.
Sunrise viewing attracts smaller crowds than sunset (typically 50-150 people during peak season) due to early wake-up times requiring departure from Yulara hotels by 5:30-6:00 AM depending on season. The reduced crowds allow more photography space and flexibility to experiment with compositions throughout the 90-minute color transformation. Tour groups visit less frequently at sunrise, with most guided tours focusing on sunset viewing followed by evening dining experiences.
The western-facing position captures Uluru’s illuminated face as sunrise light washes across the rock from left to right (north to south), with colors building gradually from grey through purple, burgundy, red, and orange over 45 minutes. Peak colors occur 10-20 minutes after sunrise as the sun climbs above the horizon and full-spectrum morning light illuminates the rock. The viewing area’s position provides middle-ground proximity revealing rock details without extreme distance compressing perspective.
Foreground opportunities include desert grasses, wildflowers (present August-November following winter rains), burnt tree stumps, and sandy patches creating textural interest in wide-angle compositions. Photographers often include foreground elements in the lower third of frames, using small apertures (f/11-f/16) to maintain sharpness from immediate foreground through distant Uluru.
Talinguru Nyakunytjaku Sunrise Alternative
While Talinguru Nyakunytjaku functions primarily as a sunset platform, visiting for sunrise offers completely different perspective with the rising sun illuminating Kata Tjuta’s domes directly while Uluru sits in morning shadow to the east. This reversed lighting creates opportunities for photographing Kata Tjuta’s dramatic color changes including the distinctive burgundy-red glows on individual dome formations as they catch first light.
Sunrise at Talinguru Nyakunytjaku attracts minimal crowds (typically 10-30 people during peak season), providing solitude and quiet reflection impossible during crowded evening viewings. The elevated platform position captures expansive views of predawn sky colors transitioning from dark blue through purple, pink, orange, and yellow as the sun approaches the eastern horizon. These sky colors reflect off Kata Tjuta’s surfaces while Uluru remains silhouetted, creating unique compositional opportunities unavailable during sunset.
Base Walk Sunrise Sections
Hiking sections of the Uluru base walk during sunrise hours provides intimate encounters with the rock’s changing colors from ground level, experiencing the monolith’s overwhelming scale as morning light illuminates specific features including Kantju Gorge, Mutitjulu Waterhole, and various cave formations along the circuit.
The Mala Walk section (2 kilometers return, 1 hour) begins at the Mala car park on Uluru’s northwest side, following along the rock face through areas receiving beautiful side-lighting during morning hours. Starting the walk 30 minutes before sunrise allows witnessing color transformations while exploring cultural sites and cave formations explained by interpretive signage. The walk remains open during sunrise hours (trails open approximately 30 minutes before sunrise seasonally), though rangers recommend carrying flashlights for predawn sections.
Kuniya Walk (1 kilometer return, 45 minutes) on Uluru’s southern side leads to Mutitjulu Waterhole, a permanent water source surrounded by cultural rock art sites and Aboriginal mythology. Morning light illuminates the waterhole area beautifully, though photography restrictions apply to specific sacred sites marked clearly with signage along the trail.
Understanding Uluru’s Color Changes in 2026
The Science of Color Transformation
Uluru’s famous color changes result from the rock’s unique composition and light’s interaction with atmospheric particles during sunrise and sunset. The monolith consists of arkose sandstone containing significant iron oxide (rust) minerals that oxidized over millions of years, creating the reddish surface coating visible today. This iron-rich surface preferentially reflects red and orange wavelengths while absorbing blue and green wavelengths.
During midday when the sun sits high in the sky, full-spectrum sunlight illuminates Uluru revealing its true red-brown color without enhancement. As the sun approaches the horizon during golden hour, light travels through increasingly thick atmosphere, scattering shorter blue wavelengths out of the direct light path while allowing longer red and orange wavelengths to pass through. This filtered light contains concentrated red-orange wavelengths that reflect intensely off Uluru’s iron-rich surface, creating the brilliant colors visitors witness during sunrise and sunset.
The sequence of color changes follows predictable patterns: the rock begins glowing bright orange 45-60 minutes before sunset as low-angle light enhances red wavelengths. Colors intensify over the next 30 minutes, reaching peak brilliance 10-20 minutes before sunset when the sun sits very low and atmospheric filtering maximizes red-orange wavelengths. As the sun touches the horizon, Uluru transitions from orange to deep red and burgundy. After sunset, the rock shifts to purple and grey as Earth’s shadow climbs and direct sunlight no longer illuminates the surface. Sunrise reverses this sequence with predawn grey transitioning through purple, burgundy, red, and orange.
Seasonal Color Variations
Winter months (May-September) provide the most consistent and dramatic color displays due to clearer atmospheric conditions, lower humidity reducing haze, and stable high-pressure systems bringing cloudless skies. The dry winter air creates optimal visibility for photography with sharp details visible across the 15-20 kilometer distances from viewing platforms to Uluru. Winter colors tend toward deeper reds and burgundies compared to summer’s lighter orange tones.
Summer months (November-March) bring humidity, dust, and occasional haze that softens colors and reduces contrast in photographs. However, summer storms create unique opportunities for capturing Uluru with dramatic cloud formations, storm lighting, and rare rainfall creating temporary waterfalls on the rock’s surface. The increased atmospheric moisture during summer produces pastel colors – softer pinks, light oranges, and lavender tones – rather than the intense reds and burgundies of winter viewing.
Spring (September-November) and autumn (March-May) provide transitional conditions with clear mornings often followed by afternoon cloud buildup. These shoulder seasons offer good color displays with fewer crowds and comfortable temperatures allowing extended photography sessions without extreme heat or cold affecting equipment performance or photographer comfort.
Weather Impact on Color Displays
Cloud cover dramatically affects Uluru’s color displays, with completely clear skies producing the most intense colors but potentially lacking visual interest in sky compositions. Partial cloud cover often creates the most spectacular scenes, with clouds catching sunset colors (pink, orange, purple) while Uluru glows below, providing layered compositions of colored rock and colored clouds.
Dust and smoke in the atmosphere intensify orange and red tones while reducing overall brightness and contrast. Bushfires burning hundreds of kilometers away occasionally fill the atmosphere with fine smoke particles that create otherworldly orange glows and blood-red sunsets, though these conditions reduce visibility and create difficult exposure challenges for photographers.
Rain dramatically changes Uluru’s appearance, darkening the rock to near-black while creating temporary waterfalls and streams across the surface. The wet rock reflects light differently than dry sandstone, with colors appearing more saturated and intense but limited to grey-black rather than the usual orange-red palette. Rain occurs infrequently (averaging only 20-40mm per month even during wettest summer months), making wet Uluru photographs extremely rare and highly sought by collectors.
Camera Equipment Recommendations for 2026
Essential Photography Gear
Sturdy tripods are mandatory for sunrise and sunset photography, supporting cameras during long exposures in low light conditions before sunrise and after sunset. Carbon fiber tripods offer best combination of stability and light weight for carrying from car parks to viewing positions, with ball heads providing quick adjustments as light changes rapidly during golden hour. Budget-conscious photographers succeed with quality aluminum tripods, accepting extra weight for lower cost.
Wide-angle lenses (16-35mm full-frame equivalent) capture Uluru with foreground elements including desert vegetation, rock formations, and sand patterns creating depth in compositions. Standard zoom lenses (24-70mm) provide versatile focal lengths for both wide landscape shots and tighter compositions isolating specific rock features. Telephoto lenses (70-200mm, 100-400mm) compress distance, making Uluru appear larger in frames and allowing detail shots of specific rock textures, caves, and surface features invisible in wide-angle photographs.
Neutral density graduated filters help balance exposures between bright skies and darker rock surfaces, reducing the extreme dynamic range that challenges digital sensors during golden hour. These filters darken skies while allowing normal exposure of Uluru, eliminating the need for extensive post-processing to recover detail in blown-out skies or shadowed rocks. Polarizing filters reduce atmospheric haze and enhance color saturation, though effects diminish during sunrise and sunset when low sun angles provide less dramatic polarization effects.
Camera Settings for Golden Hour
ISO settings should remain low (ISO 100-400) during sunrise and sunset when ample light exists despite golden hour appearance, reducing digital noise and maximizing image quality. Modern cameras with excellent high-ISO performance allow raising ISO to 800-1600 for handheld shooting before sunrise or after sunset when twilight reduces available light, accepting minimal noise for sharper images compared to slow shutter speeds causing motion blur.
Aperture selection balances depth of field requirements with shutter speed considerations. Wide apertures (f/2.8-f/5.6) create shallow depth of field isolating Uluru while blurring foreground and background, useful for telephoto compositions emphasizing the rock. Narrow apertures (f/11-f/16) maximize depth of field keeping foreground elements through distant Uluru sharp, essential for wide-angle landscape compositions including near-to-far elements.
Shutter speeds vary based on available light, with typical golden hour exposures ranging 1/60-1/250 second at ISO 100-200 and apertures f/8-f/11. Exposure bracketing captures multiple frames at different exposures (+/- 1-2 stops), ensuring at least one perfectly exposed image despite challenging lighting conditions. Bracketed sequences also enable HDR processing combining multiple exposures for final images showing detail in both bright skies and shadowed rock areas.
Backup Equipment and Accessories
Multiple camera batteries are essential as cold desert nights drain battery power rapidly during winter sunrise shoots when temperatures drop below 0°C. Keep spare batteries in warm pockets close to body heat, swapping them with camera batteries as power depletes. Memory cards with sufficient capacity (64-128GB) accommodate hundreds of RAW images during golden hour when rapid color changes encourage shooting multiple exposures of the same scene at slightly different moments.
Lens cleaning supplies including microfiber cloths, lens tissues, and air blowers remove dust that accumulates quickly in desert environments. Desert dust creates spots on images when present on lens surfaces or camera sensors, requiring regular cleaning during multi-day shoots. Protective UV filters on lens fronts guard expensive glass from blowing sand and dust while providing minimal impact on image quality.
Remote shutter releases or intervalometers trigger cameras without touching, eliminating camera shake during long exposures on tripods. These accessories enable time-lapse photography capturing Uluru’s color transformations over 30-60 minute sequences, creating videos showing complete sunrise or sunset color changes in compressed time.
Photography Techniques for Capturing Color Changes in 2026
Composition Strategies
Rule of thirds places Uluru along the right or left vertical third line rather than dead center, creating more dynamic compositions with negative space balanced by rock mass. Positioning the horizon line along the upper or lower horizontal third allows emphasizing either dramatic desert foreground or spectacular sky colors depending on which elements provide stronger visual interest during specific shooting sessions.
Foreground elements add depth to landscape photographs, leading the viewer’s eye from immediate foreground through middle ground (Uluru) to distant sky. Burnt tree stumps, desert grasses, wildflowers, and rock formations in the lower third of frames provide textural interest and scale reference showing Uluru’s massive size. Use small apertures (f/11-f/16) maintaining sharpness throughout the depth range from foreground elements meters away through Uluru kilometers distant.
Leading lines created by desert vegetation patterns, sand ripples, or access roads guide the viewer’s eye toward Uluru creating visual flow within compositions. Diagonal lines from lower corners toward the rock create dynamic energy compared to horizontal lines creating static, peaceful moods. Experiment with different positions around viewing areas finding leading lines that strengthen compositions.
Exposure Management
Uluru’s color intensity varies throughout golden hour, requiring exposure adjustments as light changes. Bright orange glows 30 minutes before sunset may require slight underexposure (-0.3 to -0.7 stops) preventing blown highlights and maximizing color saturation. As colors deepen to burgundy and purple after sunset, increase exposure (+0.3 to +0.7 stops) revealing detail in shadowed rock areas while maintaining rich colors.
Histogram monitoring ensures proper exposure by displaying the distribution of tones from black (left side) to white (right side) in captured images. Ideal histograms for Uluru sunset photography show peaks in the middle range representing the rock’s mid-tones, with gentle slopes toward both shadows and highlights indicating full dynamic range without clipping. Histograms bunched entirely toward the left indicate underexposure losing shadow detail, while histograms pushed to the right show overexposure with blown highlights in sky areas.
Exposure bracketing captures multiple frames at different exposures creating safety net against misjudged exposures in rapidly changing light. Set cameras to auto-bracket 3-5 frames at 1-stop intervals (+/- 2 stops), ensuring at least one perfectly exposed image. Bracketed sequences also enable HDR processing combining multiple exposures showing detail throughout the entire tonal range from darkest shadows to brightest highlights.
White Balance Considerations
Auto white balance often neutralizes the warm orange-red colors that make Uluru sunset photography spectacular, correcting for golden hour light and producing less dramatic images with muted colors. Manual white balance settings preserve the warm color casts that viewers expect in sunset photographs, with Daylight white balance (5200K) or Cloudy white balance (6000K) settings maintaining natural golden hour warmth without excessive correction.
Shooting RAW format captures maximum color information allowing complete white balance adjustments in post-processing without image degradation. RAW files enable changing white balance freely during editing, trying different color temperatures to find the most appealing rendition of Uluru’s colors. JPEG files permanently apply in-camera white balance settings, limiting post-processing flexibility for color adjustments.
Transportation and Logistics for 2026 Viewing
Self-Drive Access
Rental cars provide maximum flexibility for sunrise and sunset viewing, allowing early departure from Yulara accommodations (typically 5:30-6:30 AM for sunrise depending on season) and flexibility to change viewing locations during golden hour if initial positions prove unsatisfactory. Cars allow carrying photography equipment comfortably including tripods, multiple lenses, and camera bags without weight restrictions imposed by walking or shuttle services.
Driving times from Yulara to viewing areas range 15-25 minutes depending on destination, with Talinguru Nyakunytjaku requiring 20-25 minutes, Uluru Sunrise Viewing Area 15-20 minutes, and Uluru Sunset Viewing Area 18-22 minutes. All roads are sealed and suitable for 2WD vehicles year-round. Fuel is available only at Yulara Resort service station (prices approximately $1.90-2.30 per liter in 2026), with distances manageable on single tank for typical multi-day visits including multiple sunrise and sunset sessions.
Free parking at all official viewing areas accommodates 50-150 vehicles depending on location, with spaces filling rapidly during peak season 90-120 minutes before sunset at popular Talinguru Nyakunytjaku platform. Arriving early secures parking close to viewing platforms, minimizing walking distance while carrying equipment. Sunrise parking rarely fills completely due to early timing and smaller crowds.
Shuttle Bus Services
Ayers Rock Resort operates shuttle bus services connecting Yulara accommodation properties to sunrise and sunset viewing platforms at $35-50 round-trip per person in 2026, with pickup times adjusted seasonally based on sunrise and sunset schedules. Sunset shuttles depart accommodations 90 minutes before sunset, allowing time for the 20-25 minute drive and setup at platforms before colors begin changing. Return shuttles depart viewing areas 30 minutes after sunset.
Sunrise shuttles depart accommodations 60-75 minutes before sunrise (typically 5:30-6:30 AM depending on season), returning to hotels 30-45 minutes after sunrise once colors complete their transformation. The scheduled return times limit flexibility for photographers wanting extended sessions or opportunities to visit multiple locations during golden hour, though shuttles solve transportation logistics for visitors without rental cars.
AAT Kings and SEIT Outback Australia include sunrise or sunset viewing in guided tour packages ($180-250 per person full-day tours including transportation, park entry, cultural experiences, and lunch). These packages combine viewing with other activities including base walk sections, Cultural Centre visits, and Kata Tjuta exploration, providing comprehensive experiences for visitors wanting structured itineraries with expert interpretation.
Seasonal Timing Adjustments
Summer sunrise sessions (December-February) require 5:30-6:00 AM hotel departure capturing early sunrise around 6:00-6:15 AM, with comfortable warm temperatures (15-20°C at sunrise) requiring minimal layering. Summer sunset sessions occur late (7:45-8:00 PM) with extended twilight lasting past 8:30 PM, allowing relaxed afternoon preparations and convenient timing after full day activities.
Winter sunrise sessions (June-August) involve 6:15-6:45 AM hotel departure for 7:15-7:30 AM sunrise, with extremely cold predawn temperatures (often 0-5°C or below) requiring heavy jackets, gloves, and warm layers. Winter sunset sessions occur earlier (5:45-6:00 PM) requiring mid-afternoon departure from other park activities to reach viewing platforms on time, though comfortable temperatures (12-18°C at sunset) allow light layering rather than heavy winter gear.
Sample 2026 Photography Itineraries
Sunrise-Focused Day Trip
5:30 AM: Depart Yulara accommodation with rental car, carrying packed breakfast, camera equipment, tripod, and warm layers. Drive 18 minutes to Uluru Sunrise Viewing Area arriving 6:00 AM (60 minutes before 7:00 AM winter sunrise). Set up tripod and frame compositions including foreground desert grasses and burnt tree stumps leading toward Uluru.
6:15 AM: Begin photography session capturing predawn grey rock and sky colors. Adjust white balance to Daylight setting (5200K) preserving natural warm tones. Shoot exposure brackets (+/- 1 stop) ensuring proper exposure as light changes rapidly.
7:00 AM: Photograph sunrise moment as sun crests horizon behind viewing position, illuminating Uluru’s western face. Capture color sequence from purple through burgundy, red, and orange over next 30 minutes as the rock glows in morning light. Eat packed breakfast between shooting sessions.
7:45 AM: Complete photography as colors stabilize to daytime orange-red. Pack equipment and drive 12 minutes to Uluru base walk starting point at Mala car park. Begin Mala Walk (2 kilometers return, 1 hour) exploring cultural sites with interpretive signage while morning light creates ideal shadows revealing rock textures.
9:30 AM: Return to car and drive 18 minutes to Cultural Centre. Explore exhibits, watch cultural presentations, and visit Maruku Arts gallery (90 minutes). Purchase cold drinks and snacks at Cultural Centre café.
11:30 AM: Return to Yulara for late checkout, swimming pool break during midday heat, and lunch at Gecko’s Café before afternoon departure. Packed breakfast $15, Cultural Centre café snacks $10, Gecko’s lunch $28. Total: $53 per person (excluding accommodation, rental car, park entry).
Sunset-Focused Extended Session
3:00 PM: Depart Yulara accommodation after midday break, driving 22 minutes to Talinguru Nyakunytjaku sunset viewing platform. Arrive 2.5 hours before sunset securing prime front-row viewing position at platform’s northern end for clearest Uluru views.
3:30 PM: Scout viewing platform identifying optimal shooting positions, testing compositions from different platform locations, and determining equipment placement. Set up primary tripod position with wide-angle lens (16-35mm) capturing both Uluru and Kata Tjuta. Position secondary tripod with telephoto lens (100-400mm) isolating Uluru’s north face for detail shots.
4:30 PM: Begin photography session capturing Uluru transitioning from midday red-brown to intensifying orange colors. Shoot test exposures determining baseline camera settings before rapid color changes begin. Check histogram ensuring proper exposure distribution without clipped highlights or blocked shadows.
5:30 PM: Intensify shooting frequency as colors brighten to brilliant orange 30 minutes before sunset. Bracket exposures capturing multiple frames at +/- 1 stop intervals. Alternate between wide-angle and telephoto lenses capturing both grand landscape and isolated rock details. Adjust exposure compensation as brightness changes, slightly underexposing (-0.3 to -0.7 stops) preserving highlight detail and color saturation during peak orange glow.
6:00 PM: Photograph sunset moment (6:00 PM winter example timing) as Uluru reaches peak burgundy-red color intensity. Shoot continuously through 10-minute window as colors transition from red through burgundy to purple. Increase exposure compensation (+0.3 to +0.7 stops) as colors darken revealing shadow detail while maintaining rich saturated colors.
6:30 PM: Continue shooting as Earth’s shadow climbs Uluru turning the rock grey while western sky retains color. Capture twilight phase with silhouetted rock and colored sky creating simplified graphic compositions. Pack equipment as full darkness approaches 7:00 PM.
7:15 PM: Return to Yulara arriving 7:35 PM. Late dinner at Ilkari Restaurant buffet. Ilkari dinner $65. Total: $65 per person (excluding accommodation, rental car, park entry).
Two-Day Comprehensive Photography Experience
Day 1 – Sunset and Night: Afternoon departure from accommodation 3:00 PM for Talinguru Nyakunytjaku arriving 3:30 PM. Extended photography session 4:30 PM through 7:00 PM capturing complete color transformation from initial orange glow through purple twilight. Return Yulara 7:35 PM for dinner at Outback Pioneer BBQ. Early sleep 9:00 PM preparing for predawn sunrise session. Pioneer BBQ dinner $35. Total: $35 per person (excluding accommodation, rental car, park entry).
Day 2 – Sunrise and Base Walk: Depart accommodation 5:30 AM for sunrise viewing area. Photography session 6:00 AM through 7:45 AM capturing predawn through full sunrise color sequence. Packed breakfast $15 eaten during photography breaks. Drive to base walk 8:00 AM completing Mala Walk section (2 kilometers, 1 hour) with ideal morning light for rock texture photography. Continue to Cultural Centre 10:00 AM exploring exhibits and galleries (90 minutes). Return Yulara 12:00 PM for checkout and lunch at Gecko’s before departure. Packed breakfast $15, Gecko’s lunch $28. Total: $43 per person (excluding accommodation, rental car, park entry).
Two-Day Photography Total: Meals $113, total $113 per person (excluding accommodation $300-500 for 2 nights, rental car $200-240 for 2 days, park entry $38).
Post-Processing Tips for 2026 Images
RAW File Processing
RAW files from Uluru photography require processing in software including Adobe Lightroom, Capture One, or free alternatives like RawTherapee bringing out colors and details captured by camera sensors but not visible in unprocessed RAW files. Begin processing by adjusting white balance to 5200-5500K (Daylight) or 5800-6200K (Cloudy) preserving natural warm golden hour tones while avoiding excessive orange casts that appear unrealistic.
Increase vibrance +20 to +40 enhancing color saturation particularly in less saturated areas like sky and foreground elements while protecting already-saturated Uluru colors from oversaturation. Vibrance selectively boosts weak colors while limiting changes to strong colors, creating more natural results than saturation adjustments that boost all colors equally often creating oversaturated orange rock and blown-out skies.
Recovery and shadow adjustments reveal detail in bright sky areas and dark rock shadows expanding the visible tonal range in final images. Reduce highlights -20 to -60 recovering detail in bright areas near the setting sun, preventing completely white blown-out zones. Increase shadows +20 to +60 revealing texture and detail in shadowed rock areas and foreground elements, creating images showing detail throughout the scene rather than solid black shadows.
Color Grading Techniques
Selective color adjustments target specific hue ranges enhancing Uluru’s colors without affecting sky or foreground elements. Increase orange and red saturation +15 to +30 intensifying the rock’s characteristic colors while leaving blue sky and green vegetation natural. Adjust orange and red hue sliders slightly toward red (+5 to +10) deepening Uluru’s color from bright orange toward burgundy for more dramatic appearance matching viewers’ memories of sunset colors.
Graduated filters in processing software mimic physical graduated ND filters, darkening sky areas while leaving Uluru properly exposed. Apply graduated filters from top of frame downward, reducing exposure -0.5 to -1.5 stops in bright sky while maintaining normal exposure in rock and foreground. This selective exposure adjustment balances the scene’s extreme dynamic range creating natural-looking images showing detail in both sky and rock.
Sharpening and Noise Reduction
Apply sharpening selectively to Uluru’s surface revealing rock texture, striations, and geological features while avoiding excessive sharpening of smooth sky areas that creates artifacts and noise. Lightroom’s detail panel allows setting sharpening amount (60-80 for landscape photography), radius (1.0-1.5 pixels), and detail (25-40) controlling how much fine texture receives enhancement versus broader features.
Use masking slider in sharpening panel limiting sharpening to high-contrast edges rather than smooth areas. Hold Alt/Option while dragging masking slider, watching preview showing white areas receiving sharpening and black areas excluded. Set masking to 60-80 confining sharpening to rock texture edges, clouds, and foreground details while excluding smooth sky gradients.
Noise reduction becomes necessary for images shot at higher ISOs (800-1600) before sunrise or after sunset in diminishing twilight. Apply luminance noise reduction 30-50 smoothing grainy texture while preserving detail through detail slider set 50-70. Color noise reduction at 50-70 eliminates colored speckles appearing in shadow areas of high-ISO images. Balance noise reduction against detail preservation – aggressive settings create smooth plastic-looking images lacking texture and detail.
Frequently Asked Questions About Uluru Sunrise & Sunset Photography 2026
Do you need a tripod at Uluru?
Tripods are strongly recommended for serious sunrise and sunset photography at Uluru, though not mandatory for casual snapshots. Golden hour light provides sufficient brightness for handheld shooting at reasonable shutter speeds (1/60-1/250 second), but tripods enable several important techniques including long exposures during twilight before/after sunrise/sunset, multiple exposures from identical positions for HDR processing, time-lapse sequences capturing color changes over 30-60 minutes, and slower shutter speeds allowing smaller apertures (f/11-f/16) maximizing depth of field. Tripods also reduce camera shake during critical peak color moments when slight camera movement degrades image sharpness. All viewing platforms allow tripod use without restrictions provided setups don’t block other visitors’ views.
What camera settings should I use for Uluru sunset?
Start with ISO 100-400, aperture f/8-f/11, and shutter speed 1/60-1/250 second adjusted based on camera’s light meter readings. Use aperture priority mode allowing camera to select shutter speed automatically while you control depth of field through aperture selection, or use manual mode controlling both aperture and shutter speed for complete creative control. Enable auto-bracketing capturing 3-5 frames at +/- 1 stop intervals ensuring proper exposure despite rapidly changing light. Set white balance to Daylight (5200K) or Cloudy (6000K) preserving natural warm golden hour colors. Shoot RAW format capturing maximum color and tonal information allowing extensive editing flexibility in post-processing. Monitor histogram after each sequence confirming exposure distribution without clipped highlights or blocked shadows.
How do I avoid crowds in sunset photos?
Eliminating crowds from sunset photographs at Talinguru Nyakunytjaku platform (200-400 people during peak season) requires careful composition and positioning strategies. Use telephoto lenses (200-400mm) isolating Uluru with tightly cropped frames that exclude viewing platform and surrounding people. Position tripods at platform edges rather than center areas where crowds concentrate, shooting from angles that minimize people in foreground. Arrive very early (2+ hours before sunset) securing front-row positions at platform railings where no people can position themselves between your camera and Uluru. Alternatively, visit less-crowded Uluru Sunset Viewing Area (100-200 people) or unofficial pullouts along sealed roads where minimal crowds provide more isolation. Sunrise viewing attracts significantly smaller crowds (50-150 people) offering better opportunities for people-free photographs.
Can I use drones at Uluru?
No, recreational drone use is completely prohibited throughout Uluru-Kata Tjuta National Park without special commercial or scientific permits issued only for specific approved purposes. The ban protects wildlife from disturbance, ensures visitor safety, respects Anangu cultural sensitivities about aerial photography of sacred sites, and prevents visual and noise pollution degrading other visitors’ experiences. Violations result in significant fines and potential prosecution under Australian aviation regulations. The few approved commercial drone operators hold specific permits arranged months or years in advance for documentary filmmaking or scientific research approved by Parks Australia and Anangu traditional owners. Helicopter flights provide the only legal option for aerial photography at Uluru, operated by licensed companies with approved routes avoiding sensitive areas.
What’s the best focal length for Uluru photography?
Wide-angle lenses (16-35mm full-frame equivalent) work best for capturing Uluru with foreground elements creating depth in landscape compositions from viewing platforms 10-20 kilometers away. Standard zoom lenses (24-70mm) provide versatile coverage for both wide scenes and tighter compositions emphasizing the rock. Telephoto lenses (100-400mm) excel at detail shots isolating specific rock features, caves, and surface textures from distant viewing platforms, plus creating compressed perspectives making Uluru appear larger in frames by eliminating empty foreground space. Serious photographers bring multiple focal lengths covering 16-400mm range allowing creative flexibility as lighting and conditions change throughout golden hour. Smartphone cameras capture acceptable snapshots but lack optical zoom and sensor size necessary for highest-quality prints and large-scale display.
Should I photograph sunrise or sunset at Uluru?
Photograph both sunrise and sunset during multi-day visits experiencing complete perspective on Uluru’s color transformations and different viewing locations. Sunset at Talinguru Nyakunytjaku offers dual Uluru-Kata Tjuta views and dramatic western sky colors but attracts large crowds (200-400 people peak season). Sunrise provides more intimate experiences with smaller crowds (50-150 people), clearer morning air quality producing sharper images, cooler temperatures allowing comfortable extended photography sessions, and different lighting angles revealing rock textures invisible during sunset. If choosing only one session, sunset’s convenient timing (late afternoon setup rather than predawn wake-up) and dual-formation viewing makes it slightly more accessible for casual visitors, while serious photographers often prefer sunrise for superior lighting conditions and reduced crowds.
What time should I arrive at sunset viewing platforms?
Arrive 90-120 minutes before sunset for optimal positioning at Talinguru Nyakunytjaku platform securing front-row locations before crowds fill prime spots. Early arrival allows scouting compositions, setting up equipment without rush, and witnessing the complete color transformation from initial orange glow through full sunset sequence. Photographers should arrive 2+ hours before sunset for best positions, while casual viewers succeed with 60-90 minute early arrival. Less-crowded Uluru Sunset Viewing Area allows arriving 60-75 minutes before sunset finding good positions, though serious photographers benefit from earlier arrival for unhurried setup. Shuttle bus services depart accommodations 90 minutes before sunset providing convenient timing for visitors without rental cars.
How cold is sunrise at Uluru in winter?
Winter sunrise sessions (June-August) involve extremely cold predawn temperatures frequently dropping below 0°C, with some mornings reaching -3 to -5°C creating frost on viewing platform surfaces and vehicle windshields. Temperatures remain below 5°C until 30-45 minutes after sunrise when solar radiation begins warming the desert landscape. Dress in heavy jackets, gloves, warm hats, and multiple layers removing outer layers as temperatures climb after sunrise. Thin gloves allow camera operation while protecting fingers from freezing metal equipment. Keep spare camera batteries warm in pockets close to body heat as cold temperatures rapidly drain battery power. Despite uncomfortable cold during setup and predawn waiting, conditions warm quickly to pleasant 15-20°C by mid-morning making the early cold worthwhile for spectacular photography opportunities.
Can I photograph Uluru from a helicopter?
Yes, helicopter flights over Uluru provide spectacular aerial photography opportunities revealing features invisible from ground level including summit details, water channels carved into the rock, and complete perspectives showing the monolith’s oval shape. Flights cost $150-545 per person in 2026 depending on duration (15-55 minutes) and route (Uluru only or including Kata Tjuta). Photograph through opened helicopter doors (doors-off flights available on some operators) avoiding window reflections and distortions, or shoot through closed windows using lens hoods pressed against glass eliminating reflections. Use fast shutter speeds (1/500-1/1000 second minimum) counteracting helicopter vibration that degrades sharpness at slower speeds. Sunrise and sunset helicopter flights command premium pricing but provide optimal lighting for aerial photography with low-angle light revealing surface textures and creating dramatic shadows.