
Rio de Janeiro Photography Guide: Mastering Carioca Landscapes & Urban Composition
Key Takeaways
- Rio de Janeiro’s UNESCO-designated Carioca Landscapes combine dramatic mountain-ocean-forest elements requiring technical understanding of extreme contrast management and tropical light qualities
- Optimal photography light occurs during golden hours 6:00-7:30 AM and 5:00-6:30 PM when warm directional light enhances colors and creates dimensional shadows across iconic landmarks
- Christ the Redeemer morning light (8:00-10:00 AM) provides front lighting on statue before clouds accumulate, while Sugarloaf sunset captures city lights emerging against twilight sky
- Lens selection priorities include ultra-wide 14-24mm for architecture and landscapes, standard zoom 24-70mm for versatility, and telephoto 70-200mm for compressed beachfront perspectives
- High dynamic range scenes require graduated neutral density filters, exposure bracketing, or HDR techniques managing 8-12 stop contrast between bright sky and shadowed foreground elements
- Beachfront safety protocols include weatherproof camera bags, minimal equipment displays, working with partners watching surroundings, and quick shooting workflows reducing theft exposure time
Understanding Rio’s Photographic Character
Rio de Janeiro presents photographers with extraordinary visual complexity where tropical Atlantic coastline meets dramatic granite mountain formations rising directly from sea level to 700+ meter elevations. The UNESCO-designated “Rio de Janeiro: Carioca Landscapes between the Mountain and the Sea” recognizes this unique geographical relationship creating distinctive photographic opportunities impossible to replicate elsewhere. Massive granite domes including Pão de Açúcar (Sugarloaf Mountain), Pedra da Gávea, and Corcovado Mountain anchor the composition while Tijuca Forest (the world’s largest urban forest) provides lush green foreground and middle-ground elements. Famous beaches Copacabana and Ipanema add horizontal blue elements balancing vertical mountain emphasis.
The Carioca Landscapes combine natural grandeur with vibrant urban culture creating visual contrast between pristine nature and dense metropolitan development. Modern high-rise buildings line beachfront creating geometric patterns, colonial architecture in Santa Teresa and Centro provides historical context, and colorful favela communities climbing hillsides offer social geography documentation opportunities. This mountain-forest-ocean-city integration within compact geographical area allows photographers to capture diverse subjects within minutes of each other, from wilderness landscapes to urban street photography to beach lifestyle documentation.
Light quality in Rio’s 23°S latitude brings intense tropical sun with high contrast, vibrant colors, and distinct seasonal variations affecting photography planning. Summer months (December-March) deliver strong overhead midday sun creating harsh shadows and blown highlights requiring technical management. Afternoon thunderstorms diffuse light creating soft even illumination ideal for certain subjects though unpredictable timing challenges outdoor sessions. Winter months (July-August) provide lower sun angles, clearer atmospheric conditions, and stable weather patterns supporting consistent planning. Understanding these light characteristics shapes successful photography strategies across Rio’s diverse environments.
Atmospheric haze from ocean humidity and urban pollution affects clarity and color saturation particularly during afternoon hours. Morning light typically offers better air quality and color contrast before heat and humidity accumulate. Seasonal variations see winter months delivering clearest air quality while summer brings higher humidity and frequent cloud formation. Photographers must adapt exposure, white balance, and post-processing strategies to these tropical atmospheric conditions differing significantly from temperate climate photography experiences.
People Also Ask About Rio Photography
What is the best time to photograph Christ the Redeemer?
Early morning 8:00-10:00 AM provides optimal Christ the Redeemer photography conditions with front lighting illuminating the statue’s white surface, clear atmospheric conditions before afternoon cloud accumulation, manageable tourist crowds allowing composition freedom, and warm golden light quality during first hour after opening. The statue faces east receiving beautiful dawn light though accessing summit at sunrise requires special arrangements as regular service begins 8:00 AM. Morning light angles create defined shadows across the Art Deco sculpture’s features and flowing robe highlighting architectural details and three-dimensional form.
Afternoon photography from 2:00-4:00 PM places sun behind statue creating challenging backlit conditions with strong contrast between bright sky and shadowed statue front. Silhouette compositions work effectively in these conditions though facial details and architectural elements disappear in shadow. Late afternoon 4:00-6:00 PM brings warmer side lighting improving statue appearance though afternoon clouds frequently obscure summit by this hour particularly during summer months. Overcast conditions provide even lighting eliminating harsh shadows and allowing consistent exposure across frame though removing dramatic light quality characterizing golden hour photography.
What lens should you use for Rio landscape photography?
Ultra-wide angle lenses 14-24mm excel for Rio’s dramatic landscapes capturing expansive mountain-ocean compositions, emphasizing vertical height of Cristo Redentor and Pão de Açúcar while including foreground interest, and allowing architectural photography in confined colonial streets where longer focal lengths cannot achieve necessary perspective. The extreme field of view exaggerates spatial relationships making mountains appear more dramatic and beaches more expansive. Distortion control becomes critical with ultra-wide lenses requiring careful leveling to prevent converging vertical lines unless intentionally used for creative effect.
Standard zoom 24-70mm f/2.8 provides optimal versatility for mixed Rio photography including landscapes, street scenes, architectural details, and environmental portraits. The moderate wide angle capability captures beach panoramas while telephoto end isolates architectural elements and compresses perspective along beachfront high-rises. The fast f/2.8 aperture supports low-light photography in favelas, colonial interiors, and evening scenes without requiring extremely high ISO settings compromising image quality. This single lens covers 80% of Rio photography situations making it ideal for travelers minimizing equipment weight.
Telephoto zoom 70-200mm f/2.8 or f/4 excels for compressed beach perspectives stacking waves, swimmers, umbrellas, and buildings in layered compositions, isolating architectural details on distant buildings or monuments, capturing candid beach lifestyle without intrusive close approach, and wildlife photography in Tijuca Forest. The longer focal length compresses perceived distance between Christ the Redeemer and Sugarloaf Mountain creating dramatic juxtapositions impossible with wider lenses. Telephoto perspectives minimize wide-angle distortion crucial for accurate architectural documentation.
How do you photograph on Rio beaches safely?
Beach photography safety requires strategic planning balancing creative opportunities against theft risks inherent in displaying expensive camera equipment in crowded public spaces. Work with partners alternating photographer and security observer roles ensuring one person maintains constant awareness of surroundings while the other focuses on composition and camera operation. Arrive early morning 7:00-9:00 AM when beaches host fewer people, lighting conditions excel, and theft opportunities decrease with lower crowd density. Avoid bringing entire camera bag to beach; carry only necessary lens and accessories in neutral-appearing bags rather than obvious camera cases advertising valuable contents.
Weatherproof camera bags protect equipment from sand, salt spray, and unexpected rain while allowing quick access for responsive shooting. Keep bags closed between shots rather than open and accessible. Consider waterproof camera housings for surf photography or beachside shooting in wave zone where splashing occurs. Use camera straps securing equipment to body preventing grab-and-run theft attempts. Shoot decisively with clear objectives rather than prolonged exposure sessions increasing risk windows. Store camera in bag immediately after completion returning to less vulnerable stance.
Insurance coverage for camera equipment provides financial protection against theft or damage. Document serial numbers and maintain equipment receipts supporting insurance claims. Police reports become necessary for insurance claims though recovery rates remain low for stolen equipment. Prevention through awareness, strategic timing, minimal equipment displays, and partner security watch provides better protection than reactive measures after theft occurs. Many photographers successfully shoot Rio beaches following these protocols without incident.
What are the most photogenic spots in Rio?
Christ the Redeemer viewing platform provides 360-degree compositions including statue foreground with cityscape background, Guanabara Bay and Sugarloaf Mountain, favela communities climbing hillsides, and Tijuca Forest canopy. Multiple vantage points around statue base allow varied perspectives though tourist crowds challenge composition exclusivity. Parque Lage offers ground-level views toward Cristo Redentor with mansion architecture and palm trees framing distant statue creating layered compositions impossible from summit.
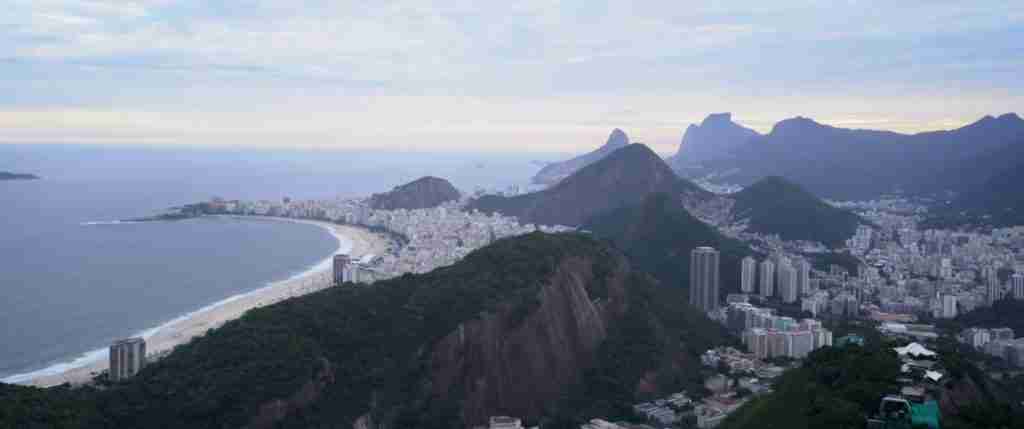
Sugarloaf Mountain cable car stations and summit deliver spectacular panoramic views across Guanabara Bay, Copacabana and Ipanema beaches, downtown Rio skyline, and surrounding mountains. Two levels (Morro da Urca and summit) provide different elevation perspectives with summit offering most expansive views. Sunset and twilight photography captures city lights emerging against colorful sky though crowds peak during these hours requiring early positioning for optimal viewpoints.
Arpoador rock formation between Copacabana and Ipanema beaches serves as classic sunset viewing platform with hundreds gathering nightly. Telephoto lenses capture silhouettes of observers against setting sun while wide-angle compositions include rock formation, beach curves, and Dois Irmãos mountain backdrop. Escadaria Selarón colorful tile staircase connecting Lapa and Santa Teresa offers vibrant street photography opportunities with 215 steps covered in international tiles creating explosive color palettes. Early morning or late afternoon avoids harsh midday overhead light and provides manageable tourist numbers.
Extended multi-day tours – 5+ days
Featured Rio De Janeiro Multi-Day Tour Packages
3 days
Rio De Janeiro 3-Day Discovery Tour
- ✓ Comprehensive Rio De Janeiro experience
- ✓ Expert local guides included
- ✓ All accommodation included
- ✓ Transportation provided
5 days
Rio De Janeiro 5-Day Highlights Experience
- ✓ Comprehensive Rio De Janeiro experience
- ✓ Expert local guides included
- ✓ All accommodation included
- ✓ Transportation provided
7 days
Rio De Janeiro 7-Day Cultural Journey
- ✓ Comprehensive Rio De Janeiro experience
- ✓ Expert local guides included
- ✓ All accommodation included
- ✓ Transportation provided
10 days
Rio De Janeiro 10-Day Complete Adventure
- ✓ Comprehensive Rio De Janeiro experience
- ✓ Expert local guides included
- ✓ All accommodation included
- ✓ Transportation provided
Multi-day tour packages powered by TourRadar. Prices and availability subject to change.
Essential Photography Equipment for Rio
Camera Bodies and Sensor Considerations
Full-frame cameras provide optimal image quality for Rio’s high-contrast scenes with superior dynamic range handling extreme brightness differences between tropical sky and shadowed foreground elements. Sensors capturing 13-15 stops dynamic range allow recovery of highlight and shadow detail during post-processing crucial for architectural photography and landscape scenes. High megapixel counts (30-50MP) enable significant cropping flexibility important when tourists interrupt ideal compositions or when experimenting with perspectives requiring post-capture adjustment.
Advanced autofocus systems with face and eye detection support street photography and environmental portraits capturing candid moments of Carioca culture without extensive manual focusing. Fast continuous shooting (8-10 fps) captures decisive moments in beach activities, street scenes, and wave action. Weather sealing protects against salt spray, humidity, and sudden rain showers characteristic of tropical coastal environment. Dual card slots provide backup security for irreplaceable travel images particularly during once-in-lifetime visits or professional assignments.
APS-C or Micro Four Thirds sensors offer acceptable alternatives with lighter weight and smaller size valuable for travel photography though sacrifice dynamic range and low-light performance compared to full-frame systems. The crop factor (1.5x-2x) extends effective focal length useful for wildlife photography in Tijuca Forest but reduces wide-angle capabilities critical for architectural photography in confined colonial streets. Budget-conscious photographers achieve excellent results with crop sensor cameras accepting dynamic range limitations and applying graduated neutral density filters or exposure bracketing techniques compensating for reduced sensor capabilities.
Lens Selection Strategy
Ultra-wide angle 14-24mm f/2.8 or f/4 excels for landscape photography emphasizing vertical drama of mountains, capturing expansive beach panoramas, architectural photography in confined spaces, and environmental portraits incorporating contextual backgrounds. The extreme field of view exaggerates perspective making foreground elements appear larger and background elements smaller creating dynamic spatial relationships. Edge-to-edge sharpness quality varies significantly between lens manufacturers with professional-grade optics maintaining corner sharpness critical for architectural photography requiring correction-free edges.
Standard zoom 24-70mm f/2.8 provides versatile coverage for mixed photography situations with fast aperture supporting low-light street photography, environmental portraits with background separation, and general travel documentation. The moderate wide-angle capability captures contextual scenes while short telephoto range isolates subjects. Professional constant-aperture zooms maintain brightness across focal range supporting consistent exposure metering and autofocus performance. Budget alternatives include variable aperture 24-70mm f/3.5-5.6 or 24-105mm f/4 sacrificing speed for extended reach and reduced cost.
Telephoto zoom 70-200mm f/2.8 or f/4 compresses perspective creating layered beach compositions, isolates architectural details, captures candid street photography from distance, and supports wildlife photography in Tijuca Forest. The longer focal length minimizes wide-angle distortion crucial for architectural documentation requiring accurate geometric representation. Fast aperture versions (f/2.8) double lens weight and cost versus f/4 alternatives with minimal practical difference for landscape photography typically shot at f/8-f/11 for depth of field though low-light advantages benefit street photography and wildlife captures.
Prime lenses including 35mm f/1.4 or f/1.8 and 85mm f/1.4 or f/1.8 provide exceptional image quality, fast apertures for low-light performance, and compact size compared to professional zooms. The fixed focal length forces creative composition problem-solving developing stronger visual skills. Environmental portrait photography benefits from 35mm moderate wide angle incorporating contextual backgrounds while 85mm creates flattering perspective and beautiful background blur for closer portraits. Prime lens investments suit photographers prioritizing image quality and low-light capability over zoom convenience.
Essential Accessories and Support Equipment
Graduated neutral density filters (GND) manage extreme contrast in Rio’s bright tropical skies with shadowed foreground elements by reducing sky brightness 2-4 stops while leaving foreground unaffected. Hard-edge GND filters suit ocean horizons with defined transitions while soft-edge versions blend gradient across mountains and urban skylines with irregular skylines. Three-stop GND handles typical beach scenes while six-stop versions manage extreme backlighting situations. Filter quality affects image sharpness with budget options introducing softness or color casts degrading professional results.
Circular polarizing filters reduce reflections on ocean water revealing underwater detail, saturate blue sky color, manage reflections on glass buildings, and reduce atmospheric haze increasing distant mountain clarity. Polarizer effectiveness peaks at 90-degree angles to sun position with minimal effect when shooting toward or away from sun. The 1-2 stop light reduction requires exposure compensation particularly in low-light situations. High-quality polarizers maintain optical clarity while budget alternatives introduce vignetting on ultra-wide lenses or reduce sharpness.
Sturdy carbon fiber travel tripods weighing 3-5 pounds provide stable platform for long exposures, HDR bracketing sequences, self-portraits, and intentional camera movements while remaining packable for air travel and daily carrying. Three-section leg designs collapse compactly while four-section models achieve smaller packed size with additional setup complexity. Ball heads offer quick positioning while geared heads provide precise adjustment for architectural photography requiring perfect level orientation. Maximum height should reach eye level without center column extension preventing stability compromise.
Remote shutter releases eliminate camera shake during tripod shooting crucial for sharp long exposures, HDR sequences, and astrophotography in Tijuca Forest. Cable releases provide reliable wired connection while wireless infrared or Bluetooth remotes offer freedom from physical connection though requiring battery management. Smartphone apps control many modern cameras wirelessly providing live view composition and exposure parameter adjustment from distance valuable for self-portraits and difficult angle photography.
Mastering Christ the Redeemer Photography
Viewing Platform Composition Strategies
The Cristo Redentor viewing platform surrounds statue base providing 360-degree vantage points with north side overlooking downtown Rio and Guanabara Bay, east side facing Sugarloaf Mountain and bay entrance, south side viewing Ipanema and Leblon beaches with Dois Irmãos mountain, and west side looking toward Barra da Tijuca and Olympic Park. Each direction offers distinct compositional opportunities requiring strategic positioning based on sun angle and desired background elements. Tourist crowds concentrate on north platform (city view) leaving south and west areas less congested for patient photographers.
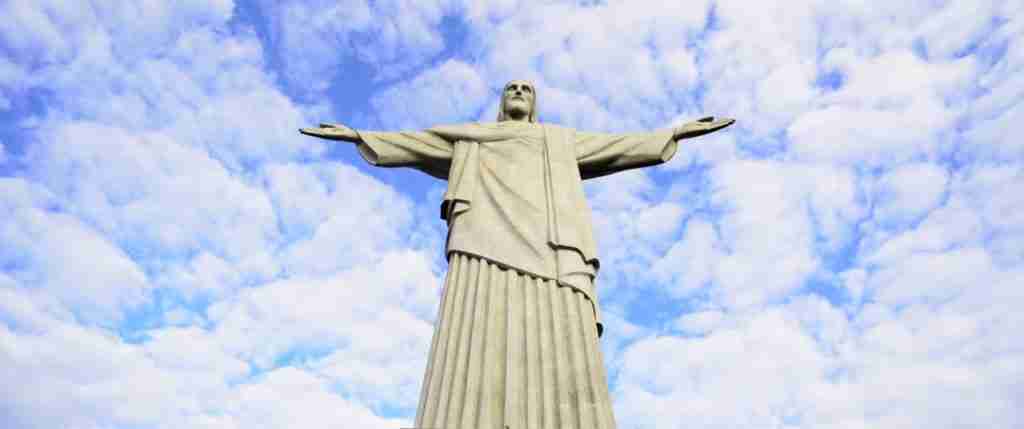
Wide-angle compositions (14-24mm) capture statue entirety with cityscape background requiring low perspective looking upward emphasizing vertical drama. Getting close to statue base and shooting upward exaggerates height and creates powerful presence though security barriers prevent closest approach to statue itself. Including foreground elements such as other visitors, security railings, or architectural details provides scale reference emphasizing statue’s impressive size. Avoid centering statue in frame; offset positioning creates dynamic asymmetry with cityscape filling opposite frame area.
Telephoto perspectives (70-200mm) isolate statue head and upper body eliminating distracting foreground tourists and background buildings. Compressed perspective minimizes distance between Cristo Redentor and distant mountains or ocean. Patient observation identifies gaps in tourist movement allowing clean compositions without people interrupting sight lines. Shooting over security barriers from slightly elevated positions (standing on benches where permitted) clears foreground obstructions. Vertical orientation emphasizes statue height while horizontal framing incorporates extended arms and background context.
Lighting Analysis and Timing
Morning light 8:00-10:00 AM illuminates statue front (east-facing) with warm golden light during first hour after opening creating beautiful color temperature and defined shadows. The low sun angle produces side lighting highlighting three-dimensional sculptural details and robe folds. Clear atmospheric conditions before afternoon cloud development ensure crisp visibility and vibrant color saturation. Tourist crowds remain manageable during early access allowing composition freedom and clean background elements without excessive people interruption.
Midday light 11:00 AM-2:00 PM creates harsh overhead illumination with minimal shadows, blown highlights on bright white marble, and flat two-dimensional appearance lacking depth perception. The high sun angle produces unflattering portraits and difficult exposure management between bright sky and darker ground elements. Overcast conditions during this period actually benefit photography by providing even lighting across entire scene eliminating extreme contrast though removing dramatic light quality. Midday timing suits silhouette photography intentionally underexposing statue against bright sky or experimental creative approaches rather than traditional documentary photography.
Late afternoon 3:00-5:00 PM brings backlit conditions with sun behind statue creating challenging technical situations. Silhouette compositions work effectively underexposing statue to pure black against colorful sky. HDR techniques capture both statue detail and sky color through bracketed exposures merged in post-processing. Fill flash or reflectors illuminate statue front though security restrictions and distance limitations make auxiliary lighting impractical for most visitors. Cloud cover during afternoon hours (common in summer) softens backlit conditions creating more manageable contrast.
Alternative Perspectives Beyond Summit
Parque Lage at Corcovado Mountain base offers ground-level compositions with mansion architecture and palm trees framing distant Cristo Redentor statue. The 2-kilometer distance requires 200mm+ telephoto lenses isolating statue against sky while architectural elements provide foreground interest. Morning light (8:00-10:00 AM) illuminates mansion and Christ statue simultaneously. The perspective captures statue’s dominant presence overlooking city impossible to convey from summit vantage point. Free park access and beautiful mansion grounds justify allocation of time for this unique vista.
Vista Chinesa pavilion in Tijuca Forest provides elevated viewpoint toward Christ the Redeemer with forest canopy foreground. The distance and angle create slightly elevated perspective emphasizing statue prominence above surrounding trees and buildings. Wide-angle compositions include Chinese-style pavilion architecture framing statue in distance. This location requires taxi access and receives far fewer visitors than main attractions allowing peaceful photography sessions. Late afternoon light works well from this west-facing vantage point.
Various favela viewpoints offer dramatic perspectives with colorful hillside communities leading eye toward Christ statue towering above. These locations require guided access through reputable favela tour operators prioritizing community relationships and safety protocols. The compositional juxtaposition between densely packed simple housing and distant monument creates powerful social geography documentation. Respect resident privacy and photography ethics working exclusively with community-approved guides who navigate appropriate shooting locations and cultural sensitivity.
Capturing Sugarloaf Mountain Drama
Cable Car Photography Techniques
Cable car cabins provide unique aerial perspective photography opportunities though technical challenges include glass reflections, moving platform, and limited positioning control. Shooting through cable car windows requires polarizing filter eliminating glass reflections and pressing lens hood directly against glass surface minimizing internal reflections from cabin lights and passengers. The smooth continuous motion allows longer exposures (1/60-1/125 second) capturing sharp landscapes despite movement. Arriving first to cable car ensures window positioning for unobstructed views rather than standing behind other passengers.
Ascending cable car photography captures Urca neighborhood, Guanabara Bay islands, Sugar Loaf approaching perspective, and Cristo Redentor in distance. Wide-angle lenses (24-35mm) capture expansive views through windows while avoiding excessive edge distortion from glass curvature. The brief 3-minute ride requires decisive shooting rather than extensive composition refinement. Descending journey provides reverse perspectives with afternoon light often superior to morning ascent conditions. Riding cable car multiple times allows experimental shooting from various positions though additional ticket costs may not justify marginal improvements.
Summit Platform Composition Strategies
Sugarloaf summit provides 360-degree views with north platform facing Cristo Redentor and Corcovado Mountain, east overlooking Guanabara Bay entrance and Niterói, south viewing Copacabana and Ipanema beaches, and west looking toward downtown Rio Centro. Each cardinal direction offers distinct compositions requiring full circuit of viewing platform capturing complete visual story. Sunset photography concentrates on west and south platforms where golden light illuminates city and beaches though all directions capture beautiful twilight color transitions.
Wide-angle compositions (14-24mm) encompass vast panoramic views including ocean, mountains, city, and sky in single frames. Vertical orientation captures foreground platform elements, middle-ground cityscape, and expansive sky creating layered depth. Including security railings, other visitors, or architectural elements provides foreground interest and scale reference. Ultra-wide perspectives exaggerate spatial depth making distant elements appear farther emphasizing summit’s dramatic elevation.
Telephoto perspectives (70-200mm) compress distance between Cristo Redentor and Sugarloaf creating juxtaposition impossible in person. The longer focal length isolates individual neighborhoods, architectural details, or beach sections eliminating distracting elements and creating clean simplified compositions. Portrait orientation captures vertical high-rise building emphasis along beaches while horizontal framing emphasizes beach extent and mountain backdrop. Sunset photography benefits from telephoto compression stacking sun, Cristo Redentor silhouette, and city buildings in layered composition.
Morro da Urca Intermediate Station Opportunities
Morro da Urca intermediate cable car station at 220 meters elevation offers less crowded photography platform with excellent views toward Copacabana, Ipanema, Botafogo Bay, and Cristo Redentor. The lower elevation creates different perspective compared to summit with middle-distance views suitable for environmental storytelling rather than distant panoramas. Amphitheater area provides open space for tripod setup and extended photography sessions without summit’s dense crowds. Restaurant terrace offers shaded positions during midday heat.
Late afternoon light (3:00-5:00 PM) illuminates beaches and mountains beautifully from this western vantage point. The intermediate elevation allows including Sugarloaf summit in compositions creating layered depth with Urca neighborhood foreground, bay middle-ground, Sugarloaf background, and sky overhead. Hiking trails from Urca connect to secluded viewpoints with vegetation framing and natural foreground elements impossible on developed summit platforms.
Beach Photography Excellence
Copacabana and Ipanema Perspectives
Elevated viewpoints above beaches provide optimal vantage points for capturing iconic wave-pattern sidewalks (calçadão), beach extent, and mountain backdrop. Rooftop terraces at beachfront hotels offer 5-15 story perspectives though access usually requires guest status or restaurant patronage. Fort Copacabana southern end provides free public access to elevated viewing platform capturing entire Copacabana beach curve toward Arpoador and Ipanema beyond. This fort location works beautifully for late afternoon light when sun angles enhance wave pattern contrast.
Beach-level photography captures human activity, wave action, and cultural details impossible from elevated positions. Wide-angle lenses (24-35mm) include contextual environmental elements while compressing perspective creates layered compositions stacking umbrellas, people, and buildings. Telephoto lenses (70-200mm) isolate specific beach activities – volleyball games, soccer matches, capoeira demonstrations, vendor interactions – from distance avoiding intrusive close approach. The compressed perspective stacks beach activities and high-rise buildings in dense energetic compositions.
Sunrise photography (6:00-7:00 AM) at Copacabana captures golden light illuminating beach and buildings before crowds arrive. The eastern exposure receives beautiful morning light though Leme end (northern) offers best mountain backdrop framing. Ipanema sunrise requires positioning at western end (Leblon border) shooting back toward Arpoador and Dois Irmãos mountain creating spectacular silhouettes. Few people on beaches at dawn enable clean compositions without excessive tourists interrupting sight lines. Morning light temperature creates warm orange and pink color palette contrasting with blue ocean.
Arpoador Sunset Compositions
Arpoador rock formation between Copacabana and Ipanema beaches serves as Rio’s most famous sunset viewing location with hundreds gathering nightly for applause tradition as sun descends behind mountains. Wide-angle compositions (14-24mm) capture entire scene including rock formation foreground, gathered observers middle-ground, sunset background, with Dois Irmãos mountain silhouette. Arriving 45-60 minutes before sunset secures optimal positioning on rock before crowds fill available space.
Telephoto perspectives (70-200mm) isolate sunset action and silhouetted observers against colorful sky. The compressed perspective stacks people layers creating graphic compositions emphasizing cultural ritual rather than landscape grandeur. Vertical orientation captures full sunset color gradation from horizon to overhead sky. Horizontal framing emphasizes observer numbers and social gathering aspect. Exposure for sunset requires careful metering preserving sky color while accepting silhouetted foreground or using graduated neutral density filters maintaining detail across frame.
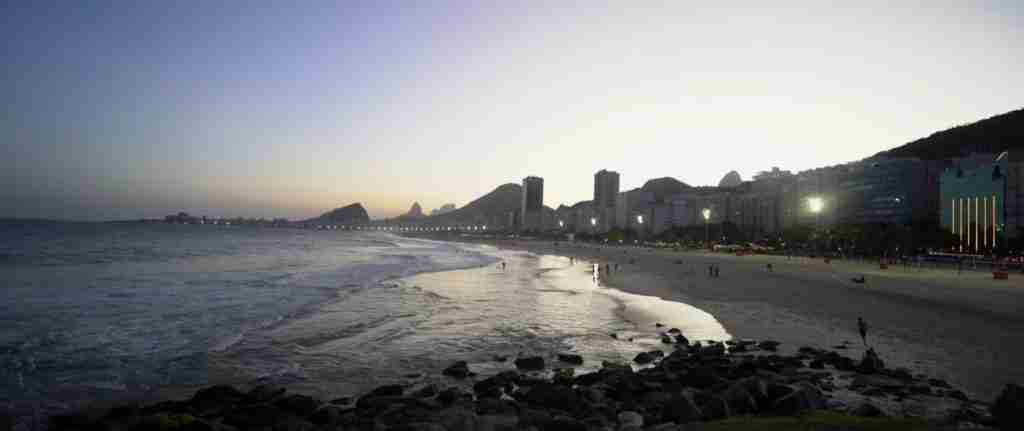
Blue hour photography (20-30 minutes after sunset) captures city lights emerging along beaches and mountains while sky retains deep blue color rather than pure black. This twilight period provides beautiful light quality for long exposures showing motion in waves and clouds while lights create warmth contrast against cool sky. Tripod becomes necessary for exposures extending 1-4 seconds at low ISO (100-400) and moderate apertures (f/8-f/11). Continue shooting through complete darkness capturing different relationships between lights and sky tones.
Wave and Water Motion Techniques
Fast shutter speeds (1/500-1/2000 second) freeze wave action capturing suspended water droplets and dynamic splash shapes. Continuous shooting mode (8-10 fps) captures sequences of wave progression with peak action frame selected during editing. High shutter speeds require wide apertures (f/2.8-f/5.6) or elevated ISO (800-1600) maintaining proper exposure in moderate light conditions. Telephoto lenses (100-200mm) compress wave action and isolate individual wave sections eliminating distracting background elements.
Slow shutter speeds (1/4-2 seconds) blur wave motion creating smooth ethereal water appearance contrasting with sharp static elements like rocks, piers, or beach posts. Neutral density filters reduce light intensity allowing longer exposures during bright daylight when slow speeds would overexpose images. Three-stop ND filter permits 1/2-2 second exposures during overcast conditions while six-stop or ten-stop ND filters enable multi-second exposures in full sun. Tripod stability becomes critical for sharp static elements against blurred water motion.
Intermediate shutter speeds (1/15-1/60 second) create partial motion blur suggesting wave movement while maintaining recognizable water structure. This technique captures sense of motion without complete abstraction. Panning camera following wave motion creates blurred background while maintaining relative sharpness in moving water. Experimentation across shutter speed range develops understanding of motion representation possibilities.
Urban and Architectural Photography
Colonial Architecture in Santa Teresa
Santa Teresa neighborhood preserves 19th-century colonial architecture with colorful facades, ornate ironwork balconies, tile roofs, and cobblestone streets offering rich architectural photography opportunities. Morning light (8:00-10:00 AM) illuminates east-facing buildings beautifully before midday harsh overhead sun. Late afternoon (3:00-5:00 PM) brings warm side-lighting emphasizing architectural texture and three-dimensional detail. Overcast conditions provide even lighting eliminating difficult shadow management beneficial for documentary photography prioritizing accurate representation over dramatic lighting.
Wide-angle lenses (14-24mm) capture building entirety in narrow street confines though careful leveling prevents converging vertical lines distorting architectural geometry. Tilt-shift lenses correct perspective distortion maintaining parallel vertical lines throughout frame though specialized equipment cost and weight limit practical travel photography applications. Vertical orientation emphasizes building height and sky inclusion while horizontal framing incorporates street context and neighboring structures.
Architectural detail photography with standard (50mm) or short telephoto (85-135mm) lenses isolates decorative elements including ironwork patterns, tile work, door and window designs, and weathered paint textures. These detail compositions complement wider establishing shots creating complete architectural documentation. Doorways and windows frame interior views or distant landscapes creating layered compositions with depth. Golden hour side-lighting enhances texture and dimensional quality in decorative elements.
Escadaria Selarón Color and Pattern
Selarón Steps present explosive color and pattern photography opportunities with 2,000+ tiles from 60+ countries creating visual complexity. Wide-angle compositions (14-24mm) capture step entirety from bottom or top perspectives emphasizing vertical extent and tile density. The staircase width allows including architectural context with colonial buildings framing steps. Shooting from midpoint landing provides symmetrical perspective with steps ascending and descending from camera position creating dynamic balance.
Detail photography isolates individual tile groupings, color combinations, or regional tile collections (Brazilian flag tiles, international contributions). Macro lenses (90-105mm) capture tile surface texture, glaze reflections, and weathering details impossible with standard focal lengths. The tile variety enables endless compositional possibilities selecting color harmonies, contrasting patterns, or narrative elements representing specific countries or themes. Shooting from various positions throughout staircase reveals different tile combinations and photographic perspectives.
Lighting challenges include harsh midday overhead sun creating strong shadows between steps and blown highlights on tile surfaces. Early morning (8:00-9:30 AM) or late afternoon (4:00-6:00 PM) brings directional light enhancing tile colors and reducing harsh contrast. Overcast conditions provide even lighting excellent for color saturation without specular highlights. Exposure for middle tones prevents highlight clipping on bright tiles while maintaining shadow detail in darker tiles. Slight underexposure (-0.3 to -0.7 EV) preserves highlight detail with shadow recovery during post-processing.
Modern Architecture Along Beaches
Beachfront high-rise development creates geometric patterns and modern architectural subjects contrasting with natural landscape elements. Telephoto lenses (70-200mm) compress building perspective creating dense vertical cityscape compositions. The repetitive balcony patterns, window grids, and similar heights create graphic minimalist images emphasizing urban density. Late afternoon side-lighting reveals building three-dimensional form with shadows defining balconies and architectural protrusions.
Reflective glass facades mirror sky, clouds, and surrounding buildings creating abstract compositions where reality and reflection merge. Polarizing filters manage reflections revealing interior space or architectural detail behind glass or maximizing reflections creating complete mirror effect. The filter orientation affects reflection strength rotating between maximum and minimum reflectivity. Environmental reflections including palm trees, mountains, or sunset colors projected onto building glass create surreal juxtapositions between natural and built environments.
Architectural nightscape photography captures lit buildings against twilight or night sky. Blue hour (20-30 minutes after sunset) provides sky color maintaining context rather than pure black void. Building lights create warm color temperature contrasting with cool blue sky tones. Long exposures (4-20 seconds) at low ISO (100-400) and moderate apertures (f/8-f/11) maintain image quality while properly exposing scene. Tripod becomes essential for sharp building details. Moving clouds during long exposure create motion streaks adding dynamic energy to static architecture.
Favela Documentation Ethics and Techniques
Ethical Photography Practices
Favela photography requires cultural sensitivity and ethical considerations prioritizing resident dignity over artistic ambition. Access favelas exclusively through reputable cultural tour operators maintaining community relationships and employing local guides from neighborhoods photographed. Never enter favelas independently without local guidance and community permission. Photography permission requires explicit consent from residents recognizing their agency over own representation. Avoid “poverty tourism” exploitation capturing images reducing people to stereotypes or victims.
Request permission before photographing individuals, homes, or businesses respecting privacy and autonomy. Many residents welcome positive documentation while others prefer exclusion from imagery. Honor these boundaries without pressure or coercion. Compensate subjects appropriately when shooting extended sessions or portraits requiring significant time investment. This compensation recognizes value of their contribution to your photographic project whether financial payment or image prints for family display.
Share images with photographed communities rather than extracting value without return benefit. Tour operators facilitate image delivery to subjects lacking digital access or email communication. Consider donating portion of image sales or licensing fees to community organizations benefiting residents. Frame images presenting human dignity, cultural richness, and community strength rather than focusing exclusively on poverty or hardship. Balance documentation includes challenges while emphasizing resilience, creativity, and agency.
Visual Storytelling Approaches
Environmental portraits combine subjects with contextual backgrounds communicating community character, housing conditions, daily activities, and social dynamics. Wide-angle lenses (24-35mm) include surrounding environment while maintaining subject prominence. Natural lighting from windows, doorways, or open sky provides authentic atmospheric quality versus flash disrupting scene authenticity. Moderate apertures (f/5.6-f/8) maintain environmental detail while keeping subject sharp.
Architectural documentation captures colorful painted walls, improvised construction techniques, density of housing units, and hillside geography characterizing favela environments. These images provide contextual understanding beyond individual portraits. Wide-angle perspectives emphasize spatial relationships and compressed vertical development. Detail photographs isolate textures, patterns, and creative architectural solutions demonstrating ingenuity and adaptation. These compositions work without human subjects reducing privacy concerns while effectively communicating community character.
Cultural activity photography documents daily life including children playing, vendors selling goods, community gatherings, and artistic expressions like graffiti or murals. Candid photography captures authentic moments though requires permission for specific individuals featured prominently. Respectful distance using telephoto lenses allows documentary photography without intrusive presence though closer engagement often produces more meaningful human connections and authentic expressions. Balance documentation needs with subject comfort creating ethical photography relationships.
Tijuca Forest Nature Photography
Landscape Compositions in Urban Forest
Tijuca National Park’s 3,200 hectares provide extensive rainforest photography opportunities unique among major cities. Dense vegetation creates layered green compositions with various plant species, sizes, and textures building visual depth. Wide-angle lenses (14-24mm) emphasize forest density and vertical tree structures leading eye upward through canopy layers. Include trails, streams, or bridges providing human scale reference and entry points guiding viewer into composition.
Waterfall photography combines moving water with lush forest environment requiring technical balance between freezing motion and blurring flow. Fast shutter speeds (1/500+ second) freeze water droplets mid-air capturing dynamic splash shapes and suspended particles. Slow exposures (1/2-4 seconds) smooth water flow creating silky white appearance contrasting with sharp static rocks and vegetation. Neutral density filters enable longer exposures during bright daylight. Tripod stability ensures sharp static elements against blurred water. Multiple exposures at various shutter speeds provide options during editing phase.
Atmospheric conditions including fog, mist, and dappled light create mood and depth perception in forest scenes. Morning fog softens harsh sunlight creating even diffused illumination ideal for forest photography. Mist layers separate forest depth planes creating dimensional spatial relationships. Shafts of light penetrating canopy (god rays) require backlighting conditions with photographer shooting toward light source. Slight underexposure (-0.5 to -1.0 EV) maintains light beam definition preventing overexposure. These conditions occur intermittently requiring opportunistic photography during favorable moments.
Wildlife and Bird Photography
Tijuca Forest hosts diverse wildlife including toucans, monkeys, sloths, butterflies, and numerous bird species providing photography opportunities impossible in other urban parks. Telephoto lenses (200-400mm) enable wildlife photography from respectful distance minimizing animal disturbance while achieving tight framing. Fast autofocus systems track moving subjects across frame. High continuous shooting rates (8-12 fps) capture behavior sequences with peak action frames selected during editing.
Morning hours (7:00-10:00 AM) offer peak wildlife activity with birds actively feeding and calling. Animals remain relatively stationary in midday heat reducing photography opportunities. Late afternoon (3:00-5:00 PM) sees renewed activity before dusk. Patient observation identifies wildlife patterns, feeding sites, and movement routes increasing successful encounter probability. Local guides recognize specific species locations and behaviors accelerating wildlife discovery versus independent exploration.
Technical challenges include low light under dense forest canopy requiring wide apertures (f/2.8-f/4) and elevated ISO (1600-6400) for adequate shutter speeds (1/500+ second) freezing animal motion. Image stabilization compensates for camera shake during handheld shooting though tripod or monopod support improves stability for heavy telephoto lenses. Focus accuracy becomes critical with narrow depth of field at wide apertures requiring precise subject tracking and anticipatory focusing.
Post-Processing Workflow for Rio Photography
RAW File Processing Fundamentals
Shooting RAW format captures maximum image data enabling extensive post-processing adjustments versus JPEG limiting editing latitude. RAW files record 12-14 bit color information versus JPEG’s 8-bit providing smoother tonal gradations and reducing posterization risk during aggressive editing. White balance, exposure, and color grading adjustments maintain image quality in RAW processing while similar JPEG edits degrade quality. Storage and processing requirements increase with RAW files (25-60MB versus 8-15MB JPEG) necessitating adequate memory cards and computer processing power.
Adobe Lightroom serves as industry-standard RAW processor offering comprehensive tools for exposure correction, color grading, selective adjustments, and batch processing. Capture One provides alternative with superior color accuracy and tethered shooting capabilities though steeper learning curve. DxO PhotoLab excels in lens distortion correction and noise reduction. These dedicated RAW processors offer superior image quality versus in-camera JPEG processing applying compression artifacts and limitations impossible to reverse.
Color and Tone Optimization
Rio’s tropical light requires white balance adjustment compensating for atmospheric haze and humidity affecting color temperature. Manual white balance selection or custom profiles create accurate color rendering versus automatic white balance producing inconsistent results across image sequence. Slight warm bias (200-400K above neutral) enhances golden hour photography while cooler adjustments (200-400K below neutral) improve ocean color saturation and blue sky vibrancy.
Contrast and clarity adjustments enhance tropical haze reducing atmospheric softness degrading image impact. Global contrast increases separate tonal values improving three-dimensional perception though excessive application creates harsh unnatural appearance. Localized clarity enhancement targets specific areas like architectural details, mountain textures, or wave patterns without affecting entire image. Vibrance control boosts muted colors while protecting saturated tones from clipping unlike saturation slider affecting all colors equally creating oversaturated unrealistic results.
Shadow and highlight recovery tools extract detail from extreme exposure ranges characteristic of Rio’s high-contrast scenes. Highlight recovery (-60 to -100) prevents blown sky details while shadow lift (+40 to +80) reveals architectural details in shade. Combined adjustments compress dynamic range fitting scene into displayable range. HDR techniques merge bracketed exposures capturing extended dynamic range impossible in single exposure though requires careful processing avoiding artificial HDR appearance with excessive local contrast and color saturation.
Architectural Distortion Correction
Vertical and horizontal perspective correction eliminates converging lines from tilted camera angles during architectural photography. Lightroom’s transform panel offers automatic perspective detection correcting distortion with single click though manual adjustments provide greater control. Vertical slider corrects converging verticals making building edges parallel. Horizontal slider straightens tilted horizon lines. Rotation adjustment levels skewed perspectives. These corrections crop image edges reducing final resolution requiring anticipatory framing allowing correction headroom.
Lens distortion removal eliminates barrel or pincushion distortion inherent in zoom lenses particularly ultra-wide focal lengths. Lightroom applies automatic lens profiles correcting known distortion patterns though manual adjustments fine-tune results. Chromatic aberration removal eliminates purple or green fringing along high-contrast edges common in backlit architectural photography. These technical corrections improve professional appearance and geometric accuracy critical for architectural documentation.
FAQ: Rio de Janeiro Photography
Can you bring a drone to Rio de Janeiro?
Drone operation in Rio requires registration with ANAC (Brazil’s civil aviation authority) and compliance with complex regulations restricting flights near airports, military installations, and densely populated areas. Christ the Redeemer, Sugarloaf Mountain, and most tourist attractions prohibit drone flights for safety and privacy protection. Parks including Tijuca Forest restrict drone use protecting wildlife. Penalties for unauthorized flights include equipment confiscation and fines. Beach flights require maintaining distance from people and respecting privacy. Research specific location restrictions before attempting drone photography and obtain necessary permissions from authorities and property owners.
What camera settings work best for Rio’s bright sunlight?
Rio’s intense tropical sun requires camera settings managing extreme contrast. Shoot RAW format preserving maximum dynamic range. Use matrix/evaluative metering balancing overall exposure though consider spot metering for specific subjects in mixed lighting. Aperture priority mode (f/8-f/11) provides depth of field for landscapes while allowing shutter speed adjustment for proper exposure. ISO 100-400 maintains image quality while higher values (800-3200) support faster shutter speeds for action or low light under forest canopy. Exposure compensation -0.3 to -0.7 EV prevents blown highlights in bright sky allowing shadow recovery during post-processing. Highlight warning display identifies overexposed areas requiring exposure adjustment.
How do you protect camera equipment in humid coastal conditions?
Salt air and humidity threaten camera equipment requiring protective measures. Store equipment in sealed bags with silica gel desiccant absorbing moisture preventing fungus growth on lenses and sensor damage from humidity. Remove equipment from bags allowing air circulation after returning from beach preventing trapped moisture accumulation. Clean equipment daily removing salt residue with dry microfiber cloth paying attention to lens front element, viewfinder, and camera body crevices. Avoid lens changes on beach where salt spray and sand enter camera body. Use weather-sealed cameras and lenses providing gasket protection against moisture and dust intrusion. Insurance coverage protects against salt damage or theft.
What are the best months for clear photography conditions?
Winter months (July-August) deliver clearest atmospheric conditions with minimal rainfall, lower humidity, stable weather patterns, and excellent visibility for mountain and ocean photography. Cooler temperatures (18-25°C) provide comfortable shooting conditions without intense heat exhaustion. Shoulder seasons (April-June, September-November) offer good clarity with occasional rain increasing toward December. Summer months (December-March) bring frequent afternoon clouds, higher humidity creating haze, and thunderstorms though morning conditions often remain clear. Weather forecasting monitors atmospheric conditions adjusting photography plans accordingly. Air quality improves after rain showers temporarily clearing atmospheric haze.
Can you photograph inside churches and museums?
Photography policies vary by institution with some churches and museums permitting photography without flash while others prohibit all photography protecting artworks or religious sanctity. Metropolitan Cathedral, Confeitaria Colombo, and most colonial churches allow respectful photography without flash or tripods. Museums typically prohibit photography of specific artworks or entire collections though photography rules display at entrances. Request permission when uncertain rather than assuming photography acceptance. Turn off camera sounds respecting quiet atmosphere. Avoid flash damaging sensitive artworks or disrupting services. Respect signs prohibiting photography even when enforcement appears lax.
How do you approach street photography in Rio?
Rio street photography balances candid documentation with cultural sensitivity and legal considerations. Brazil’s laws generally permit photography in public spaces for editorial and personal use though commercial applications may require model releases. Cultural norms prefer respectful approach seeking permission for close portraits while distant candid scenes remain acceptable. Smile, gesture toward camera, and request permission with “Posso tirar uma foto?” (Can I take a photo?). Many Cariocas enjoy being photographed while others decline requiring respect for their preference. Avoid photographing children without parent permission. Focus on scenes, architecture, and activities rather than individuals reducing privacy concerns. Candid photography captures authentic moments though ethical practice considers subject dignity and reasonable privacy expectations.
What challenges does Rio present for night photography?
Night photography in Rio requires balancing artistic opportunities with safety concerns. Illuminated landmarks including Cristo Redentor, Sugarloaf, and beachfront create beautiful nightscapes though accessing viewpoints after dark requires taxis rather than walking or public transportation. High-crime areas become more dangerous at night restricting photography to well-trafficked tourist zones. Tripod setup draws attention to expensive equipment increasing theft risk. Work with partners providing security observation. Shoot decisively with clear objectives rather than prolonged sessions. Camera settings require long exposures (4-30 seconds) at low ISO (100-400) and moderate apertures (f/8-f/11) maintaining image quality. Higher ISO (1600-6400) enables handheld shooting though increases noise reducing image quality. City lights create mixed color temperatures requiring white balance adjustment or RAW processing flexibility.
Are photography tours worth the investment?
Photography tours provide local knowledge, safe access to locations, cultural context, and technical instruction valuable for serious photographers maximizing Rio visit productivity. Reputable operators lead photographers to optimal viewpoints at ideal times, navigate safety concerns in challenging areas like favelas, provide historical and cultural context enriching photographic storytelling, and offer technical advice improving camera skills. Costs range $180-400 per day for group tours, $400-800 for private instruction. Tours suit photographers prioritizing serious work over casual snapshots, visiting during limited timeframes requiring efficiency, lacking local knowledge about locations and timing, or uncomfortable navigating safety concerns independently. Independent photographers may achieve similar results with research and planning though miss insights from local expertise.
What backup equipment should you bring to Rio?
Equipment redundancy protects against failures ruining trip photography opportunities. Backup camera body prevents complete failure if primary body malfunctions. Memory card backup with multiple smaller cards (32-64GB) versus single large card prevents total loss if card fails. Battery backup provides power security with 3-4 batteries supporting full day shooting. Lens cleaning kit maintains image quality managing dust, salt spray, and moisture. Cable releases backup includes both wired and wireless options. Laptop or tablet for image backup protects against memory card loss or failure. External hard drives create redundant storage. These backups add weight and cost though protect against equipment failures that would otherwise compromise entire trip documentation.
How do you handle photography in rainy conditions?
Rain creates technical challenges and creative opportunities requiring protective equipment and adapted techniques. Weather-sealed cameras and lenses resist moisture though rain covers provide additional protection during heavy downpours. Clear plastic bags with hole for lens work as emergency rain covers. Lens hoods prevent water droplets on front element. Microfiber cloths dry equipment between shots. Overcast rain conditions provide beautiful even lighting without harsh shadows ideal for architectural photography and intimate environmental portraits. Wet surfaces create reflections adding visual interest to street photography. Reduce ISO maintaining image quality in dimmer light. Use faster apertures or slower shutter speeds compensating for reduced light. Rain gear including jacket and waterproof bag protects photographer and equipment enabling shooting during conditions most tourists avoid creating unique imagery.