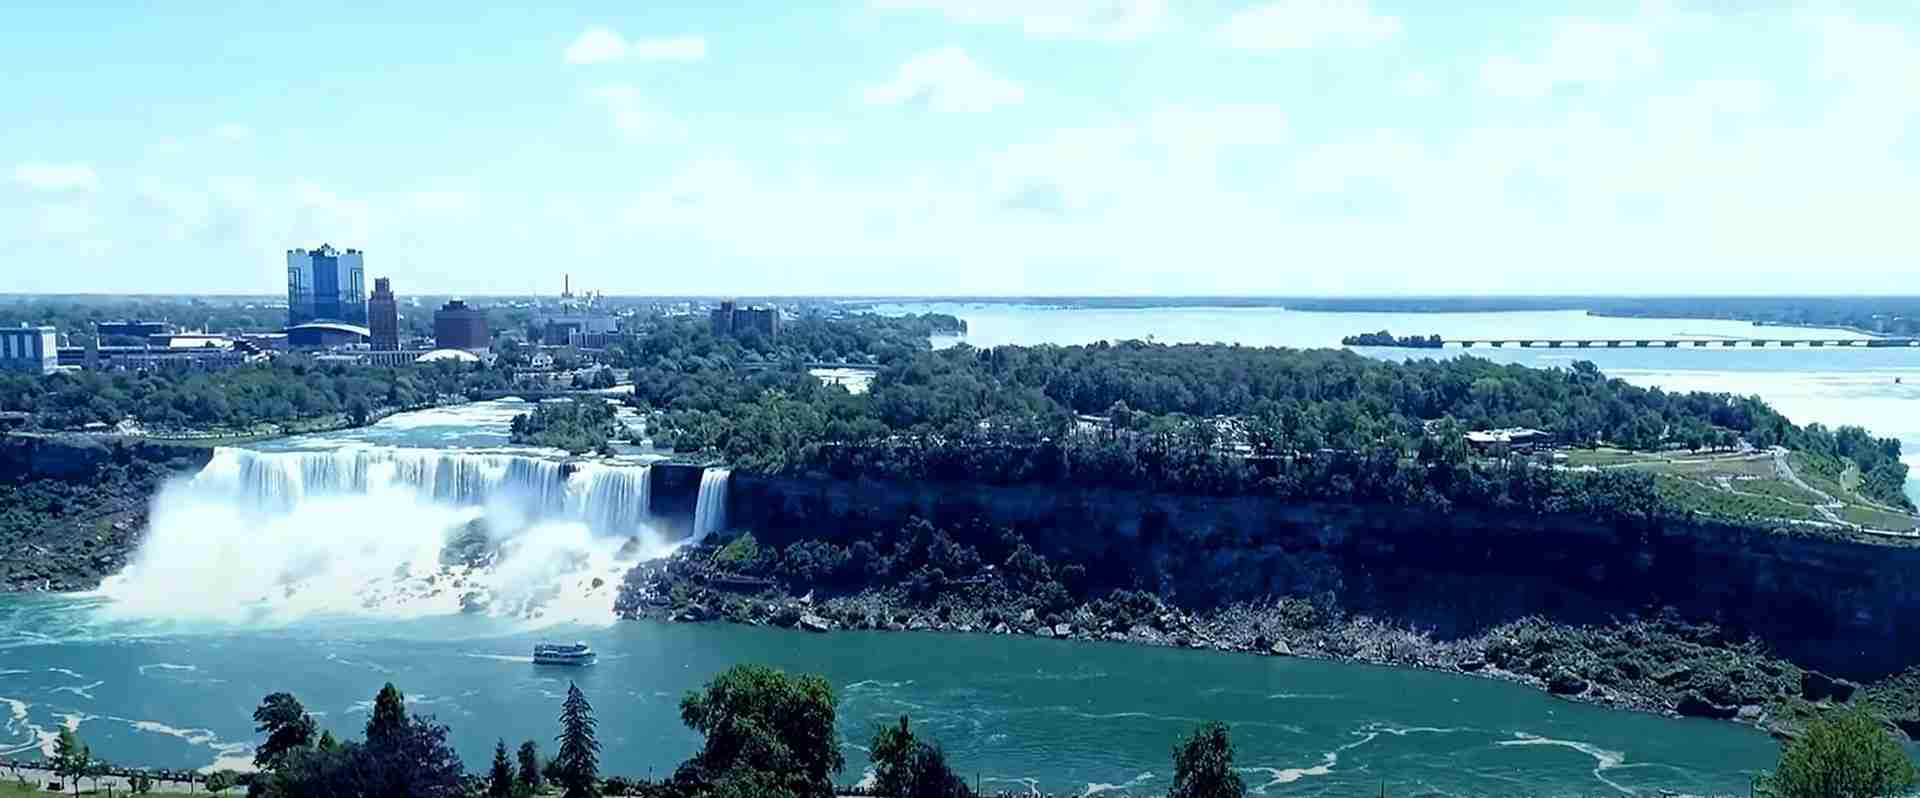
Niagara Falls Photography Guide: Master Techniques & Best Spots
Niagara Falls presents photographers with an extraordinary challenge: capturing the raw power and ethereal beauty of 750,000 gallons of water cascading over cliffs every second. The constant mist, dramatic lighting conditions, and ever-changing atmospheric effects create a dynamic subject that rewards technical mastery and artistic vision. This guide provides comprehensive techniques for photographing Niagara Falls across all seasons, lighting conditions, and skill levels.
Key Takeaways
- Shutter speeds between 1/4 to 4 seconds create the classic silky water effect while maintaining detail in the mist and surrounding landscape
- Golden hour (sunrise and sunset) provides dramatic lighting with less crowd interference, offering warm tones that contrast beautifully with the blue-green water
- Canadian side viewpoints deliver superior compositions with frontal perspectives of all three falls, while American side offers intimate close-up opportunities
- Winter photography presents unique crystalline formations and ice bridges, requiring specialized cold-weather equipment protection and faster shutter speeds
- Neutral density filters enable long exposures during bright daylight, essential for achieving motion blur effects at optimal viewing times
- Mist management requires protective gear for cameras and strategic positioning relative to wind direction to capture clear shots while maintaining dramatic atmosphere
Introduction: Photographing One of Nature’s Greatest Spectacles
The falls’ unique characteristics—the immense volume of water, the perpetual mist cloud rising hundreds of feet, the interplay of natural and artificial lighting—demand specific photographic approaches. Understanding these elements separates amateur snapshots from professional-quality images that truly convey the falls’ majesty. Whether shooting with professional equipment or modern smartphones, the principles remain consistent: proper exposure management, strategic positioning, and creative composition.
People Also Ask About Niagara Falls Photography
What camera settings work best for photographing Niagara Falls?
Optimal camera settings depend on your creative vision. For the classic silky water effect, use shutter speeds between 1/4 to 4 seconds with apertures of f/11 to f/16 for maximum depth of field. ISO settings remain at 100-200 to minimize noise. For dramatic frozen action shots capturing individual water droplets, use shutter speeds of 1/500 second or faster with wider apertures of f/5.6 to f/8. Manual mode provides complete control over exposure, essential when dealing with the bright mist against darker surrounding rocks.
When is the best lighting for Niagara Falls photography?
Golden hour—the first hour after sunrise and the last hour before sunset—provides the most dramatic natural lighting. Morning light at 6-7 AM illuminates the Canadian Horseshoe Falls from the east, creating warm tones across the water. Evening light at 7-8 PM during summer bathes the American Falls in golden hues. Overcast days eliminate harsh shadows and provide even lighting across the entire scene, ideal for capturing detail in both highlights and shadows. Blue hour immediately after sunset enables stunning long exposures with the illumination system activated.
What equipment do I need for professional Niagara Falls photography?
Essential equipment includes a sturdy tripod capable of withstanding constant vibration from the falls’ power, a camera with manual controls, wide-angle lenses (16-35mm range) for capturing the full breadth, and telephoto lenses (70-200mm) for isolating specific sections. Neutral density filters in 3-stop and 6-stop densities enable long exposures during daylight. Lens cleaning cloths and protective rain covers manage the omnipresent mist. Circular polarizing filters reduce glare on water surfaces and enhance rainbow visibility. Remote shutter releases prevent camera shake during long exposures.
How do you photograph Niagara Falls in winter conditions?
Winter photography requires specialized preparation. Camera batteries drain rapidly in sub-zero temperatures—carry multiple spares in inner pockets. Condensation forms when moving equipment between extreme temperatures; place cameras in sealed bags before transitioning environments. Ice formations on observation decks create slippery conditions requiring stable tripod placement. Faster shutter speeds (1/60 to 1/250 second) freeze the combination of flowing water and windblown ice particles. The reduced mist in freezing conditions allows clearer long-distance shots. Sunrise photography captures the ice formations with dramatic side-lighting that emphasizes texture.
Extended multi-day tours – 5+ days
Featured Niagara Falls Multi-Day Tour Packages
2 days
Niagara Falls and Outlet Shopping
- ✓ Comprehensive Niagara Falls tour
- ✓ Expert local guides included
- ✓ All accommodation arranged
- ✓ Transportation provided

5 days
Ultimate Niagara & East Coast Highlights – 5 days
- ✓ Comprehensive Niagara Falls tour
- ✓ Expert local guides included
- ✓ All accommodation arranged
- ✓ Transportation provided
7 days
Toronto, Niagara and Chicago (6 destinations)
- ✓ Comprehensive Niagara Falls tour
- ✓ Expert local guides included
- ✓ All accommodation arranged
- ✓ Transportation provided

6 days
Toronto to New York City and Nature Adventure – 6 days
- ✓ Comprehensive Niagara Falls tour
- ✓ Expert local guides included
- ✓ All accommodation arranged
- ✓ Transportation provided
Multi-day tour packages powered by TourRadar. Prices and availability subject to change.
Essential Camera Equipment and Settings
Camera Body Requirements
Full-frame or APS-C sensor cameras with manual exposure controls provide optimal results. Weather-sealed bodies offer superior protection against the constant moisture, though non-sealed cameras function effectively with proper rain covers. High dynamic range capabilities prove essential for managing the extreme contrast between bright mist and dark rock faces. Cameras with in-body image stabilization assist when shooting handheld during crowded conditions or when rapid composition changes are necessary.
Mirrorless cameras offer advantages in weight and electronic viewfinders that accurately preview exposure in challenging lighting. DSLR optical viewfinders excel in bright sunlight when electronic screens become difficult to read. Both systems deliver professional results; personal preference and existing lens investments determine the optimal choice. Entry-level cameras produce excellent results when paired with quality lenses and proper technique.
Lens Selection Strategy
Wide-angle lenses between 16-35mm capture the falls’ complete scope from nearby viewpoints. These focal lengths include surrounding landscape elements that provide scale and context. The Table Rock viewpoint on the Canadian side particularly benefits from ultra-wide perspectives that encompass the entire Horseshoe Falls crest in a single frame. Rectilinear wide-angles maintain straight lines in the horizon and vertical elements, crucial for architectural elements like observation towers.
Standard zoom lenses covering 24-70mm serve as versatile all-purpose tools. The moderate wide-angle captures group compositions while the short telephoto end isolates specific sections. These lenses excel for documentary-style photography documenting the visitor experience alongside the natural spectacle. The constant f/2.8 aperture enables shooting in lower light conditions during overcast weather or blue hour sessions.
Telephoto lenses from 70-200mm enable intimate compositions of water patterns, rainbow details, and distant viewpoints. From the American side observation platforms, 200mm focal lengths isolate the Horseshoe Falls’ curved crest against sky backgrounds. These compressed perspectives emphasize the falls’ height and power. Telephoto lenses also prove valuable for wildlife photography of gulls and other birds attracted to the falls’ ecosystem.
Critical Filter Systems
Neutral density filters enable long exposures during bright daylight hours. Three-stop ND filters extend shutter speeds from 1/125 to 1 second, creating subtle motion blur while maintaining some texture in the water. Six-stop ND filters push exposures to 4-8 seconds, producing the classic silky flow effect. Ten-stop ND filters enable exposures of 30 seconds or longer, transforming the water into ethereal fog and eliminating crowds from compositions through motion blur.
Circular polarizing filters reduce reflections on water surfaces and enhance color saturation in both water and sky. Rotation to the optimal angle darkens blue skies and increases rainbow visibility by reducing scattered light. Polarizers prove particularly effective during midday when harsh sunlight creates glare across water surfaces. The 1-2 stop light reduction also assists in achieving slower shutter speeds without excessive ND filtration.
Graduated neutral density filters balance exposure between bright sky and darker foreground elements. Soft-edge graduates blend naturally in compositions where the horizon appears irregular, common when including mist plumes. These filters enable single-exposure captures that preserve detail in both highlights and shadows, reducing post-processing requirements and maintaining natural tonal relationships.
Mastering Technical Settings
Shutter Speed for Water Motion
Shutter speed selection fundamentally determines the water’s appearance. Speeds faster than 1/500 second freeze individual water droplets, creating dramatic action shots that emphasize the falls’ violent power. At 1/250 second, water shows motion but maintains distinct streams and splash patterns. Between 1/60 and 1/125 second creates a balanced effect with visible motion blur while preserving water texture and detail.
The classic long-exposure aesthetic emerges between 1/4 and 4 seconds. One-second exposures create smooth flow patterns while maintaining distinguishable water volumes. Four-second exposures produce the signature silky appearance with mist rendered as soft clouds. Exposures beyond 10 seconds transform water into pure white ethereal flows, though some photographers find this effect overly processed.
Experiment across the full range to develop personal aesthetic preferences. Morning and evening light enables longer exposures without filters, while midday requires significant ND filtration to achieve even moderate shutter speeds. The constant water flow ensures every exposure captures unique patterns, encouraging multiple takes at each setting to select optimal results.
Aperture Selection for Depth of Field
Apertures between f/11 and f/16 provide maximum depth of field, ensuring sharp focus from foreground rocks to distant horizon elements. These narrow apertures prove essential when including near-distance elements like railings or vegetation as compositional frames. Most lenses deliver peak sharpness at f/8 to f/11, though the depth of field advantages of f/16 outweigh the minimal diffraction-induced softness.
Wide apertures of f/2.8 to f/5.6 enable shooting in lower light conditions without raising ISO values. These settings work effectively for telephoto isolation shots where shallow depth of field draws attention to specific water patterns or distant viewpoint silhouettes. The narrow depth of field at wide apertures creates separation between subject and background, though this technique requires precise focus placement.
Hyperfocal distance focusing maximizes depth of field efficiency. Focus approximately one-third into the scene rather than at infinity or the nearest element. This technique ensures acceptable sharpness throughout the frame while maintaining optimal resolution in critical zones. Most modern cameras include focus peaking or magnified view options that assist in achieving precise focus placement.
ISO Management in Varying Light
Base ISO values of 100-200 produce optimal image quality with maximum dynamic range and minimal noise. Long exposures at base ISO preserve detail in shadow areas, critical when photographing in the mixed lighting of dawn or dusk. The tripod-mounted shooting that Niagara Falls photography demands enables these low ISO values across most shooting conditions.
Overcast days require moderate ISO increases to 400-800 when shooting handheld or when faster shutter speeds are necessary to freeze visitor movement in documentary compositions. Modern cameras handle these moderate values with negligible noise impact, particularly in well-exposed images. Expose slightly to the right of the histogram to maximize data capture, then reduce highlights in post-processing if necessary.
Night photography of the illuminated falls requires ISO values between 1600-3200 depending on desired shutter speeds and available artificial lighting. The colored illumination system provides sufficient light for exposures of 1-4 seconds at f/8 and ISO 1600. Higher ISO values enable handheld shooting during evening illumination, though tripod-mounted exposures at lower ISO values produce superior quality results.
Best Viewpoints and Vantage Points
Canadian Side Premier Locations
Table Rock Centre provides the most dramatic Horseshoe Falls perspective, positioning photographers directly at the crest with unobstructed views across the 2,600-foot curved edge. The elevated platform enables compositions encompassing the entire falls width with the Niagara River gorge extending into the background. This location excels during sunrise when eastern light illuminates the falls’ face, and during blue hour when the illumination system activates. Arrive 30-45 minutes before sunrise to secure optimal positioning along the railing.
Queen Victoria Park offers varied perspectives along a mile-long parkway parallel to the river gorge. The northern sections near Murray Hill provide elevated views capturing both the Canadian Horseshoe Falls and American Falls in single wide-angle compositions. Southern areas near the Horseshoe Falls enable low-angle shots that emphasize the water’s power as it crashes into the basin. The manicured gardens provide foreground interest during spring and summer bloom periods.
Journey Behind the Falls tunnels position photographers at the base of the Horseshoe Falls, offering unique perspectives looking upward through the water curtain. The protected viewing portals enable long exposures without mist interference, capturing the falls’ underside structure and the 158-foot drop’s full height. Side-lighting during midday creates dramatic effects as sunlight penetrates the water wall. These viewpoints require purchased admission but deliver perspectives unavailable from surface vantage points.
American Side Strategic Positions
Prospect Point Observation Tower elevates photographers 200 feet above the falls’ base, providing panoramic perspectives across the entire falls complex. The enclosed viewing area protects cameras from mist while floor-to-ceiling windows enable unobstructed compositions. This location excels for overview shots documenting the falls’ relationship to surrounding development and landscape. The elevation minimizes foreground obstructions common at ground-level viewpoints.
Terrapin Point extends photographers directly beside the Horseshoe Falls’ edge at the dividing line between American and Canadian territories. This intimate perspective emphasizes the water’s volume and velocity as it surges toward the precipice. The location enables close-up compositions of water patterns and textures impossible from more distant viewpoints. Mist intensity at this location requires protective equipment but creates dramatic atmospheric effects when backlit by afternoon sun.
Luna Island separates the American Falls from the smaller Bridal Veil Falls, positioning photographers between active waterfalls with unique perspectives on both. The narrow island enables compositions incorporating multiple water features in layered arrangements. This location proves particularly effective during lower water volumes when rock formations behind the falls become partially visible, adding geological interest to compositions.
Alternative Elevated Perspectives
Skylon Tower’s observation deck rises 775 feet above the falls, providing aerial perspectives that reveal the complete falls complex, river gorge, and surrounding urban development. Wide-angle lenses capture the entire scene while telephoto compression creates striking stacked compositions of falling water, mist, and distant Lake Ontario. The tower’s height enables shots above the mist layer, particularly effective during winter when reduced mist permits clearer long-distance visibility. Evening photography from this vantage point captures the illuminated falls against city lights.
Niagara Helicopters offers dynamic aerial photography opportunities from chartered flights circling the falls complex. These perspectives reveal geological formations invisible from ground viewpoints and capture the full scope of water flowing through the Niagara River system. Morning flights encounter optimal lighting with fewer tourists visible in ground compositions. The flights follow set routes that provide multiple angle opportunities over a 12-15 minute duration.
Seasonal Photography Opportunities
Spring Awakening Photography
March through May brings increased water flow as winter snow melts across the Great Lakes watershed. Volume increases of 20-30% above winter baseline create more dramatic water displays with enhanced mist production. The swollen river level submerges winter-exposed rock formations, focusing compositions purely on flowing water. Spring storms produce dramatic skies with variable cloud patterns that add atmospheric interest to compositions.
Early spring often features partial ice remnants along riverbanks and viewing platforms, providing foreground interest elements. The contrast between melting ice and powerful flowing water tells seasonal stories in single frames. Trees along the gorge edges show early leaf development, adding touches of green to predominantly gray and white winter palettes. Cherry blossoms and other spring flowers in Queen Victoria Park offer colorful foreground elements for wide-angle environmental portraits of the falls.
Summer Peak Conditions
June through August delivers maximum tourist activity but also provides extended golden hour periods with sunrise as early as 5:30 AM and sunset as late as 9 PM. The long days enable multiple shooting sessions at optimal light times. Summer storms produce dramatic weather photography opportunities with lightning, rainbow formations, and dynamic cloud movements. The full foliage along the gorge creates lush green frames for waterfall compositions.
Summer evening illumination programs extend from sunset until midnight, enabling blue hour photography transitioning into full night shots. The colored lighting system cycles through various hues, providing creative opportunities for different color palettes. Summer crowds require early arrival at premium viewpoints and patience when waiting for clear sight lines. Consider midweek visits to reduce crowd density in compositions.
Autumn Color Integration
September through November transforms surrounding forests with vibrant fall colors. The gorge’s deciduous trees display brilliant reds, oranges, and yellows that complement the blue-green water tones. Wide-angle compositions incorporating fall foliage create seasonal context while telephoto shots isolate color-framed waterfall sections. Peak foliage occurs in mid-October, attracting significant photographer crowds to premier viewpoints.
Autumn’s lower angle sunlight creates longer shadows and warmer tones throughout the day. Morning mist combines with fall colors for ethereal atmospheric effects. The reduced summer crowds enable easier access to optimal viewpoints, though weekend traffic remains significant during peak foliage periods. Overcast autumn days provide even lighting that enhances fall color saturation without harsh shadows.
Winter Wonderland Conditions
December through February presents unique ice formation photography. Mist freezes on surrounding vegetation, railings, and rock faces, creating crystalline sculptures that sparkle in sunlight. The falls themselves continue flowing, though reduced hydroelectric diversion increases winter flow rates for improved viewing. Ice bridges occasionally form at the falls’ base, creating rare photographic opportunities of visitors walking on frozen river surfaces.
Sub-zero temperatures reduce mist production, enabling clearer long-distance shots. The bare trees along the gorge simplify compositions, focusing attention on the falls without foliage distractions. Snow coverage creates high-contrast scenes with white landscapes emphasizing the blue-green water. Winter sunrise and sunset colors intensify in the clear, dry air, producing vivid orange and pink skies. Reduced tourist numbers enable longer shooting sessions at premium viewpoints without interference.
Lighting Techniques and Conditions
Golden Hour Mastery
The hour following sunrise bathes the Canadian Horseshoe Falls in warm directional light that emphasizes water texture and creates dimensional modeling across the falls’ curved face. Position on the Canadian side with the sun rising behind and to the left, illuminating the falls from a 45-degree angle. This side-lighting reveals water patterns while creating subtle shadows that add depth. Summer golden hour begins around 6 AM, while winter extends to 7:30-8 AM, offering more reasonable wake-up times.
Evening golden hour illuminates the American Falls and Bridal Veil Falls most effectively. Shooting from the American side positions the sun behind photographers, creating front-lighting that maximizes color saturation and rainbow opportunities. The warm light contrasts beautifully against the cool water tones. Summer sunset golden hour extends until 8:30-9 PM, enabling extended shooting sessions. Position near Prospect Point for optimal evening light angles.
Blue Hour Opportunities
The 20-30 minutes after sunset and before sunrise create magical blue hour lighting where natural sky glow combines with artificial illumination. The falls’ colored lighting system activates approximately 30 minutes after sunset, creating opportunities for blended natural and artificial light compositions. Longer exposures of 4-10 seconds balance the dimmer natural light with brighter illumination beams, creating otherworldly effects.
Pre-sunrise blue hour offers clear skies without the previous evening’s crowds. The illumination system typically remains active until sunrise, enabling peaceful shooting sessions. The deep blue sky provides rich color backgrounds that complement the warm illumination hues. This timing proves particularly effective during winter when sunrise occurs later and sleep schedules accommodate more easily.
Overcast Day Advantages
Cloudy skies act as natural diffusers, eliminating harsh shadows and reducing contrast between bright mist and dark rocks. This even lighting enables single-exposure captures that preserve detail across the entire tonal range. Colors appear more saturated under overcast conditions as the diffused light reduces glare and reflection. Rainbow formation becomes less likely, but the overall scene gains a moody, dramatic atmosphere.
Overcast conditions prove ideal for long-exposure photography throughout the day. The reduced light enables longer shutter speeds without extensive ND filtration. Four-second exposures at f/16 and ISO 100 become achievable with only 3-stop ND filters. The flat lighting also benefits post-processing flexibility, as the compressed tonal range provides more latitude for adjustments without posterization or noise.
Backlighting and Silhouettes
Position with the sun behind the falls to create dramatic backlit effects where mist glows and water appears translucent. This lighting proves particularly effective during midday when the high sun angle creates even backlighting across the entire falls height. The technique works best from the Canadian side looking toward the American Falls, where the morning sun backlights the entire scene. Expose for the highlights to create silhouetted foreground elements and emphasize the glowing mist.
Rainbow photography benefits from strategic backlighting positioning. Stand with the sun behind you at approximately 42 degrees above the horizon for optimal rainbow formation in the mist. Morning light between 9-11 AM and afternoon light between 2-4 PM create the most reliable rainbow conditions. Move along the viewing platforms to position the rainbow against darker backgrounds—water or gorge walls rather than bright sky—for maximum visibility.
Composition Techniques and Strategies
Rule of Thirds Application
Position the falls’ crest along the upper third line to create balanced compositions with sufficient sky and foreground elements. This placement emphasizes the falls’ height while including contextual environmental elements. Place the most dramatic water flow sections at the intersection points where third lines meet, drawing viewers’ eyes to these powerful areas. Horizontal compositions work effectively for capturing the full breadth of the Horseshoe Falls, while vertical formats emphasize the American Falls’ height.
Breaking the rule of thirds creates impact in specific situations. Center-weighted compositions work effectively when symmetry serves the artistic vision, such as shooting directly into the Horseshoe Falls’ curved center from Table Rock. Low-horizon compositions with the falls dominating the upper two-thirds emphasize scale and power, particularly effective when including visitors as scale references in the foreground.
Leading Lines and Visual Flow
The Niagara River’s flow creates natural leading lines that guide viewers’ eyes toward the falls. Compose to include sections of the river entering the frame, creating visual paths that lead to the main subject. The gorge walls provide strong diagonal lines that add energy and movement to static compositions. Railings and pathways at observation points serve as foreground leading elements that direct attention while providing human-scale context.
Use the water’s motion itself as a directional element. Position the frame to show water flowing into the composition from corners, creating dynamic movement. The mist rising from the falls’ base provides vertical leading elements that connect the falling water to the sky above. These vapor plumes prove particularly effective during backlit conditions when they glow and stand out clearly against darker backgrounds.
Framing Techniques
Natural framing elements add depth and context to falls compositions. Overhanging tree branches in Queen Victoria Park create organic frames that direct attention while adding seasonal color. Architectural elements like observation tower windows or railing sections provide structured frames that emphasize the contrast between human-built environments and natural power. Ice formations during winter create unique crystalline frames that sparkle in direct sunlight.
Create layered compositions with multiple depth planes. Include foreground elements like rocks, railings, or visitors at the nearest plane, the falls itself at the middle plane, and sky or distant landscape at the far plane. This three-dimensional approach adds immersion and scale to two-dimensional images. Use narrow apertures to maintain sharpness across all three planes, ensuring each layer contributes to the overall composition.
Scale and Perspective
Include human figures to convey the falls’ immense scale. A single person standing at an observation railing provides immediate size reference that viewers instinctively understand. Position these scale references strategically rather than allowing random crowd placement to clutter compositions. Wait for moments when visitors occupy compositionally strong positions—along leading lines or at rule-of-thirds intersections.
The 158-foot drop of the Horseshoe Falls and 70-90 foot drops of the American and Bridal Veil Falls challenge photographers to convey vertical scale. Include full falls height from base to crest in vertical compositions, using wide-angle lenses to compress the scene. Telephoto shots from distant viewpoints emphasize height through compression effects that stack the falling water into narrow vertical bands.
Special Techniques and Creative Approaches
Night Illumination Photography
The colored illumination system transforms Niagara Falls into a different subject entirely after dark. The lighting cycles through various color combinations every 15 minutes, creating opportunities for diverse color palettes. Position camera settings for exposures between 1-4 seconds at f/8 and ISO 1600-3200. The artificial lighting provides sufficient illumination for handheld shooting, though tripod-mounted exposures at lower ISO values produce cleaner results.
Capture the moment when lighting colors shift, creating transitional effects with multiple hues simultaneously illuminating different fall sections. These in-between moments create unique color combinations unavailable during stable lighting phases. The illumination system intensifies during special events and holidays, with expanded color programs and higher intensity levels that enable shorter exposures or lower ISO settings.
Include surrounding city lights in wider compositions that contextualize the falls within the developed landscape. Long exposures blur moving clouds against static landscape elements, creating dreamlike atmospheres. The Skylon Tower’s illuminated structure provides recognizable landmark elements that orient viewers. Water surface reflections of colored lights add additional color elements in foreground river sections.
Panning and Motion Blur
Experiment with ultra-slow shutter speeds beyond traditional long-exposure ranges. Exposures of 30 seconds to several minutes, achieved through stacked ND filters or during twilight conditions, transform the falls into completely abstract forms. The water becomes pure white fog, and moving clouds streak across the sky in directional bands. This extreme approach creates artistic interpretations that emphasize the falls’ constant motion rather than precise representation.
Combine stationary tripod shots with intentional camera movement during exposure. Vertical pans following the water’s downward motion create impressionistic streaks that convey energy and movement. This technique requires shutter speeds around 1/4 second while moving the camera smoothly downward throughout the exposure. Horizontal pans across the falls’ width during 1-2 second exposures create flowing abstract bands of color and light.
Multiple Exposure Techniques
Create composite images that blend different shutter speeds in a single final image. Photograph the same composition twice—once with fast shutter freezing water detail, once with slow shutter creating motion blur. Blend these exposures in post-processing to create images showing both the water’s power and its ethereal flow. This technique provides creative control over which areas show motion versus frozen action.
Panoramic stitching extends beyond the limitations of single wide-angle frames. Shoot overlapping vertical frames across the falls’ entire breadth, then stitch in post-processing to create ultra-high resolution images that capture immense detail. This technique proves particularly effective from elevated viewpoints like the Skylon Tower where single frames cannot encompass the full scene at high resolution. Use consistent manual exposure across all frames to ensure even blending.
Infrared Photography
Infrared-converted cameras or infrared filters create surreal false-color images where flowing water appears dark while mist and clouds glow white. The technique works effectively during bright sunny conditions that typically prove challenging for standard photography. Foliage becomes brilliant white in infrared, creating high-contrast compositions during summer when conventional photography struggles with harsh midday light.
Infrared imaging requires specialized technique adjustments. Focus compensation proves necessary as infrared light focuses at different points than visible light. Most lenses include infrared focus marks, though digital focusing through live view eliminates this concern. Exposure times typically require 2-3 stops more light than visible-spectrum photography. Convert infrared images to black-and-white or apply false-color adjustments to create otherworldly artistic interpretations.
Weather and Atmospheric Conditions
Mist Management and Protection
The constant mist presents the greatest challenge to Niagara Falls photography. Waterproof camera covers or rain sleeves protect equipment while enabling access to controls and viewfinders. Position with wind direction behind you to minimize direct mist contact with the front lens element. Keep lens cleaning cloths readily accessible for quick cleaning between shots—mist accumulation on the lens occurs within 30-60 seconds at close viewpoints.
Strategic positioning relative to mist plumes maximizes shooting time. The mist rises vertically then drifts with prevailing winds, creating clear zones and heavy mist zones. Observe the mist pattern before setting up equipment, positioning in areas with lighter mist density. Accept that some mist will always impact close viewpoint photography; incorporate it as an atmospheric element rather than fighting its presence.
Silica gel packets in camera bags absorb moisture before it damages electronics. Store equipment in sealed bags when not actively shooting to prevent condensation formation. Bring spare batteries as cold, damp conditions accelerate power drain. After shooting, place equipment in sealed bags before entering warm indoor spaces to prevent condensation damage. Allow gradual temperature equalization over 30-60 minutes before removing equipment from protective bags.
Rainbow Photography Techniques
Rainbows appear reliably in Niagara Falls mist when sunlight strikes the water vapor at specific angles. The optimal viewing angle places the sun behind the photographer at approximately 42 degrees above the horizon. This geometry creates the most vivid primary rainbows. Secondary rainbows appear at 51 degrees with reversed color order, though these fainter arcs require clear atmospheric conditions to photograph effectively.
Circular polarizing filters enhance rainbow visibility by reducing scattered light and increasing color saturation. Rotate the polarizer while viewing the rainbow to find the optimal angle—usually perpendicular to the sun’s direction. Be cautious not to over-polarize, which can eliminate the rainbow entirely. Expose for the rainbow rather than the overall scene, accepting that surrounding areas may appear darker. Bracket exposures to ensure optimal rainbow capture while maintaining detail in other compositional elements.
Morning light between 9-11 AM and afternoon light between 2-4 PM creates the most reliable rainbow conditions. The sun’s angle during these periods produces rainbows positioned against the falls’ darker rock faces rather than bright sky backgrounds. This positioning maximizes rainbow visibility and color intensity. Arrive early to scout rainbow positions, as they shift with sun angle and wind direction throughout the day.
Storm and Dramatic Weather
Storm systems create dramatic photography opportunities with dark clouds, lightning, and powerful atmospheric effects. Monitor weather forecasts for approaching storm fronts. Photograph during the leading edge when dramatic clouds arrive but heavy rain has not yet begun. The contrast between dark storm clouds and the white water creates powerful high-impact compositions. Use graduated ND filters to balance exposure between bright falls and dark sky.
Lightning photography requires long exposures that capture multiple strikes. Set shutter speeds of 15-30 seconds at narrow apertures around f/16. Use a remote trigger to fire exposures continuously during active lightning periods. The technique captures whatever lightning occurs during the exposure window. Position compositions to include both the falls and sky where lightning appears, creating layered images of natural power. Safety remains paramount—shoot from protected observation areas during active storms.
Post-Processing Workflow
RAW Processing Fundamentals
Shoot in RAW format exclusively for maximum post-processing flexibility. The extreme contrast between bright mist and dark rocks requires the expanded dynamic range that RAW files provide. Begin processing by adjusting white balance to neutralize color casts introduced by mist and spray. The falls’ natural blue-green tones serve as reference points for accurate color. Slight warming often enhances the appearance during golden hour shooting, while cooling creates dramatic effects during blue hour.
Expose slightly to the right during capture to maximize shadow detail, then recover highlights in post-processing. The goal maintains detail in both the brightest mist areas and darkest rock faces. Use highlight recovery tools conservatively to avoid creating flat, lifeless bright areas. Shadow lifting reveals detail in foreground elements and rock faces without introducing excessive noise when shooting at base ISO.
Selective Adjustments and Local Edits
Apply graduated filters to balance exposure between sky and foreground sections. Digital graduated filters provide more flexibility than physical filters, allowing asymmetrical applications that follow irregular horizon lines. Strengthen sky color and detail without affecting falls exposure through careful gradient positioning and feathering.
Radial filters highlight specific falls sections or water pattern areas. Brighten and sharpen key focal areas while leaving surrounding regions slightly darker to direct viewer attention. Create multiple radial filters with subtle adjustments rather than single dramatic edits that appear obvious. The goal guides viewers naturally through the composition rather than creating jarring transitions.
Adjustment brushes enable precise local corrections. Brighten individual rainbow sections to enhance visibility. Darken background areas that compete with the main subject. Increase clarity and texture in water patterns to emphasize motion and power. Reduce clarity in mist areas to maintain their soft, ethereal quality. These targeted adjustments create images that feel natural while emphasizing photographic intentions.
Color Grading and Mood Enhancement
Enhance the natural blue-green water tones through selective color adjustments. Increase saturation moderately in aqua and cyan ranges to intensify water color without affecting skin tones or other elements. Shift hues slightly toward blue to create cooler, more dramatic effects, or toward green to emphasize the natural mineral content that creates the water’s characteristic color.
Golden hour images benefit from slight warming in midtones while maintaining cooler shadows for depth and dimension. This split toning creates the sought-after golden hour glow while preserving the water’s cool tones. Blue hour images require opposite treatment—cooling midtones while warming shadows slightly prevents images from appearing too cold and uninviting.
Contrast adjustments affect mood dramatically. Increase contrast moderately to enhance drama and impact during storm photography or night illumination scenes. Reduce contrast slightly during overcast conditions to maintain the soft, ethereal quality of diffused light. Use tone curve adjustments for precise control over specific tonal ranges, lifting shadow detail while controlling highlight rolloff.
Equipment Care and Maintenance
Moisture Protection Strategies
Invest in quality waterproof camera covers designed for DSLR and mirrorless cameras. These covers provide full protection while maintaining access to essential controls. Less expensive disposable rain sleeves offer adequate protection for shorter shooting sessions. Keep multiple cleaning cloths readily accessible—microfiber cloths for lenses, cotton cloths for camera bodies and filters.
Create a moisture-management system for camera bags. Line bags with waterproof materials and include multiple silica gel packets that absorb ambient moisture. Store equipment in sealed bags within backpacks when moving between locations. Never leave equipment in vehicle trunks overnight where temperature fluctuations create condensation. Bring equipment inside climate-controlled accommodations for overnight storage.
Lens Cleaning Protocol
Clean lens elements frequently during Niagara Falls photography sessions. Mist deposits create water spots that appear in every image, particularly visible in bright sky areas. Use proper cleaning sequence: blow away loose particles with a bulb blower, brush remaining debris with a lens brush, apply lens cleaning solution to a microfiber cloth (never directly to the lens), wipe in circular motions from center outward.
Protect the front lens element with clear UV or protective filters that absorb mist damage rather than exposing expensive lens elements. Clean these protective filters aggressively with less concern than direct lens element cleaning. Replace protective filters if scratching occurs from repeated cleaning under mist conditions. Consider maintaining multiple protective filters to quickly swap when one becomes excessively marked.
Battery Performance in Extreme Conditions
Cold weather dramatically reduces battery performance. Carry 3-4 spare batteries for full-day winter shooting sessions where single batteries might last 30 minutes in sub-zero conditions. Store spare batteries in inner jacket pockets where body heat maintains temperature. Swap batteries when low rather than waiting for complete depletion—partially drained batteries warm faster than fully depleted ones.
Humidity affects battery contacts. Clean battery contacts periodically with isopropyl alcohol and lint-free cloths. Dry batteries completely before installation if exposed to mist. Store batteries in sealed containers with silica gel packets when not in use. Consider battery grips that accommodate two batteries, extending shooting time and providing backup redundancy.
Smartphone Photography Excellence
Maximizing Phone Camera Capabilities
Modern smartphones deliver impressive Niagara Falls photography when used properly. Access manual controls through third-party camera apps that provide ISO, shutter speed, and focus control. Lower ISO to minimum (50-100) for optimal quality. Use longer exposures of 1-4 seconds for motion blur effects, though most phones max out at 30-second exposures in specific modes.
Phone cameras excel in bright conditions but struggle with dynamic range in mixed lighting. Use HDR modes conservatively—they work effectively during overcast conditions but create artifacts during long exposures with moving water. Disable HDR for long-exposure photography. Focus manually by tapping the screen, then locking focus/exposure to prevent constant readjustment during composition refinement.
Phone-Specific Accessories
Invest in quality smartphone tripod adapters that provide stable mounting for long exposures. Many adapters include cold shoe mounts for external lights or microphones, though these remain less critical for pure photography. Waterproof phone cases prove essential given constant mist exposure. Full waterproof cases enable underwater housing-style protection at viewpoints with heaviest mist.
External lenses expand smartphone creative possibilities. Wide-angle adapters capture more of the falls in single frames from close viewpoints. Telephoto adapters enable isolation shots of distant details. Ensure adapter lenses include quality glass rather than cheap plastic elements that degrade image quality. Clean adapter lenses as frequently as the phone’s native lens given identical mist exposure.
Advanced Planning and Logistics
Scouting and Location Research
Study existing Niagara Falls photography extensively before visiting. Analyze compositions to understand vantage points, lighting conditions, and timing. Use Google Maps satellite view and street view to preview viewpoint access, positioning, and background elements. Note the sun’s arc across the sky using sun-tracking apps to predict lighting angles at specific times and seasons.
Visit premier viewpoints at multiple times during initial days to observe how lighting changes throughout the day. Note where rainbows appear, when mist becomes manageable, and when crowds peak. This scouting investment enables focused shooting during optimal conditions rather than hoping to discover them randomly. Create shot lists that pair specific compositions with optimal timing windows.
Crowd Management Strategies
Arrive at premier viewpoints 45-60 minutes before sunrise to secure optimal positions before crowds arrive. Summer weekend mornings bring photographers competing for limited space at Table Rock and Prospect Point. Midweek visits reduce competition significantly. Consider visiting during shoulder seasons (May or September) when weather remains favorable but summer peak crowds diminish.
Use long exposures strategically to eliminate crowds through motion blur. Exposures of 30+ seconds render moving people as ghostly transparent figures or remove them entirely. This technique works effectively during moderate crowd conditions but proves inadequate during peak periods when people remain stationary. Alternatively, embrace crowds as compositional elements that convey the falls’ popularity and provide human scale.
Weather Monitoring and Timing
Monitor detailed weather forecasts from multiple sources in the days preceding photography sessions. Satellite imagery reveals cloud pattern movements that help predict clear periods. Radar data indicates approaching precipitation systems. Plan shooting schedules around forecast weather, preparing to shoot during predicted clear periods while having backup indoor activities during poor conditions.
Understand microclimates around Niagara Falls. Conditions at the falls often differ from regional forecasts due to the massive water volume’s localized effects. The area creates its own weather patterns with persistent mist and humidity. Check falls-specific webcams that provide real-time condition views. These cameras enable morning assessment before leaving accommodations, ensuring worthwhile conditions exist before investing travel time.
FAQ Section
What is the single most important piece of equipment for Niagara Falls photography?
A sturdy tripod proves most essential for Niagara Falls photography. The long exposures required for silky water effects demand absolute stability, and the constant vibration from the falls’ power challenges tripod performance. Choose tripods rated for loads exceeding your camera setup’s weight, with leg locks that prevent creep during extended exposures. Carbon fiber tripods offer superior vibration dampening compared to aluminum alternatives.
Can I photograph Niagara Falls effectively with only a smartphone?
Modern smartphones produce excellent Niagara Falls photography when used within their capabilities. They excel during bright daylight conditions with wide-angle compositions. Limitations include reduced low-light performance, minimal telephoto reach, and restricted manual controls. Third-party camera apps unlock additional capabilities like RAW capture and extended exposure times. Smartphone photography delivers entirely satisfactory results for most viewers and social media applications.
What time of day produces the best photographs?
Golden hour—the first hour after sunrise and last hour before sunset—consistently produces the most dramatic natural lighting. Morning golden hour illuminates the Canadian Horseshoe Falls optimally, while evening light favors the American Falls. These periods provide warm directional light, reduced crowds, and enhanced rainbow opportunities. Blue hour immediately after sunset combines natural sky glow with the illumination system for unique creative effects.
Do I need special permits to photograph Niagara Falls?
General photography from public viewpoints requires no permits or permissions. Commercial photography for advertising, promotional materials, or client work may require permits from Niagara Parks Commission (Canadian side) or New York State Parks (American side). Wedding and portrait photography for personal use remains unrestricted. Drone photography faces significant restrictions in the airspace surrounding the falls for safety reasons.
How do I protect my camera equipment from the constant mist?
Use dedicated waterproof camera covers, rain sleeves, or weather-sealed camera bodies and lenses. Position with wind direction behind you to minimize direct mist exposure. Keep multiple microfiber cleaning cloths readily accessible for frequent lens cleaning. Store equipment in sealed bags with silica gel packets when not actively shooting. Work quickly when equipment is exposed, then return to protected positions for camera adjustments.
What focal length lens is most versatile for Niagara Falls?
A standard zoom lens covering 24-70mm provides the most versatility for general Niagara Falls photography. The moderate wide-angle encompasses complete falls views from nearby positions, while the short telephoto isolates specific sections and details. This focal range handles most compositional needs without constant lens changes in mist conditions. Ultra-wide lenses (16-35mm) and telephoto lenses (70-200mm) expand creative possibilities for specialized shots.
How do I achieve the classic silky water effect in photographs?
Use shutter speeds between 1/4 and 4 seconds combined with narrow apertures (f/11-f/16) for maximum depth of field. During bright daylight, add neutral density filters that reduce light entering the lens, enabling longer exposures without overexposure. Mount the camera on a sturdy tripod and use a remote shutter release to eliminate camera shake. The exact shutter speed becomes an artistic choice—1 second creates moderate smoothing while 4 seconds produces maximum silky effects.
What are the advantages of photographing from the Canadian versus American side?
The Canadian side provides superior overall views with frontal perspectives of all three falls. Table Rock Centre and Queen Victoria Park deliver the most iconic compositions. The American side offers intimate close-up opportunities and unique perspectives looking across to the Horseshoe Falls. Serious photographers visit both sides to capture the full range of compositions. Neither side proves definitively superior—each offers distinct creative opportunities.
When is the best season for Niagara Falls photography?
Each season provides unique advantages. Summer offers extended daylight hours, lush foliage, and maximum water flow but brings significant crowds. Fall delivers spectacular foliage colors and reduced crowds with favorable weather. Winter creates unique ice formations and crystalline effects with minimal tourists but challenging weather conditions. Spring presents increased water flow from snowmelt and emerging greenery. Personal preferences and tolerance for weather challenges determine optimal seasons.
How do I photograph rainbows at Niagara Falls?
Position with the sun behind you at approximately 42 degrees above the horizon—typically between 9-11 AM and 2-4 PM. Use circular polarizing filters rotated to enhance rainbow visibility without eliminating it completely. Expose for the rainbow rather than the overall scene, accepting darker surrounding areas. Position compositions to place rainbows against dark backgrounds like gorge walls or flowing water rather than bright sky. Rainbows appear most reliably on sunny days with strong mist production.