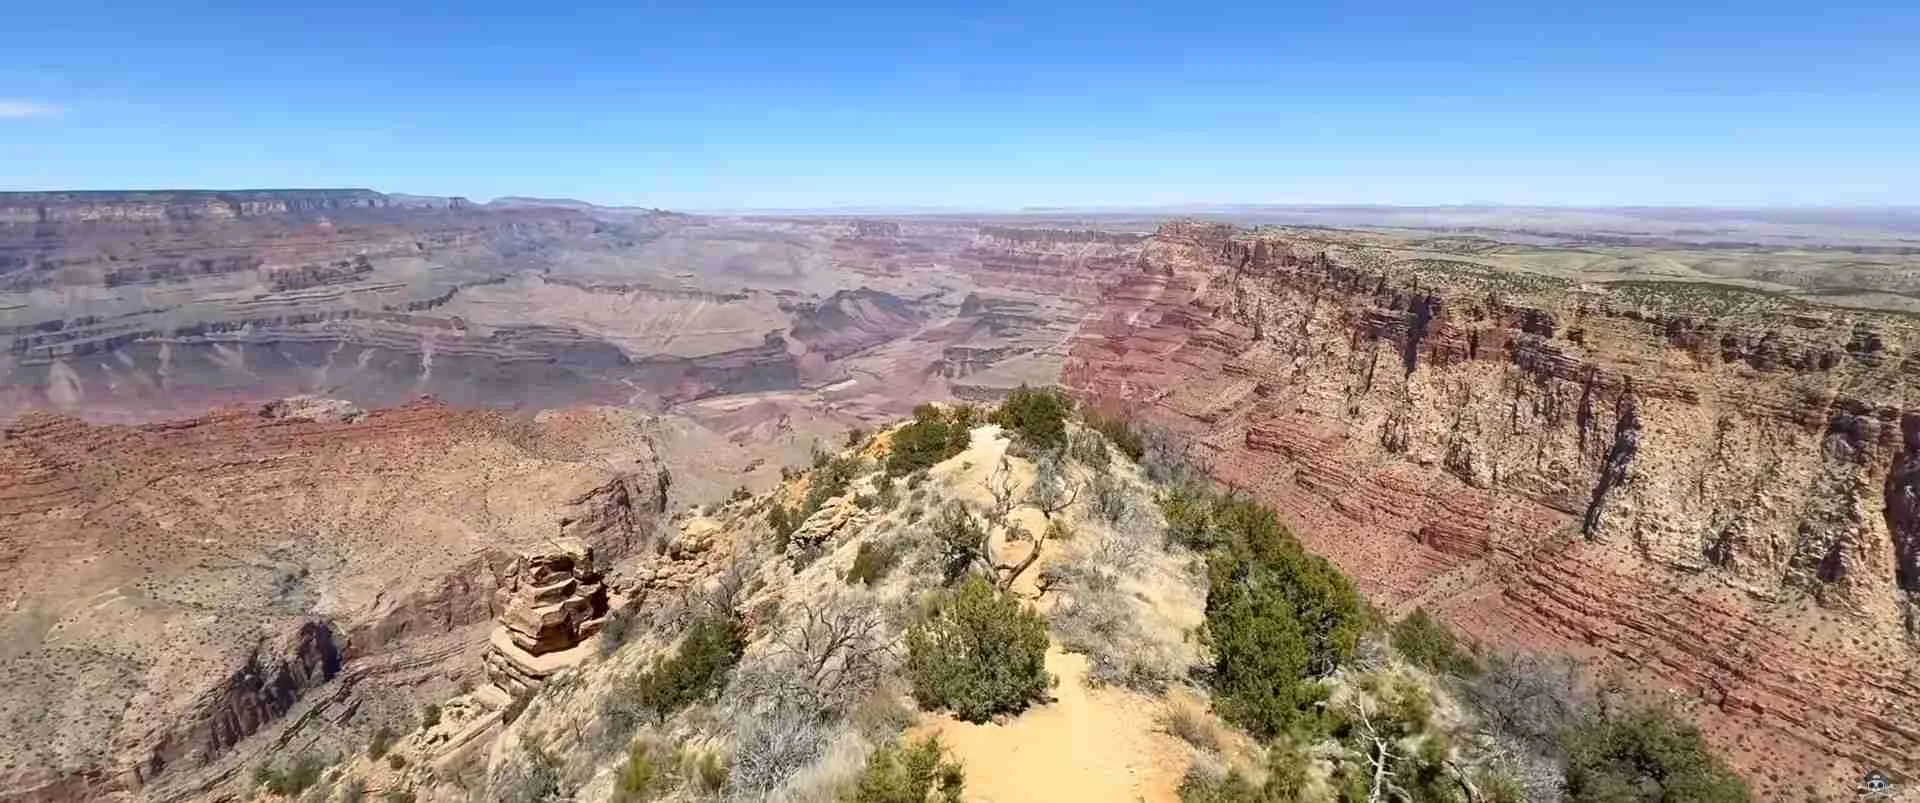
Grand Canyon Travel Tips 2026: Essential Planning & Safety Guide
The Grand Canyon rewards prepared visitors with transformative experiences while punishing poor planning through heat exhaustion, parking frustration, missed photo opportunities, and preventable discomfort. The difference between memorable adventure and disappointing ordeal often reduces to simple preparation—proper hydration, appropriate clothing, realistic itinerary planning, and basic safety knowledge. This comprehensive guide distills essential tips across categories including pre-trip planning, on-site navigation, safety protocols, photography strategies, and insider knowledge acquired through ranger experience and visitor feedback.
Key Takeaways:
- Arrive before 9:00 AM or after 3:00 PM to avoid parking congestion during peak season
- Carry one gallon of water per person for below-rim day hikes with electrolyte supplements
- Altitude at 7,000 feet causes shortness of breath—acclimate gradually and pace activities
- Download offline maps before arrival as cell service remains spotty throughout the park
- Layer clothing for 30-40°F daily temperature swings from morning cold to afternoon warmth
- Book accommodation and permits 4-13 months ahead depending on experience type and season
Introduction: Maximizing Your Grand Canyon Experience
Success at the Grand Canyon requires understanding that this remains genuine wilderness despite developed infrastructure. The canyon’s scale, elevation, temperature extremes, and remoteness create challenges absent from typical tourist destinations. Visitors arriving unprepared encounter dangerous heat, altitude effects, dehydration risks, and logistical complications. However, modest preparation eliminates these issues while unlocking experiences unavailable to casual tourists rushing between viewpoints without deeper engagement.
These tips organize into practical categories addressing specific challenges visitors face. Some advice applies universally across all visits while other recommendations target specific activities, seasons, or visitor profiles. Reviewing relevant sections before your trip and referencing specific tips during your visit transforms this guide into actionable intelligence improving experience quality substantially.
People Also Ask About Grand Canyon Travel Tips
What should I not miss at the Grand Canyon?
Sunrise or sunset viewing from Mather Point, Hopi Point, or Yavapai Point delivers the canyon’s most dramatic lighting with long shadows revealing depth and texture invisible during midday. The Rim Trail walk between Bright Angel Lodge and Yavapai Point covers 2.5 miles of paved path with constantly changing perspectives. Desert View Watchtower 25 miles east provides 360-degree views and Mary Colter’s architectural masterpiece. At least one below-rim hike—even just the first mile—transforms understanding through perspective shift from looking at the canyon to experiencing it from within. A ranger program delivers expert interpretation enriching all subsequent exploration. The sunrise-to-sunset progression showing how light transforms the canyon throughout the day provides the single most important “don’t miss” element—allocate full days rather than quick stops to experience this dynamic quality.
How many days do you need at the Grand Canyon?
Two to three days provides sufficient time for comprehensive South Rim exploration without feeling rushed. Day one covers major viewpoints along both Hermits Rest Road and Desert View Drive with ranger program attendance. Day two focuses on below-rim hiking descending 3-6 miles on Bright Angel or South Kaibab trails. Day three allows flexibility for sunrise/sunset viewing, museum visits, additional hiking, or exploring areas missed earlier. Single-day visits work for travelers passing through the region but sacrifice deeper experiences. Four to five days enables visiting both South and North Rims with the cross-canyon drive. Week-long stays allow multi-day backpacking trips or river rafting expeditions. Most first-time visitors find 2-3 days optimal, balancing thorough exploration with practical vacation length constraints.
What are common mistakes to avoid at the Grand Canyon?
Underestimating hiking difficulty represents the most common and dangerous mistake—ascending from the canyon requires twice the time and energy as descending, with heat compounding exhaustion. Many visitors hike too far down then struggle to return, risking heat exhaustion or rescue needs. Inadequate water carrying leads to dehydration—carry one gallon per person for full-day below-rim hikes. Arriving midday during summer finds parking lots full and viewpoints crowded—early morning or evening visits avoid these problems. Spending entire visits at developed village areas misses spectacular eastern canyon viewpoints and quieter experiences. Attempting too much in too little time creates stress—the canyon rewards contemplative viewing over frantic viewpoint rushing. Ignoring weather preparations leads to discomfort during temperature swings and sudden storms. Poor footwear causes blisters and ankle injuries on uneven trails. These mistakes all stem from inadequate preparation but remain easily avoided through basic planning.
Is one day enough for the Grand Canyon?
One day suffices for viewpoint visits and short rim walks capturing the canyon’s visual drama, but single-day trips sacrifice deeper experiences including serious hiking, ranger programs, sunrise/sunset viewing, and unhurried exploration. Visitors treating the canyon as primary destination rather than road trip stop should allocate minimum two days. However, one day spent thoughtfully—arriving for sunrise, hiking the first 1-3 miles of a trail, visiting both eastern and western viewpoints, and staying through sunset—creates more meaningful experience than three days of rushed viewpoint-hopping. If limited to one day, focus on quality over quantity by selecting 4-5 viewpoints explored thoroughly rather than attempting comprehensive coverage.
Extended multi-day tours – 5+ days
Featured Park Grand Canyon Multi-Day Tour Packages
3 days
Grand Canyon and More 3 day tour
- ✓ Comprehensive Park Grand Canyon tour
- ✓ Expert local guides included
- ✓ All accommodation arranged
- ✓ Transportation provided

3 days
National Parks Winter Tour
- ✓ Comprehensive Park Grand Canyon tour
- ✓ Expert local guides included
- ✓ All accommodation arranged
- ✓ Transportation provided
4 days
4-Day Las Vegas+Grand Canyon National Park+ Antelope Canyon+Horseshoe Bend(Bilingual: Chinese+English)
- ✓ Comprehensive Park Grand Canyon tour
- ✓ Expert local guides included
- ✓ All accommodation arranged
- ✓ Transportation provided

4 days
Viva Las Vegas: 4-Day Adventure
- ✓ Booking needs min. 2 travelers
Multi-day tour packages powered by TourRadar. Prices and availability subject to change.
Pre-Trip Planning Essentials
Strategic planning before departure eliminates common problems and maximizes on-site efficiency.
Reservation Timing Strategy
Grand Canyon reservations follow specific opening schedules requiring precise timing for securing desired dates. Park lodges open reservations exactly 13 months in advance at 6:00 AM Mountain Time through grandcanyonlodges.com—for July 2026, booking becomes available June 1, 2025. Peak summer dates and holidays sell out within hours. Phantom Ranch lottery applications open 15 months before travel month with random selection determining awards. Backcountry camping permits become available four months before each month’s start date at 8:00 AM Mountain Time through nps.gov/grca—popular routes and weekends fill within hours.
Create accounts on these reservation systems before booking dates arrive, input payment information ahead of time, and log in at exact opening moments for best availability. Have alternative dates prepared as first-choice dates may fill immediately. Gateway town accommodation books through standard hotel websites with 1-6 week advance windows depending on season—summer requires 4-6 weeks while winter allows last-minute booking.
Physical Preparation
The 7,000-foot South Rim elevation causes shortness of breath and faster fatigue than sea level activity—visitors arriving from lower elevations notice these effects immediately. Acclimate gradually by minimizing exertion during the first 24 hours, staying well-hydrated, and avoiding alcohol. Below-rim hiking demands substantially greater fitness than flat terrain walking due to elevation changes, uneven footing, and altitude effects. Prepare through pre-trip hiking with elevation gain/loss if possible, or realistic assessment of current fitness levels when planning trail distances.
Age and fitness honestly when selecting activities. The temptation to “tough it out” leads to dangerous situations when exhaustion, dehydration, or injury occurs miles below the rim. Err toward conservative estimates of capability—hike shorter distances, take more frequent breaks, and recognize that ascending requires twice the time and energy compared to descending.
Research and Information Gathering
Review the park website (nps.gov/grca) thoroughly before departure, paying particular attention to current conditions, alerts, and temporary closures. Download offline maps to your phone as cell service remains unreliable throughout the park. The NPS app provides trail maps, GPS-enabled positioning, and basic information functional without cell connectivity. Study trail profiles understanding elevation changes, water availability, and distance requirements. Read recent trip reports on hiking websites for current trail conditions, water source status, and seasonal considerations.
Understand shuttle bus routes and schedules before arrival—four color-coded routes serve different areas with varying frequencies. The Village Route (Blue) connects lodges and amenities, Hermits Rest Route (Red) accesses western viewpoints, Kaibab Rim Route (Orange) reaches South Kaibab Trailhead, and Tusayan Route (Purple) links the town to the park. Familiarize yourself with The Guide newspaper (available online) listing current ranger programs, facility hours, and temporary changes.
Arrival and Navigation Tips
Strategic arrival timing and efficient navigation maximize limited vacation time while minimizing frustration.
Optimal Arrival Timing
Arrive before 9:00 AM during peak season (June-August) to secure parking in preferred locations and avoid traffic congestion at entrance stations. The 8:00-11:00 AM window sees heaviest arrivals with parking lots filling by 9:30 AM at popular areas. After 3:00 PM, departing visitors free parking spaces as crowds diminish for the day. Midday arrivals (11:00 AM-2:00 PM) face maximum parking challenges requiring use of remote lots and shuttle transfers.
Winter arrivals allow more flexible timing as parking rarely fills except during holiday weekends. However, arriving by 10:00 AM still maximizes daylight hours given shorter winter days (7:00 AM sunrise, 5:30 PM sunset). Shoulder season timing falls between these extremes—arrive by 9:30 AM for optimal parking without extreme early departure requirements.
Parking Strategy
Primary parking areas include Grand Canyon Visitor Center (largest lot, good starting point), Market Plaza (central location near shops and restaurants), Bright Angel Lodge area (close to rim but fills earliest), Maswik Lodge (inland from rim but usually available), and remote lots served by shuttles. Park at the visitor center if arriving mid-morning after closer lots fill—the Blue shuttle provides convenient access to all village areas.
Once parked, use shuttles rather than moving your vehicle between locations. Attempting to drive between viewpoints wastes time searching for parking and creates unnecessary stress. The shuttle system operates efficiently during daylight hours—use it extensively. Display your park pass prominently on dashboards to avoid re-entry confusion or potential tickets.
First Actions After Arrival
Stop at the visitor center first for orientation film, exhibits explaining geology and ecology, and ranger advice on current conditions. Obtain The Guide newspaper listing current ranger programs and facility hours. Use clean restrooms and fill water bottles before heading to viewpoints. Review shuttle maps and schedules if planning shuttle-dependent exploration. Many visitors skip the visitor center rushing to viewpoints—this mistake sacrifices valuable context enhancing all subsequent experiences.
Check ranger program schedules and plan your day around 2-3 programs of interest. These free interpretive walks and talks provide extraordinary value and insight impossible to gain through independent viewing. Popular programs fill quickly—arrive 15-30 minutes early during peak season to ensure admission.
Safety and Health Protocols
The Grand Canyon’s beauty masks genuine hazards requiring attention and preparation.
Hydration and Heat Management
Carry one gallon (four liters) of water per person for full-day below-rim hikes, more during summer months or for strenuous routes. The dry air, elevation, and exertion combine to cause dehydration faster than lower-elevation environments. Drink regularly rather than waiting until thirsty—thirst indicates dehydration has already begun. Add electrolyte supplements to water replacing salts lost through sweating. Sports drinks, electrolyte tablets, or salt-containing snacks maintain electrolyte balance preventing hyponatremia (dangerous sodium depletion from drinking excessive plain water).
Recognize heat exhaustion symptoms including excessive fatigue, nausea, headache, dizziness, and decreased urine output. Rest immediately in shade, drink fluids with electrolytes, and cool your body with wet clothing or water immersion if available. Heat stroke symptoms—confusion, lack of sweating despite heat, rapid pulse, and potential unconsciousness—constitute medical emergencies requiring immediate assistance. Prevent these conditions through adequate hydration, avoiding midday hiking during hot months, wearing appropriate clothing, and recognizing early warning signs.
Summer inner canyon temperatures exceed 110°F creating life-threatening conditions during midday hours. The National Park Service advises against hiking below the rim between 10:00 AM and 4:00 PM from May through September. Start hikes before 6:00 AM if descending below rim during warm months, rest in shade during peak heat, and complete ascents before midday temperatures peak.
Altitude Acclimatization
The 7,000-foot South Rim elevation affects most visitors arriving from lower elevations. Symptoms include shortness of breath during exertion, faster heart rates, mild headaches, and fatigue. These effects diminish after 24-48 hours as your body adjusts. Minimize strenuous activity during the first day, maintain excellent hydration, avoid alcohol which worsens altitude effects, and recognize that fitness doesn’t eliminate altitude impacts—elite athletes still experience effects at elevation.
Altitude medication including acetazolamide (Diamox) can prevent or reduce symptoms for those particularly sensitive to elevation—consult your physician before the trip if altitude sensitivity concerns you based on previous experiences. Most visitors acclimate naturally through gradual exposure without medication needs.
Wildlife Safety Protocols
The Grand Canyon hosts potentially dangerous wildlife including rattlesnakes, scorpions, mountain lions, and elk. Rattlesnakes inhabit both rim and inner canyon areas April-October, becoming active during warm weather. Watch where you place hands and feet, particularly when scrambling on rocks or resting in shaded areas. Give snakes wide berth if encountered—they strike only when threatened or cornered. Wear ankle-high boots providing some protection against bites.
Elk congregate around Grand Canyon Village particularly during fall rutting season (September-October) when bulls become aggressive protecting harems. Maintain 100-foot distance from elk, never approach or attempt feeding, and retreat immediately if elk display aggression signs including raised hair, laid-back ears, or charging postures. Mountain lions rarely appear but inhabit the area—hike in groups, supervise children closely, and fight back aggressively if attacked rather than playing dead.
Squirrels, ravens, and other small animals may approach seeking food—never feed wildlife as this creates dangerous habituation, spreads disease, and violates park regulations. Store food securely and pack out all trash preventing wildlife access.
Trail Safety Fundamentals
Stay on designated trails avoiding shortcuts that accelerate erosion and create false paths confusing subsequent hikers. Footing on Grand Canyon trails varies from smooth to rocky and uneven—ankle-supporting boots prevent injuries better than lightweight shoes or sandals. Use trekking poles if available to reduce knee strain and improve balance on descents. Hike at conversational pace enabling sustained effort without extreme exertion—if breathing too hard to talk comfortably, slow down.
Descending represents the easy direction but depletes energy needed for ascent—ration physical resources reserving substantial capacity for climbing back out. The rule of thumb allocates twice the time for ascending versus descending the same distance. Take breaks every 30-60 minutes during long hikes, consuming snacks and water during rest stops. Never hike alone on below-rim trails—partners provide assistance during injuries, navigate if one person becomes disoriented, and can seek help if serious problems arise.
Emergency assistance below rim involves long evacuation times and helicopter costs potentially exceeding $5,000 for medical evacuations. Purchase travel insurance covering emergency evacuation if planning extensive below-rim hiking. Carry first aid supplies including blister treatment, pain relievers, and basic wound care materials. Cell phones rarely work below rim—don’t rely on phones for emergency communication.
Packing Lists and Gear Recommendations
Appropriate gear and clothing dramatically improve comfort and safety across varying conditions.
Essential Day Pack Items
Every visitor needs a day pack containing water (minimum one liter for rim walks, one gallon for below-rim hikes), high-energy snacks (trail mix, energy bars, fruit), sun protection (sunscreen SPF 30+, lip balm, sunglasses, wide-brimmed hat), first aid basics (blister treatment, pain relievers, bandages), trail map, flashlight or headlamp with extra batteries, and layers for temperature changes. Add trekking poles for below-rim hiking, camera equipment, binoculars for wildlife viewing, and toilet paper plus trowel for backcountry needs.
Pack weight matters substantially during long hikes—every unnecessary pound increases fatigue and water needs. Evaluate each item’s utility versus weight, eliminating non-essentials. However, never skimp on water, food, or emergency supplies attempting to reduce pack weight—these items prevent dangerous situations.
Clothing Strategy by Season
Summer clothing (June-August) includes lightweight moisture-wicking shirts, convertible pants allowing shorts/long pants flexibility, wide-brimmed hat providing neck and face sun protection, and light jacket for morning chill and evening coolness. The 30-40°F daily temperature swing requires layers despite overall warm conditions. Avoid cotton which stays wet from sweat—synthetic or merino wool materials dry quickly and wick moisture.
Winter clothing (November-March) requires substantial insulation—base layers, insulating mid-layer (fleece or down), waterproof/windproof outer layer, insulated pants, gloves, warm hat covering ears, and scarf or neck gaiter. Winter temperatures range 20s-50s°F with wind chill substantially colder. Layer system allows adding or removing insulation as activity level and conditions change. Winter below-rim hiking requires less insulation due to warmer inner canyon temperatures but keep warm layers accessible for rim exposure.
Shoulder season clothing (April-May, September-October) balances between summer and winter extremes—long pants, long-sleeve shirt, fleece or light jacket, hat, and gloves for cold mornings. Afternoon temperatures may reach 70-80°F allowing shirt-sleeve comfort while mornings stay in 40s-50s°F requiring multiple layers. The changeable conditions make layering essential.
Footwear Recommendations
Ankle-supporting hiking boots provide optimal support and protection for below-rim hiking on uneven rocky trails. Break in new boots before arrival—blisters develop quickly in un-broken boots during long hikes. Trail running shoes work for short below-rim hikes (1-2 miles) or rim walking on paved paths, offering lighter weight and flexibility at some stability cost. Sandals suffice for rim viewpoint visits and shuttle travel but lack support for serious hiking.
Bring multiple footwear options if space allows—boots for below-rim hiking, comfortable shoes for rim walking and evening village activities, and sandals for showering and lodge relaxation. Wool or synthetic hiking socks prevent blisters better than cotton—bring extra pairs allowing dry socks for multi-day trips. Consider gaiters during winter preventing snow entry into boots or during dusty conditions keeping debris out.
Photography Equipment
DSLR or mirrorless cameras capture highest-quality images though modern smartphones produce excellent results for casual photography. Wide-angle lenses (16-35mm full-frame equivalent) work best for capturing canyon scale and expansive vistas. Telephoto lenses (70-200mm+) photograph distant formations, wildlife, and compressed perspective shots. Polarizing filters reduce haze and enhance sky colors—essential for midday shooting when harsh light prevails.
Tripods enable long exposures during sunrise/sunset, support heavy telephoto lenses, and allow self-timer group photos. However, tripods add substantial weight and bulk—evaluate whether photography importance justifies carrying equipment. Smartphone photographers should bring portable chargers as heavy camera use drains batteries quickly, particularly in cold weather reducing battery performance.
Backcountry Camping Gear
Multi-day backpackers need lightweight tents (2-3 pounds for two-person capacity), sleeping bags rated appropriately for season (20°F rating for three-season use, 0-10°F for winter), sleeping pads providing insulation and comfort, backpacking stoves and fuel, cooking equipment, water filtration or purification, 70+ liter backpack, and complete food provisions. The dry canyon environment allows lightweight equipment—rain protection needed primarily during monsoon season (July-September).
Backcountry camping in the canyon creates unique challenges including limited water sources, extreme temperature variations, and complete self-sufficiency requirements. Research specific routes thoroughly understanding water availability, campsite locations, and seasonal considerations before departure.
Photography Tips and Techniques
The Grand Canyon’s scale and dynamic lighting create both opportunities and challenges for photographers.
Optimal Lighting Periods
Sunrise and sunset provide the most dramatic canyon lighting with warm colors, long shadows revealing depth and texture, and rapidly changing conditions creating dynamic images. Summer sunrise occurs 5:15-5:30 AM requiring pre-dawn positioning at viewpoints. Winter sunrise delays to 7:00-7:15 AM allowing more civilized wake times. Sunset timing ranges from 5:15 PM in winter to 7:45 PM in summer.
The “golden hour”—the hour after sunrise and before sunset—delivers warm directional light perfect for landscape photography. The “blue hour”—30-45 minutes before sunrise and after sunset—creates soft even lighting and saturated colors ideal for long exposures and moody atmospheric images. Plan to arrive at viewpoints 30-45 minutes before sunrise/sunset for optimal positioning and preparation.
Midday light (10:00 AM-3:00 PM) creates harsh contrast and flat textures generally unfavorable for canyon photography. However, monsoon season afternoon storms create dramatic clouds and changing conditions salvaging midday photography through atmospheric interest. Use midday hours for indoor activities, moving between locations, or hiking rather than serious photography.
Composition Strategies
The canyon’s immense scale challenges composition—incorporate foreground elements including trees, rocks, or architectural features providing context and depth. Use leading lines like trails, ridges, or river courses drawing viewer eyes through the image. Frame distant canyon elements through natural windows created by rock formations or vegetation. Shoot from low angles emphasizing foreground interest or high vantage points showing sweeping vistas.
Avoid centering horizon lines—place them one-third from top or bottom edge using rule of thirds compositional guidance. Include human figures providing scale reference helping viewers comprehend the canyon’s vastness. Experiment with vertical orientations capturing canyon depth rather than defaulting to horizontal landscape orientation. Shoot multiple compositions at each location rather than settling for first framing—small position changes dramatically alter perspective.
Technical Settings Recommendations
Use small apertures (f/11-f/16) for maximum depth of field keeping both foreground and distant elements sharp. Lower ISO settings (ISO 100-400) minimize noise and maximize image quality—use tripods enabling longer exposures at low ISO during sunrise/sunset. Expose for highlights preserving detail in bright sky areas—underexposure appears preferable to blown highlights since shadow detail recovers better in post-processing than highlight detail.
Bracket exposures (shoot multiple images at different exposure levels) during high-contrast sunrise/sunset conditions enabling HDR processing or selection of optimal single exposure. Shoot RAW format rather than JPEG preserving maximum image data for post-processing flexibility. Use manual focus for landscapes ensuring critical sharpness rather than trusting autofocus which may hunt or focus incorrectly.
Location-Specific Photography Advice
Mather Point near the visitor center offers excellent sunrise photography with interesting foreground rocks and east-facing views capturing direct sunlight. Hopi Point on Hermits Rest Road provides premier sunset location with unobstructed western views and Colorado River visibility below. Yavapai Point combines excellent any-time-of-day views with geology museum providing photography education. Desert View Watchtower creates architectural interest and 360-degree panoramas from the tower observation deck.
Lipan Point on Desert View Drive shows Colorado River prominently with Unkar Delta floodplain creating mid-ground interest. Grandview Point provides perspective on the canyon’s eastern sections with dramatic drop-offs and fewer crowds than village-area viewpoints. These locations represent starting points—explore Rim Trail segments between major viewpoints discovering countless additional compositions with fewer photographers competing for positions.
Insider Tips and Local Knowledge
Experienced Grand Canyon visitors and rangers share strategies maximizing experience quality beyond obvious advice.
Crowd Avoidance Strategies
Visit Tuesday-Thursday avoiding weekend crowds—Friday-Sunday sees 20-30% higher visitor numbers as regional travelers join destination visitors. Early morning (sunrise-9:00 AM) and evening (5:00 PM-sunset) periods find dramatically fewer people at even the most popular viewpoints. Mather Point, Yavapai Point, and Bright Angel Trail host hundreds midday but dozens during early/late hours.
Explore the Desert View Drive area 25 miles east of Grand Canyon Village—these viewpoints (Grandview Point, Moran Point, Lipan Point, Desert View) attract 70% fewer visitors while offering equally spectacular views. Hike beyond the first mile of popular trails experiencing solitude unavailable near trailheads. The Bright Angel Trail’s first mile hosts hundreds daily while mile 2-3 encounters drop by 80%.
Consider winter visits (December-February excluding holidays) for maximum solitude at minimum costs despite cold conditions. The 80% visitor reduction compared to summer peaks transforms the experience entirely—parking available everywhere, trails to yourself, viewpoints offering contemplative quiet impossible during crowded seasons.
Money-Saving Strategies
Purchase the America the Beautiful annual pass for $80 if visiting multiple national parks within 12 months—single Grand Canyon visits cost $35 per vehicle making the annual pass valuable for trips including additional parks. Stay in gateway towns (Williams, Flagstaff) rather than park lodges saving 30-50% on accommodation despite 60-90 minute drives. Camp at Mather Campground for $18 nightly versus $150-250 for park lodges.
Bring food from grocery stores outside the park—prices inside run 20-40% higher than external markets. Pack picnic lunches rather than purchasing meals at park restaurants. Take advantage of free ranger programs, shuttle buses, and self-guided exploration rather than paid tours for most activities. The canyon provides extraordinary experiences without expensive commercial tours through thoughtful independent exploration.
Lesser-Known Experiences
Attend ranger programs beyond basic talks—specialized programs covering condors, geology field trips, historical walks, and night sky viewing provide deeper engagement than standard viewpoint talks. The Tusayan Ruin and Museum 3 miles west of Desert View preserves 800-year-old Ancestral Puebloan site with self-guided trail and museum explaining the region’s archaeological significance.
Walk the Rim Trail’s eastern sections between Pipe Creek Vista and South Kaibab Trailhead experiencing significantly fewer hikers than popular western sections near the village. Explore Hermits Rest during winter when private vehicles access the road closed to cars during summer shuttle season—driving allows stopping anywhere rather than limiting stops to shuttle bus designated viewpoints. Visit the Grand Canyon Railway Depot and historic train displays even if not riding the train itself.
Optimal Daily Routines
Structure days around optimal lighting and crowd patterns. Wake pre-dawn for sunrise viewing at carefully selected viewpoint, return to lodging for breakfast and midday rest during harsh light and peak crowds (9:00 AM-3:00 PM), resume activities mid-afternoon focusing on different locations than morning, and commit to sunset viewing at premier locations. This routine maximizes quality photography, avoids crowds, and prevents exhaustion from full-day exertion.
Alternate active days with recovery days during multi-day visits. Hike below rim one day, explore rim viewpoints the next, then return to strenuous activity after recovery. The elevation, dry air, and walking demands accumulate fatigue faster than lower-elevation tourism—respect your body’s recovery needs rather than pushing through exhaustion.
Weather Preparedness
Grand Canyon weather varies dramatically by season, elevation, and time of day requiring preparation and flexibility.
Seasonal Weather Patterns
Summer (June-August) brings 80-95°F rim temperatures, 100-115°F inner canyon heat, and afternoon thunderstorms during monsoon season (mid-July through September). Morning starts require light layers (50-60°F) warming rapidly by midday. Monsoon storms develop 2:00-4:00 PM, peak 3:00-5:00 PM, and dissipate 5:00-7:00 PM. Lightning poses serious risks during storms—seek shelter in buildings or vehicles when thunder audible.
Winter (November-March) delivers 20s-50s°F rim temperatures with frequent snowfall totaling 60-80 inches seasonally. Individual storms drop 6-12 inches requiring highway chain use or causing temporary closures. Clear days between storms provide excellent visibility and dramatic snow-draped landscapes. Inner canyon maintains mild 40-60°F making winter among the best below-rim hiking seasons despite rim cold.
Shoulder seasons (April-May, September-October) balance these extremes with 50-70°F temperatures, reliable weather, and minimal precipitation. However, weather unpredictability increases during transitional periods—April can bring snow or sunshine, October may deliver summer heat or winter cold. Pack for variable conditions during shoulder seasons.
Sudden Weather Changes
Weather shifts rapidly at elevation and in canyon topography. Morning sunshine can transition to afternoon thunderstorms within hours during monsoon season. Clear skies can cloud over quickly during any season. Temperature drops 3-5°F per 1,000 feet elevation as you descend into the canyon—pleasant 70°F rim conditions correspond to 90°F+ heat 4,700 feet below at the river.
Monitor sky conditions continuously during outdoor activities. Afternoon storm development shows clear warning signs—cumulus clouds building vertically, darkening cloud bases, increasing winds, and distant thunder. Begin descending from exposed ridges or viewpoints when these signs appear. Flash flooding occurs in narrow side canyons when thunderstorms concentrate rainfall—avoid slot canyons during monsoon season or when storms threaten.
Weather Information Sources
Check weather forecasts before departure at weather.gov entering specific Grand Canyon locations—separate forecasts exist for South Rim, North Rim, and inner canyon reflecting dramatic elevation differences. The visitor center posts current conditions and forecasts. Rangers provide weather updates during programs and at information desks. However, recognize that weather changes rapidly—forecasts guide planning but shouldn’t replace continuous personal observation and adaptive decision-making.
Communication and Connectivity
Limited cell service and internet connectivity require preparation and adjusted expectations.
Cell Phone Coverage
Cell service exists at Grand Canyon Village and major developed South Rim areas though coverage remains spotty and congested during peak use periods. Service disappears quickly once you leave village areas or descend below the rim. The North Rim has minimal cell coverage even in developed areas. Don’t rely on cell phones for navigation, emergency communication, or real-time information updates.
Download offline maps, trail guides, and critical information before arriving. Screenshot confirmations, reservations, and important contacts. The NPS app functions offline providing GPS positioning on downloaded maps. Inform family/friends of your itinerary before entering areas without service—establish expected check-in times and emergency contact protocols.
WiFi Availability
WiFi exists at park lodges for guests, visitor centers for public use, and some restaurants. However, bandwidth remains limited during peak seasons with many users competing for capacity—expect slow speeds unsuitable for video streaming or large uploads. Use WiFi for essential communication and information gathering rather than entertainment. Many visitors appreciate disconnecting from constant connectivity, treating limited access as opportunity for digital detox enhancing canyon presence.
Emergency Communication
Emergency phones exist at trailheads and strategic locations providing direct contact with park dispatch during emergencies. Rangers patrol popular trails and viewpoints during busy periods. For genuine emergencies—serious injuries, medical crises, lost persons—call 911 from any working phone or use emergency phones. Non-emergency issues or questions should address to visitor center staff or rangers during normal operations rather than emergency services.
Accessibility and Special Needs
The Grand Canyon accommodates visitors with varying abilities through accessible facilities and services.
Wheelchair Accessibility
Paved Rim Trail sections between Bright Angel Lodge and Maswik Lodge provide wheelchair-accessible canyon viewing with gentle grades and smooth surfaces. Mather Point, Yavapai Point, and several other viewpoints feature paved paths and accessible viewing areas. The visitor center, museum, and most lodges meet full accessibility standards. Accessible parking spaces exist at major locations with proximity to accessible routes.
Free shuttle buses accommodate wheelchairs through low-floor designs and wheelchair-securing equipment. Service animals accompany owners on all trails, shuttles, and facilities. However, below-rim trails lack wheelchair accessibility due to terrain, steps, and steep grades. Contact the park’s accessibility coordinator through the main number (928-638-7888) for detailed information about specific needs and available services.
Senior and Family Considerations
Senior visitors (62+) qualify for lifetime America the Beautiful senior passes for $80 providing unlimited park access. Paved rim trails and viewpoint visits require minimal exertion suitable for most seniors. Shuttle buses eliminate walking and driving demands. Ranger programs accommodate all ages and abilities with topics and formats serving diverse audiences.
Families with children find numerous age-appropriate activities—Junior Ranger programs engage kids through activity booklets earning participation badges, short rim walks maintain children’s attention better than extended hikes, geology exhibits and fossil displays fascinate young visitors, and ranger programs include child-focused presentations. However, below-rim hiking with children requires realistic assessment of capabilities and substantial adult supervision given hazards and demands.
Environmental Responsibility
Protecting Grand Canyon resources ensures preservation for future generations.
Leave No Trace Principles
Stay on designated trails preventing erosion and vegetation damage. Pack out all trash including food scraps—animals shouldn’t access human food creating dangerous habituation. Never feed wildlife regardless of how “friendly” or “hungry” they appear—feeding harms animals and violates regulations. Use restrooms at facilities or practice proper backcountry waste disposal techniques burying human waste 6-8 inches deep at least 200 feet from water sources, trails, and camps.
Leave rocks, plants, fossils, and archaeological artifacts undisturbed for others to discover and for scientific preservation. Resist temptations to collect “souvenirs”—remove only photographs, leave only footprints. Minimize campfire impacts by using established fire rings where permitted or camp stoves for cooking. Respect quiet and other visitors’ experiences by maintaining reasonable noise levels.
Water Conservation
Water scarcity challenges park operations—all water at the South Rim comes from underground sources pumped from Roaring Springs below the North Rim requiring significant energy and infrastructure. Conserve water through short showers, turning off taps while brushing teeth, and reusing towels during multi-night stays. Fill water bottles at hydration stations rather than purchasing disposable plastic bottles creating waste. These small actions accumulate across millions of visitors maintaining sustainable operations.
FAQ: Grand Canyon Travel Tips 2026
What should I wear to the Grand Canyon?
Layer clothing for 30-40°F daily temperature swings—morning cold (40s-50s°F even in summer) warms to afternoon heat (80s-90s°F). Wear moisture-wicking shirts rather than cotton, comfortable pants, ankle-supporting boots for hiking, wide-brimmed hat for sun protection, and bring light jacket for temperature changes. Winter requires substantial insulation with base layers, fleece or down mid-layer, waterproof outer shell, gloves, and warm hat. Avoid new footwear causing blisters—wear broken-in shoes or boots.
Can you drink water from the Grand Canyon?
Tap water at all park facilities remains safe to drink—fill bottles at hydration stations, restrooms, and lodges. Natural water sources including springs and streams require purification through filtration, chemical treatment, or boiling before drinking due to bacteria and parasites. The Colorado River water needs purification regardless of appearance. Backcountry hikers must carry sufficient water or purification equipment accessing natural sources safely.
Is it safe to hike the Grand Canyon alone?
Rim trail hiking alone poses minimal risks given paved surfaces, abundant other visitors, and proximity to facilities. However, below-rim hiking alone increases risks substantially—injuries, dehydration, or navigation errors become dangerous without partners for assistance. Rangers strongly discourage solo below-rim hiking, though it’s not prohibited. At minimum, inform someone of your detailed itinerary including expected return time and emergency contacts. Carry first aid supplies and recognize that cell phones won’t work below rim for emergency calls.
What is the best viewpoint at the Grand Canyon?
No single “best” viewpoint exists—different locations offer unique perspectives. Mather Point near the visitor center provides classic panoramic views ideal for first impressions. Hopi Point on Hermits Rest Road delivers premier sunset viewing with Colorado River visibility. Yavapai Point combines excellent views with geology museum education. Desert View offers 360-degree panoramas from the watchtower observation deck. Lipan Point shows the Colorado River prominently with interesting mid-ground floodplain features. Visit multiple viewpoints experiencing varying perspectives rather than seeking one “best” location.
Do I need a permit to visit the Grand Canyon?
No permit required for day use including viewpoint visits, rim walking, and day hiking. Backcountry overnight camping requires permits obtained through the reservation system four months in advance. Phantom Ranch overnight stays require reservations through separate lottery system. River trips require permits awarded to commercial operators (included in your trip booking) or through competitive lottery for private trips. Developed campground camping requires reservations but the reservation itself serves as your permit. Most visitors need no special permits beyond park entrance fees.
How do you prevent altitude sickness at the Grand Canyon?
The 7,000-foot South Rim elevation causes mild symptoms for many visitors but rarely triggers serious altitude sickness. Minimize exertion during the first 24 hours allowing acclimation, maintain excellent hydration drinking more water than usual, avoid alcohol which worsens altitude effects, and pace activities recognizing you’ll fatigue faster than at sea level. Most visitors acclimate naturally within 24-48 hours. Persistent headaches, nausea, or dizziness warrant rest and hydration—consult medical staff if symptoms worsen despite rest.
Can you see the Grand Canyon without paying?
No free public access exists to Grand Canyon National Park—entrance fees ($35 per vehicle, $20 per person arriving by bike/foot/shuttle) fund park operations and preservation. However, viewpoints on tribal lands outside park boundaries including Desert View Watchtower area (requires separate Navajo Nation permit) and overlooks on adjacent national forest lands provide free views. The America the Beautiful annual pass ($80) covers entrance to all national parks for 12 months—valuable for trips visiting multiple parks.
What should I eat before hiking the Grand Canyon?
Eat substantial breakfast including protein, complex carbohydrates, and healthy fats providing sustained energy—oatmeal with nuts and fruit, eggs with whole grain toast, or yogurt with granola work well. Avoid foods causing digestive distress during exertion—heavy fats, excess dairy, or unfamiliar foods. Carry high-energy snacks for trail consumption including trail mix, energy bars, dried fruit, and sandwiches. Eat regularly during hikes maintaining energy levels rather than waiting until hungry. Electrolyte supplements in water or sports drinks replace salts lost through sweating. Post-hike meals should include protein for muscle recovery and carbohydrates replenishing depleted glycogen stores.
Is the Grand Canyon safe at night?
The South Rim remains safe at night with paved paths, lighting near lodges and facilities, and regular ranger patrols. However, avoid approaching rim edges in darkness—fatal falls occur when visitors move too close to unmarked precipices in poor visibility. Wildlife including elk becomes more active after dark—maintain distance and awareness. Below-rim hiking at night requires headlamps, excellent navigation skills, and familiarity with trail conditions—most hikers avoid night hiking except during forced circumstances. Stargazing safely occurs from designated viewpoints or cleared areas away from rim edges. Vehicle break-ins remain rare but lock cars and avoid leaving valuables visible.
What time do the shuttle buses start running?
Shuttle buses begin operating one hour before sunrise and continue until one hour after sunset with exact times varying seasonally. During summer (June-August), buses run approximately 4:30 AM-9:00 PM. Winter hours contract to approximately 6:00 AM-7:00 PM reflecting shorter days. The Village Route (Blue) operates year-round while Hermits Rest Route (Red) runs March-November only (private vehicles access the road December-February). Kaibab Rim Route (Orange) operates year-round with seasonal schedule adjustments. Consult The Guide newspaper or visitor center for current exact schedules during your visit dates.