
Grand Canyon Photography Guide
Photographing the Grand Canyon presents extraordinary technical and compositional challenges that have tested photographers since the medium’s earliest days. The canyon’s overwhelming scale defeats normal perspective cues, making distant features appear deceptively close while near objects seem disconnected from surroundings. Extreme contrast between brilliantly sunlit cliff faces and deep shadows exceeds most cameras’ dynamic range capabilities. Atmospheric haze reduces contrast and saturates colors in distant formations. These challenges require photographers to develop specialized techniques, understand optimal lighting conditions, carefully select viewpoints, and employ post-processing strategies translating direct experience into compelling two-dimensional images.
Key Takeaways
- Golden Hour Magic: The first and last hours of daylight provide optimal lighting conditions, with low-angle sun creating dramatic shadows, intense colors, and three-dimensional depth impossible to achieve during midday flat light
- Composition Strategies: Effective canyon photography requires incorporating foreground elements, using leading lines to guide viewers’ eyes through space, and employing the rule of thirds to create balanced compositions addressing the challenge of overwhelming scale
- Seasonal Variations: Each season offers distinctive photographic opportunities from winter snow-dusted cliffs and crisp clear air to summer monsoon storms creating dramatic cloud formations and occasional rainbows spanning the canyon
- Equipment Essentials: Wide-angle lenses capture expansive vistas, telephoto lenses isolate distant formations, tripods enable sharp exposures during low-light periods, and neutral density graduated filters balance exposure between bright sky and shadowed canyon
- Viewpoint Selection: Classic locations including Mather Point, Yavapai Point, and Desert View provide iconic perspectives, while lesser-known spots offer unique compositions avoiding crowded tourist areas
- Technical Challenges: High contrast between sunlit cliffs and deep shadows requires careful exposure management, extreme depth of field demands small apertures, and atmospheric haze necessitates post-processing adjustments for optimal clarity
Introduction: Capturing the Incomprehensible
Successful canyon photography requires more than technical competence—it demands understanding how the landscape’s essential qualities can be conveyed through carefully considered compositional choices. The canyon’s grandeur emerges not merely from scale but from relationships between forms, colors, textures, and spatial arrangements. Photographers must identify these relationships and employ compositional strategies emphasizing them. Incorporating foreground elements provides scale references and depth cues. Leading lines guide viewers’ eyes through space. Careful framing isolates compelling sections from the overwhelming whole. These compositional techniques transform random snapshots into photographs communicating the canyon’s character and emotional impact.
This comprehensive photography guide provides practical guidance for capturing exceptional Grand Canyon images. It examines optimal lighting conditions throughout the day and across seasons, analyzes successful composition strategies for addressing scale and depth challenges, identifies premier viewpoints offering diverse perspectives, recommends equipment and camera settings for various situations, and explores post-processing techniques enhancing images while maintaining natural appearance. Whether shooting with professional camera systems or smartphones, photographers can apply these principles to create images successfully capturing the canyon’s sublime beauty.
People Also Ask About Grand Canyon Photography
What is the best time of day to photograph the Grand Canyon?
Golden hour periods—the first hour after sunrise and the last hour before sunset—provide optimal lighting conditions for Grand Canyon photography. During these periods, low-angle sunlight rakes across the canyon’s stratified cliffs, creating long shadows that emphasize three-dimensional relief and reveal textural details invisible under midday overhead light. The warm color temperature of golden hour light intensifies the canyon’s natural reds, oranges, and yellows, creating saturated colors far more dramatic than midday’s neutral tones.
Sunrise offers particularly favorable conditions on the South Rim, where eastern light illuminates the canyon’s stratified walls while shadows recede westward. The canyon’s layered structure becomes dramatically visible as light progressively illuminates successively lower formations. Morning air quality typically surpasses afternoon conditions, with less atmospheric haze and dust providing better visibility and sharper detail in distant formations. Additionally, sunrise photography involves smaller crowds than sunset, enabling photographers to work without jostling for position at popular viewpoints.
Sunset creates dramatic lighting on the North Rim, where western light illuminates the Kaibab Plateau’s limestone cliffs in warm tones while the canyon’s depths fall into shadow. South Rim sunset photography requires careful composition incorporating foreground elements that remain illuminated while distant formations recede into blue shadow tones. The hour following sunset provides “blue hour” conditions when residual skylight bathes the landscape in cool blue tones contrasting with warm artificial lights from Grand Canyon Village, creating opportunities for distinctive twilight images combining natural and human-scale elements.
What camera settings work best for Grand Canyon photography?
Aperture priority mode works well for most Grand Canyon photography, allowing photographers to control depth of field while the camera selects appropriate shutter speeds. Small apertures (f/11 to f/16) provide extensive depth of field keeping both foreground elements and distant cliffs in sharp focus—essential for landscape photography emphasizing spatial relationships across vast distances. However, extremely small apertures (f/22 or smaller) should be avoided as diffraction reduces overall sharpness despite increased depth of field.
ISO settings should remain as low as possible (ISO 100-200) to minimize digital noise and maximize image quality, particularly important for large prints revealing fine details. Higher ISOs become necessary during golden hour periods when reduced light levels require faster shutter speeds preventing camera shake. Photographers using tripods can employ longer exposures maintaining low ISO settings, though windy conditions may require faster shutter speeds preventing motion blur from camera movement.
Exposure metering requires careful attention due to the canyon’s extreme contrast range. Spot metering enables precise exposure measurement of specific scene elements—photographers can meter sunlit cliff faces ensuring proper exposure for important highlight areas while accepting that deep shadows may block up to solid black. Alternatively, exposing for middle tones and employing exposure bracketing (capturing multiple frames at different exposure values) provides latitude for creating high dynamic range (HDR) images or selecting the best single exposure during post-processing.
Do I need a tripod for Grand Canyon photography?
Tripods provide substantial advantages for serious Grand Canyon photography, enabling sharper images, careful composition refinement, and creative techniques impossible with handheld shooting. During golden hour periods when optimal lighting occurs, reduced light levels often require shutter speeds slower than 1/60 second—below the threshold for reliably sharp handheld photography. Tripods enable exposures of several seconds or longer, allowing photographers to use optimal apertures (f/11-f/16) and base ISOs (100-200) producing maximum image quality.
Beyond enabling sharp images, tripods force photographers to slow down and carefully compose images rather than shooting casually. The discipline of mounting the camera, adjusting composition incrementally, and thoughtfully considering all frame elements before exposing results in more carefully considered photographs. Tripods also enable precise positioning for panoramic sequences requiring exact alignment between frames, focus stacking combining multiple exposures at different focus distances, and long exposures creating motion blur effects in clouds or moving visitors.
Lightweight carbon fiber tripods provide the best combination of stability and portability for photographers hiking to remote viewpoints. These tripods weigh substantially less than aluminum alternatives while providing comparable stability. Ball heads enable quick camera positioning adjustments, while pan-tilt heads offer precise independent control over horizontal and vertical axes—useful for panoramic photography requiring level horizons and exact alignment between frames.
Which viewpoints offer the best photographic opportunities?
Mather Point provides the most accessible classic South Rim vista, located adjacent to the main visitor center parking area. This location offers expansive views encompassing multiple canyon layers, prominent buttes including Vishnu Temple, and foreground rock outcrops serving as compositional anchors. The viewpoint features multiple overlook platforms at varying elevations, enabling photographers to explore different compositions and perspectives. However, Mather Point suffers from severe crowding during peak visitation periods, requiring early arrival for unobstructed shooting positions.
Yavapai Point offers exceptional eastward views ideal for sunrise photography, with the canyon’s layered structure dramatically revealed as light progressively illuminates lower formations. The adjacent Yavapai Geology Museum provides educational context about visible rock formations, helping photographers understand and identify geological features appearing in their images. The point’s slightly elevated position relative to surrounding viewpoints provides distinctive perspectives distinguishing images from the standard tourist snapshots captured at nearby Mather Point.
Desert View, located at the South Rim’s eastern terminus 25 miles from Grand Canyon Village, provides the most expansive panoramic vistas available from paved roads. The viewpoint encompasses the Painted Desert stretching eastward, the Colorado River visible in the canyon bottom, and the Watchtower serving as a dramatic architectural element for foreground compositions. The site’s relative distance from Grand Canyon Village reduces crowding even during peak periods, enabling photographers to work without constant interruptions from other visitors.
Extended multi-day tours – 5+ days
Featured Park Grand Canyon Multi-Day Tour Packages
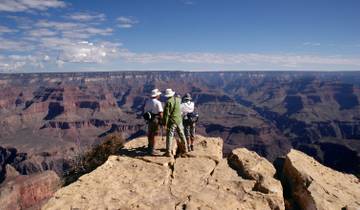
3 days
Grand Canyon and More 3 day tour
- ✓ Comprehensive Park Grand Canyon tour
- ✓ Expert local guides included
- ✓ All accommodation arranged
- ✓ Transportation provided

3 days
National Parks Winter Tour
- ✓ Comprehensive Park Grand Canyon tour
- ✓ Expert local guides included
- ✓ All accommodation arranged
- ✓ Transportation provided
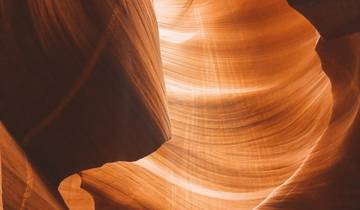
4 days
4-Day Las Vegas+Grand Canyon National Park+ Antelope Canyon+Horseshoe Bend(Bilingual: Chinese+English)
- ✓ Comprehensive Park Grand Canyon tour
- ✓ Expert local guides included
- ✓ All accommodation arranged
- ✓ Transportation provided
4 days
Viva Las Vegas: 4-Day Adventure
- ✓ Booking needs min. 2 travelers
Multi-day tour packages powered by TourRadar. Prices and availability subject to change.
Mastering Golden Hour Light
Understanding and maximizing golden hour light requires knowledge of sun angle, color temperature, and how these factors change throughout the year. Summer golden hours occur early (around 5:30-6:30 AM) and late (around 7:30-8:30 PM), requiring photographers to commit to early departures or late returns. Winter golden hours happen at more convenient times (around 7:30-8:30 AM and 4:30-5:30 PM) but are substantially shorter due to the sun’s lower arc, providing less working time before light quality deteriorates. Spring and fall offer moderate golden hour timing with extended working periods as the sun’s arc provides prolonged low-angle illumination.
Color temperature during golden hour shifts from warm orange-pink tones immediately after sunrise toward neutral daylight within 30-45 minutes. Photographers should monitor how changing color temperature affects the canyon’s appearance, recognizing that the most dramatic warm tones occur during the first 15-20 minutes when sunlight travels through maximum atmospheric distance. Auto white balance settings typically produce pleasing results, though custom white balance using daylight or cloudy presets can intensify warm tones if desired. Shooting RAW format enables white balance adjustment during post-processing without image quality degradation.
Side-lighting during golden hour creates three-dimensional modeling by illuminating cliff faces while casting shadows into recesses and alcoves. This lighting reveals textural details including crossbedding in sandstone formations, erosional features in limestone cliffs, and vegetation clinging to rock surfaces—details that disappear under flat midday overhead light. Photographers should observe how shadows move as the sun rises or sets, recognizing that even brief periods provide dramatically different lighting effects. Returning to the same viewpoint across multiple mornings or evenings enables capturing varied lighting conditions that transform familiar compositions.
Backlighting situations occur when photographing toward the sun during golden hour, creating silhouettes, lens flare, and atmospheric glow effects. While conventional landscape photography wisdom advises avoiding shooting into the sun, skilled photographers employ backlight creatively to produce distinctive images emphasizing form, atmosphere, and emotional mood rather than textural detail. Backlit rim edges glow with warm light, atmospheric haze becomes visible as luminous veils, and carefully positioned sun stars (created by shooting at small apertures like f/16 or f/22) add graphic elements to compositions. Lens hoods become essential for controlling flare, though intentional flare can add dreamy qualities to images if managed thoughtfully.
Composition Strategies for Overwhelming Scale
Incorporating foreground elements provides essential scale references and depth cues that help viewers comprehend the canyon’s vast dimensions. Without foreground elements, the canyon can appear as a flat two-dimensional backdrop rather than a three-dimensional space extending miles into the distance. Effective foreground elements include rim-edge rocks, gnarled pinyon pines or junipers, wildflowers, and architectural features including rim walls or overlook railings. These elements should be positioned in the lower third of the frame, providing anchors for compositions while allowing canyon vistas to dominate the upper two-thirds.
Leading lines guide viewers’ eyes through photographic compositions, creating visual paths from foreground into distance. In canyon photography, leading lines might include rim edges receding toward distant viewpoints, stratified rock layers creating horizontal bands marching into space, trails descending into the canyon, or rivers winding through gorges. Identifying and emphasizing these natural lines through careful camera positioning and compositional arrangement creates images with strong visual structure and movement rather than static presentations of overwhelming detail.
The rule of thirds provides a reliable framework for balanced compositions, dividing the frame into nine equal sections using two horizontal and two vertical lines. Positioning important compositional elements—horizon lines, prominent buttes, foreground rocks—along these lines or at their intersections creates compositions that feel balanced and natural rather than static and centered. Placing the horizon along the upper third line emphasizes foreground elements and the canyon’s stratified structure, while positioning it along the lower third emphasizes sky, clouds, and atmospheric conditions. Off-center placement of prominent features including buttes or temples creates asymmetric compositions with visual tension and interest exceeding centered arrangements’ static quality.
Selective focus techniques isolate important elements from overwhelming visual complexity, directing viewers’ attention to specific features rather than attempting to render everything sharp. Employing larger apertures (f/4-f/5.6) with telephoto lenses creates shallow depth of field, throwing distracting background elements into soft blur while keeping selected foreground or middle-ground features sharp. This technique works particularly well for photographing details including wind-sculpted trees, interesting rock formations, or wildflowers rather than attempting comprehensive wide-angle views capturing entire vistas.
Panoramic compositions address the canyon’s horizontal extent by capturing multiple overlapping frames later stitched into single images spanning 180 degrees or more. This technique enables creating images with extreme width-to-height ratios emphasizing the canyon’s horizontal extent while maintaining sufficient resolution for large prints. Shooting panoramas requires level tripod mounting, consistent exposure across frames, and 30-40% overlap between adjacent images ensuring adequate information for seamless stitching. The resulting images provide immersive views impossible to capture with single exposures, conveying the canyon’s sweeping extent more effectively than conventional rectangular frames.
Seasonal Photography Opportunities
Winter photography provides distinctive opportunities including snow-dusted rim vegetation and canyon features, crisp clear air enabling exceptional visibility, and dramatic low-angle lighting throughout shortened days. Fresh snow transforms the canyon’s appearance, highlighting rim-edge trees and rock formations with white accents contrasting dramatically against red and orange cliff faces. However, winter photography involves challenges including frequent storm closures of the North Rim and higher elevation viewpoints, cold temperatures reducing battery life and requiring warm clothing for extended outdoor work, and icy conditions creating hazardous footing near rim edges.
Spring offers moderate weather, wildflower blooms along the rim and inner canyon trails, and extended golden hour periods providing ample working time. Wildflowers including lupine, Indian paintbrush, and prickly pear cactus blossoms add color and compositional variety to foreground elements. Spring weather remains somewhat unpredictable with occasional late-season snowstorms, but these storms often create dramatic clearing conditions when clouds break revealing fresh snow-covered landscapes under improving lighting. Spring sees increasing visitation as weather improves, though crowds remain more manageable than summer peak season.
Summer monsoon season (July-August) creates spectacular opportunities for dramatic storm photography, with towering thunderheads building during afternoon hours, lightning displays illuminating the canyon during evening storms, and occasional rainbows spanning gorges when sunlight breaks through storms. These dramatic weather conditions require photographers to protect equipment from rain while remaining alert to lightning dangers—seeking covered viewpoints or vehicles during electrical activity. Summer’s intense midday heat and overwhelming tourist crowds favor shooting during early morning and evening hours, with midday periods better spent resting or exploring indoor interpretive facilities.
Fall photography benefits from comfortable temperatures, reduced visitation following summer peak, and autumn color transformations affecting rim vegetation including aspens (on the North Rim), oak brush, and sumac. Fall also provides excellent atmospheric conditions with reduced haze compared to summer, enabling sharp detail in distant formations. The North Rim’s closure in mid-October (depending on snowfall) creates urgency for photographers seeking that area’s unique perspectives, while South Rim fall photography continues through November with progressively improving light quality as the sun’s arc lowers.
Equipment Recommendations
Wide-angle lenses (14-24mm on full-frame cameras, 10-16mm on APS-C sensors) capture expansive canyon vistas emphasizing dramatic perspective and vast scale. These lenses enable incorporating substantial foreground elements while encompassing distant features, creating compositions with strong depth and three-dimensional character. Ultra-wide lenses require careful attention to composition as they easily include distracting elements at frame edges, necessitating thoughtful positioning and awareness of everything within the frame. Distortion in extreme wide-angle lenses can be corrected during post-processing though architectural features including the Watchtower may require perspective correction avoiding unnatural appearance.
Telephoto lenses (70-200mm or 100-400mm) isolate distant canyon features including specific buttes, temples, and cliff formations that would appear insignificant in wide-angle views. These lenses compress perspective, making distant formations appear larger and closer together, creating graphic compositions emphasizing pattern, color, and form rather than spatial relationships. Telephoto photography works best during morning hours when air quality provides maximum clarity, as afternoon heat and dust degrade image quality in distant subjects. Telephoto lenses require sturdy tripods and careful technique avoiding camera shake, with image stabilization providing substantial benefit during handheld shooting.
Neutral density graduated filters balance exposure between bright sky and darker canyon regions, preventing blown-out highlights in clouds while maintaining shadow detail in canyon depths. These rectangular filters slide into holders mounted on lens front, with the graduated transition positioned along the horizon line. Soft-edge graduated filters work best for uneven horizons including buttes and temples projecting above the rim, while hard-edge versions suit seascapes and other scenes with defined straight horizon lines. Though HDR processing can replace graduated filters’ function, single-exposure captures using filters often provide more natural results with fewer artifacts.
Polarizing filters reduce atmospheric haze, intensify blue sky colors, and minimize reflections on rock surfaces made shiny by desert varnish. These filters screw onto lens fronts and rotate to adjust polarization intensity, with maximum effect occurring when shooting at 90-degree angles to the sun. However, polarizing filters have limitations including vignetting (darkened corners) when used with ultra-wide lenses, up to 2-stop light loss requiring exposure compensation, and potential oversaturation producing unnatural blue skies. Careful use produces enhanced clarity and color saturation while maintaining natural appearance; overuse creates artificial-looking images with blocked-up deep blue skies.
Post-Processing Techniques
Basic adjustments including exposure compensation, contrast enhancement, and highlight/shadow recovery constitute essential first steps in processing canyon photographs. Exposure adjustments address inevitable compromises made during capture when balancing bright skies against shadowed canyon regions. Contrast adjustments restore punch and dimensionality often diminished by atmospheric haze and flat midday lighting. Highlight recovery pulls detail from bright cliff faces and clouds verging on overexposure, while shadow lifting reveals detail in canyon depths without introducing excessive noise or unnatural appearance.
Color adjustments address atmospheric haze’s blue color cast affecting distant formations and restore warm tones in sandstone and limestone formations. Increasing vibrance (which selectively boosts muted colors while protecting already-saturated tones from oversaturation) enhances canyon reds and oranges without creating garish oversaturation. Adjusting individual color channels enables fine-tuning specific hues—warming oranges and reds in cliff formations while cooling blues in shadows creates separation and depth. However, restraint remains crucial as excessive color manipulation produces unrealistic results that fail to represent the canyon’s actual appearance.
Sharpening enhances detail and textural definition degraded by atmospheric diffusion and camera sensor characteristics. Capture sharpening compensates for slight softness introduced by camera sensors’ anti-aliasing filters, while output sharpening optimizes images for specific display media including prints or screen viewing. Proper sharpening technique employs masking that targets high-contrast edges while protecting smooth areas including skies from sharpening artifacts. Over-sharpening creates obvious halos around high-contrast edges and emphasizes noise in smooth areas—subtle sharpening that enhances perceived detail without announcing its presence produces best results.
Panorama stitching combines multiple overlapping frames into seamless wide-format images capturing the canyon’s horizontal extent. Specialized software including Adobe Photoshop, Lightroom, or PTGui analyzes common elements between adjacent frames, corrects for lens distortion and perspective differences, and blends exposures creating seamless transitions. Successful panorama stitching requires consistent exposure across frames (manual exposure mode prevents automatic adjustments between frames), level camera mounting ensuring straight horizons, and adequate overlap between frames (30-40%) providing sufficient information for accurate alignment and blending.
FAQ: Grand Canyon Photography
Can I use my smartphone to photograph the Grand Canyon effectively?
Modern smartphones produce surprisingly capable Grand Canyon photographs given their computational photography features, wide-angle lenses, and increasing dynamic range. HDR modes automatically combine multiple exposures balancing bright skies and shadowed canyons, while portrait modes create selective focus effects isolating specific elements. However, smartphones have limitations including fixed focal lengths restricting composition options, small sensors producing inferior image quality compared to dedicated cameras, and minimal manual controls limiting creative possibilities. For casual documentation and social media sharing, smartphones work excellently; serious photography requiring maximum image quality and creative control benefits from dedicated camera systems with interchangeable lenses.
When does the North Rim offer better photography than the South Rim?
The North Rim provides distinctive photographic opportunities from mid-May through mid-October when the area opens to vehicle access. The North Rim’s 1,000-foot higher elevation supports conifer forests creating foreground compositions impossible on the South Rim’s sparse pinyon-juniper woodland. North Rim viewpoints look south across the canyon toward the South Rim, providing excellent lighting during late afternoon and sunset when western light illuminates the Kaibab Plateau’s cliffs. The North Rim receives far fewer visitors than the South Rim, enabling photographers to work without crowds even during summer peak season. However, the North Rim closes during winter, eliminating opportunities for dramatic snow photography available year-round on the South Rim.
How do I photograph the Colorado River from rim viewpoints?
The Colorado River appears visible from limited South Rim locations including Desert View, Lipan Point, and Moran Point, where the river’s course brings it close enough to rim edges for telephoto photography. Telephotos lenses (200mm or longer) compress perspective bringing the river visually closer while isolating sections from surrounding canyon. Morning light works best as afternoon heat and dust degrade air quality reducing clarity in distant subjects. The river appears as a thin ribbon or disappears entirely from most viewpoints, requiring hikers to descend inner canyon trails including Bright Angel or South Kaibab for close-up river photography. Photographers seeking dramatic river images should consider rafting trips providing water-level access impossible from rim viewpoints.
What are the best locations for sunset photography?
Hopi Point offers the premier South Rim sunset photography location, with westward views enabling backlit rim edges and atmospheric glow effects as the sun descends toward the horizon. The viewpoint extends into the canyon providing 270-degree vistas encompassing both Colorado River views and prominent buttes including Vishnu Temple. However, Hopi Point’s reputation creates severe crowding during sunset hours requiring arrival 60-90 minutes before sunset securing good positions. Alternative sunset locations including Mohave Point and Pima Point offer similar westward orientations with reduced crowding. Yavapai Point provides distinctive eastward-looking sunset compositions as eastern cliffs glow with warm reflected light while foreground shadows deepen creating dramatic contrast.
How do I photograph star trails over the Grand Canyon?
Star trail photography requires clear moonless nights, sturdy tripods, cable releases or interval timers, and patient commitment to multi-hour exposures. Photographers compose images incorporating interesting foreground elements including rim-edge trees or architectural features silhouetted against star-filled skies. Using wide apertures (f/2.8-f/4), high ISOs (1600-3200), and exposure times of 15-30 seconds captures individual star positions before Earth’s rotation creates noticeable trails. Multiple consecutive exposures stacked during post-processing create continuous trails showing star motion across extended periods. Alternatively, single exposures lasting 30-60 minutes create trails in-camera though this technique requires gap-free neutral density filters preventing sky glow and understanding reciprocity failure affecting long film exposures.
Should I shoot RAW or JPEG format?
RAW format provides substantial advantages for serious Grand Canyon photography by preserving maximum sensor data enabling extensive post-processing adjustments without quality degradation. RAW files allow white balance adjustment after capture, extensive exposure compensation recovering detail from highlights and shadows, and selective color adjustments impossible with JPEGs. However, RAW files require post-processing before viewing, occupy substantially more storage space than JPEGs, and demand powerful computers with specialized software. Casual photographers prioritizing convenience over maximum quality may prefer JPEG format producing immediately viewable images, though this choice limits post-processing flexibility and sacrifices image quality through lossy compression.
How do I avoid crowds affecting my photography?
Avoiding crowds requires commitment to off-peak timing including arriving at popular viewpoints during sunrise rather than sunset, visiting during shoulder seasons (April-May, September-October) rather than summer peak, and exploring lesser-known locations including viewpoints along Hermit Road beyond Hopi Point or the eastern Desert View area. Midweek visits encounter fewer tourists than weekends and holidays. North Rim photography eliminates crowd issues entirely as that area receives just 10% of total park visitation. Serious photographers should scout locations during midday when lighting quality limits actual photography, identifying composition possibilities and optimal camera positions for returning during golden hour periods.
What weather conditions create the best dramatic photography?
Clearing storm conditions provide spectacular dramatic photography opportunities as breaking clouds create shafts of sunlight illuminating specific canyon features while surrounding areas remain in shadow. Monsoon season (July-August) generates afternoon thunderstorms that occasionally produce rainbows, dramatic cloud formations, and lightning displays. Winter storms deposit snow on rim vegetation and canyon features creating short-lived transformations before melting. However, storm photography requires weather monitoring, flexible scheduling allowing quick response when conditions develop, and protective equipment including rain covers for cameras and lenses. Lightning photography demands extreme caution as photographers standing on exposed rim points become prime lightning strike targets during electrical storms.
Can I use drones for Grand Canyon aerial photography?
Drone flight is prohibited throughout Grand Canyon National Park including all airspace above park boundaries. This restriction protects visitor experiences from drone noise, prevents disturbance to wildlife including endangered California condors, ensures safety as crashes into crowded viewpoints could cause injuries, and maintains wilderness character. Violations result in citations, fines, and equipment confiscation. Photographers seeking aerial perspectives should book authorized helicopter tours operating under special permits, though even these flights face restrictions including altitude minimums and flight-free zones protecting sensitive areas. Ground-based photography using telephoto lenses, foreground elevation changes, and careful composition creates dramatic images without requiring aerial access.
How do I photograph wildlife at the Grand Canyon?
Grand Canyon wildlife photography requires telephoto lenses (300mm or longer), patient observation, and respect for animal welfare. Rim areas support elk, mule deer, California condors, ravens, and various smaller species including squirrels and lizards. Early morning and evening hours when wildlife actively feeds provide best opportunities. Telephoto lenses enable photographing animals without approaching closely and causing disturbance—National Park Service regulations prohibit approaching within 100 feet of most wildlife, 300 feet of California condors. Fast shutter speeds (1/500 second or faster) freeze animal movement. Using continuous autofocus modes tracks moving subjects maintaining sharp focus. Wildlife photography requires patience as productive opportunities arise unpredictably, rewarding photographers who invest time observing animal behavior and anticipating photogenic moments.