📸 Key Takeaways
- Arrive at 8 AM for the best lighting and empty compositions before tour groups arrive around 10 AM
- Panoramic Point offers the classic three-pyramid alignment shot that’s perfect for social media
- Golden hour starts early in Egypt (4-5 PM) – the site closes before sunset, making late afternoon crucial
- Smartphone photography is free but tripods require 20 EGP permit; professional cameras may need additional permissions
- Best photo season is winter (November-February) with clear skies and minimal morning haze
- Camel rides cost 300-500 EGP but provide unique desert perspectives and authentic cultural elements
Capturing the perfect photograph at the Pyramids of Giza requires more than just pointing and shooting at these ancient wonders. As the world’s most photographed archaeological site and the only remaining Wonder of the Ancient World, the Giza complex presents both incredible opportunities and unique challenges for photographers of all skill levels.
This comprehensive photography guide reveals the 15 most spectacular photo locations at Giza, along with insider tips on timing, equipment, and techniques that will help you create truly memorable images of these 4,500-year-old monuments. Whether you’re shooting with a smartphone for Instagram or using professional equipment for fine art photography, these locations and techniques will transform your pyramid visit into a photographic adventure.
Understanding Giza’s Photography Landscape
The Giza Necropolis spans 9 kilometers of desert plateau, offering diverse perspectives from intimate architectural details to sweeping panoramic vistas. Each location presents unique lighting conditions, crowd challenges, and compositional opportunities that change dramatically throughout the day.
Seasonal photography considerations play a crucial role in image quality. Winter months (November through February) provide optimal conditions with crystal-clear skies, minimal heat haze, and comfortable temperatures for extended shooting sessions. Summer months often feature dusty conditions and extreme heat that can damage equipment and create challenging working conditions.
Photography Equipment and Permissions
Smartphone photography is included with general admission and allows unlimited shooting throughout the complex. Modern smartphones excel in Giza’s bright conditions and offer convenient sharing capabilities for social media.
Professional camera equipment including DSLRs and mirrorless cameras are generally permitted but may require additional permits costing 20-50 EGP depending on specific locations. Tripods require a separate 20 EGP permit and may be restricted in certain areas due to crowd safety concerns.
Interior photography rules vary by pyramid, with smartphone photography typically allowed inside the Great Pyramid while professional cameras may be restricted due to narrow passages and preservation concerns.
The 15 Best Photography Locations at Giza
1. Panoramic Point – The Classic Three-Pyramid Shot
Location: Southeast of the main pyramids, accessible by foot, camel, or horse
Best Time: Early morning (8-10 AM) or late afternoon (3-5 PM)
Difficulty: Moderate (20-minute walk from Great Pyramid)
This elevated viewpoint provides the iconic image that appears in countless travel brochures and social media posts. Panoramic Point perfectly frames all three pyramids in a single composition, with the vast desert landscape stretching toward the horizon.
Photography tips: Use a wide-angle lens or panoramic mode to capture the full scope. Include foreground elements like desert rocks or camel shadows for depth. The location offers 360-degree shooting opportunities, so explore different angles beyond the standard composition.
Composition advice: Position yourself to align the pyramids according to the rule of thirds, with the largest pyramid (Khufu) occupying the left third of your frame. This creates more dynamic compositions than centering all three monuments.
2. Great Pyramid Northeast Corner – Architectural Drama
Location: Directly northeast of the Great Pyramid
Best Time: Mid-morning (9-11 AM) for optimal side lighting
Difficulty: Easy (5-minute walk from entrance)
This position showcases the Great Pyramid’s imposing corner perspective, emphasizing its massive scale and precise geometry. Morning side lighting creates dramatic shadows that accentuate the individual stone blocks and ancient construction techniques.
Scale photography: Include people in your compositions to demonstrate the pyramid’s overwhelming size. A person standing at the base appears tiny against the 146-meter structure, creating powerful perspective shots that convey the monument’s true magnitude.
Technical settings: Use a wide-angle lens and low shooting position to exaggerate the pyramid’s height. Higher ISO settings may be necessary for shadow detail while maintaining fast shutter speeds for sharp handheld shots.
3. Sphinx Viewing Platform – Icon Meets Icon
Location: Official viewing platform facing the Great Sphinx
Best Time: Late afternoon (4-5 PM) for warm lighting on the Sphinx face
Difficulty: Easy (direct access from main pathway)
The Great Sphinx viewing platform offers the classic “kissing the Sphinx” photo opportunity while showcasing both the Sphinx and pyramids in a single frame. This location provides controlled access and optimal positioning for one of Egypt’s most recognizable compositions.
Portrait photography: The platform’s elevated position creates natural portrait opportunities with the Sphinx and pyramids forming an incredible backdrop. Use the platform’s railing for stability during longer exposures or group photography.
Crowd management: This popular spot fills quickly after 10 AM. Arrive early or wait for brief lulls between tour groups to capture clean compositions without other tourists in your frame.
4. Sphinx’s Left Side – Profile Perspective
Location: Southwest of the Great Sphinx
Best Time: Early morning (8-9 AM) or mid-afternoon (2-3 PM)
Difficulty: Easy (10-minute walk from main entrance)
This lesser-known viewpoint captures the Sphinx’s noble profile with the Pyramid of Khafre rising dramatically in the background. The composition emphasizes the Sphinx’s guardian role and its relationship to the pyramid complex.
Lighting dynamics: Morning light illuminates the Sphinx’s face beautifully, while afternoon light creates more dramatic shadows that emphasize facial features and the monument’s weathered texture.
Compositional elements: Include the ancient blocks and ruins in the foreground to add depth and context. The contrast between the carved Sphinx and constructed pyramids creates visual interest in your compositions.
5. Queens’ Pyramids Complex – Intimate Scale
Location: East of the Great Pyramid
Best Time: Mid-morning (10 AM-12 PM) for even lighting
Difficulty: Easy (accessible via main pathways)
The three Queens’ Pyramids offer more intimate photography opportunities compared to their massive neighbors. These smaller monuments provide excellent subjects for architectural photography and create interesting foreground elements when composing with the Great Pyramid.
Detail photography: Focus on the construction differences between the queens’ pyramids and main monuments. The smaller scale allows for complete compositions that show entire structures within single frames.
Perspective play: Use the queens’ pyramids to create forced perspective shots that make them appear larger than the Great Pyramid, demonstrating photography’s power to alter perceived reality.
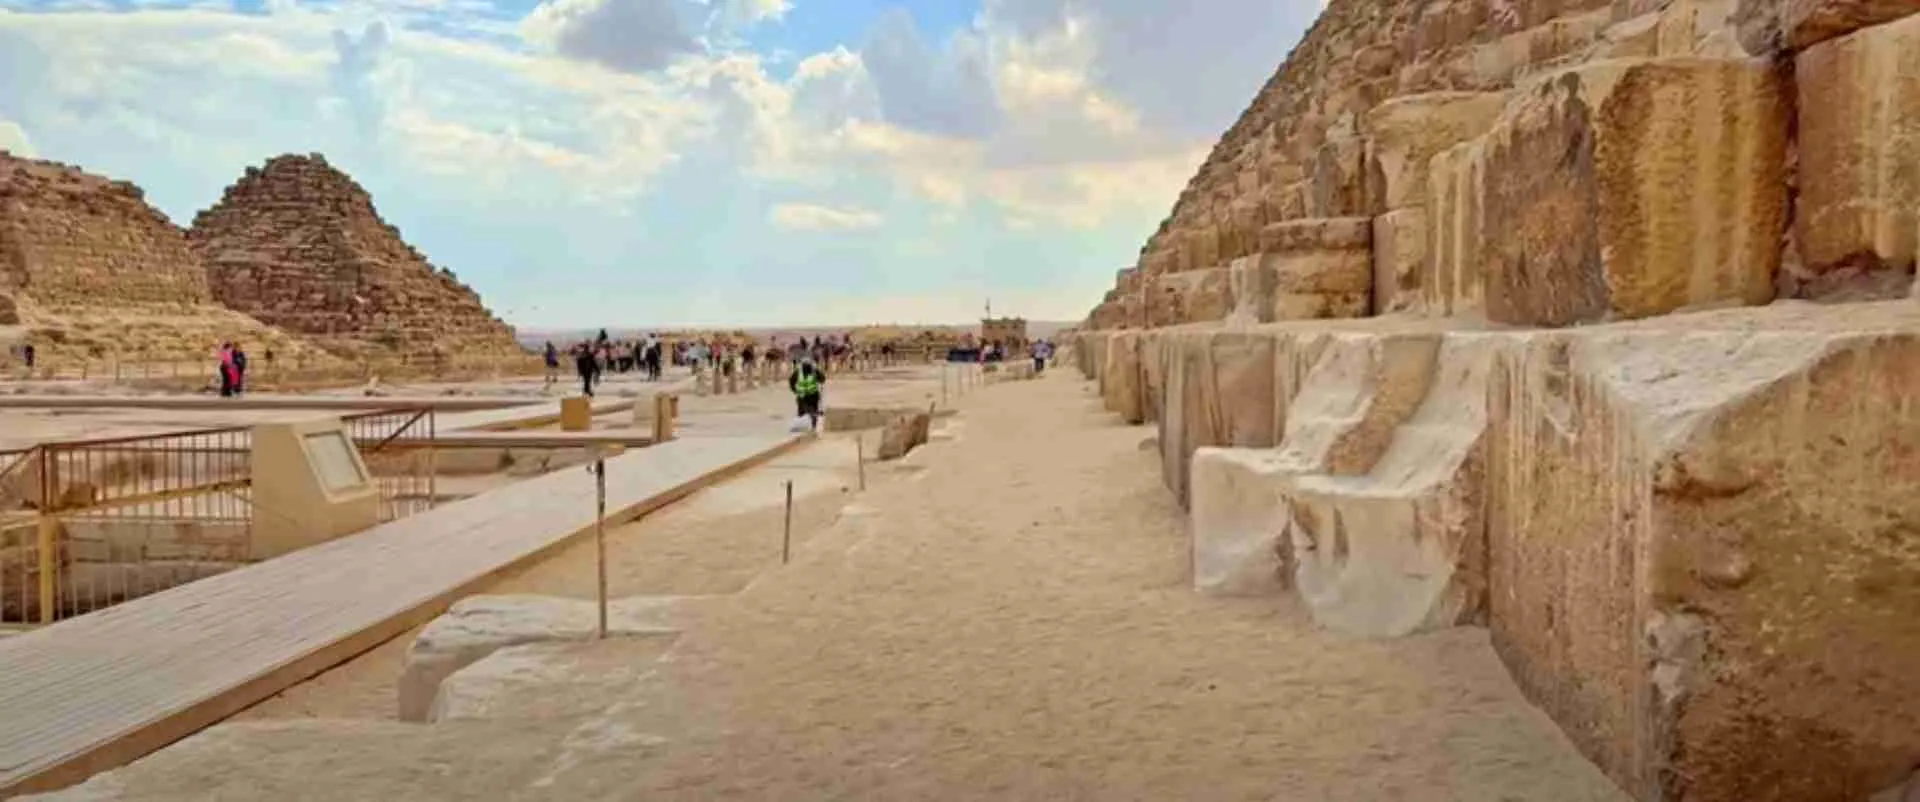
6. Great Pyramid’s Original Entrance – Historical Detail
Location: North face of the Great Pyramid
Best Time: Mid-morning (10-11 AM) for shadow detail
Difficulty: Easy (clearly marked and accessible)
The original entrance passage provides fascinating detail shots that showcase ancient Egyptian engineering precision. This location offers opportunities for both wide architectural shots and intimate detail photography.
Technical challenge: The entrance requires careful exposure management due to extreme contrast between bright limestone and dark interior passages. Use HDR techniques or exposure bracketing for optimal results.
Historical context: Include the modern tourist entrance alongside the original passage to illustrate the pyramid’s dual role as ancient monument and contemporary attraction.
7. Desert Dunes Viewpoint – Classic Camel Silhouettes
Location: Western edge of the complex (camel ride required)
Best Time: Late afternoon (4-5 PM) for silhouette photography
Difficulty: Moderate (requires negotiating camel ride, 300-500 EGP)
This elevated position in the desert dunes provides the quintessential Egyptian photography experience, combining pyramids with authentic desert elements like camels and Bedouin guides. The location offers unique perspectives unavailable from ground-level positions.
Camel photography tips: Work with your camel guide to position the animal for optimal compositions. Silhouette shots against the late afternoon sky create dramatic images, while detail shots can capture the camel’s textured features and traditional decorations.
Safety considerations: Bring lens cleaning equipment as desert conditions create dusty environments that can affect image quality. Protect camera equipment from sand and extreme temperatures during extended desert shoots.
8. Mortuary Temple of Khafre – Archaeological Drama
Location: East of the Pyramid of Khafre
Best Time: Early morning (8-10 AM) for soft lighting
Difficulty: Moderate (requires walking through archaeological area)
The Mortuary Temple ruins provide excellent foreground elements for pyramid photography while offering insight into the complete funerary complex. Ancient columns and carved stones create compelling compositional elements.
Architectural photography: Focus on the contrast between ruined temple elements and intact pyramids. The weathered limestone and fallen blocks tell the story of time’s passage while the pyramids stand eternal.
Wide-angle opportunities: Use ultra-wide lenses to include extensive temple ruins in the foreground while maintaining pyramid prominence in the background.
9. Solar Boat Museum Exterior – Modern Meets Ancient
Location: South of the Great Pyramid
Best Time: Any time (covered location)
Difficulty: Easy (accessible via main pathways)
The Solar Boat Museum’s modern architecture creates interesting juxtaposition opportunities when photographed with the ancient pyramids. This location demonstrates the ongoing relationship between past and present at Giza.
Contemporary architecture: The museum’s sleek lines and glass surfaces reflect the pyramids, creating abstract compositions that blend ancient and modern elements.
Interior opportunities: The museum’s interior offers controlled lighting conditions for photographing the reconstructed solar boat, providing relief from intense outdoor conditions.
10. Pyramid of Menkaure Base – Intimate Monument Photography
Location: Directly at the base of the smallest pyramid
Best Time: Late morning (11 AM-1 PM) for overhead lighting
Difficulty: Moderate (longer walk from main entrance)
The Pyramid of Menkaure offers the most intimate pyramid photography experience due to smaller crowds and closer access to the monument’s base. This location provides excellent opportunities for detail photography and architectural studies.
Texture photography: Focus on the pyramid’s unique granite facing stones, which differ from the limestone used in larger pyramids. The varied stone textures and colors create interesting abstract compositions.
Scale relationships: Use the smaller pyramid to create more human-scale compositions while still conveying the monument’s impressive size and ancient craftsmanship.
11. Central Plateau Overview – Documentary Style
Location: Central area between all three pyramids
Best Time: Mid-morning (10 AM-12 PM) for balanced lighting
Difficulty: Easy (accessible via main pathways)
This central position provides documentary-style photography opportunities that capture the complete Giza experience, including tourists, guides, vendors, and the monuments themselves. These images tell the story of Giza as a living archaeological site.
Street photography approach: Capture candid moments of visitors experiencing their first view of the pyramids. These emotional reactions create powerful human interest images that complement architectural photography.
Cultural documentation: Include local guides, camel handlers, and vendors in your compositions to document the contemporary culture surrounding these ancient monuments.
12. Valley Temple Approach – Sphinx Complex
Location: Approach pathway to the Sphinx complex
Best Time: Early morning (8-9 AM) for directional lighting
Difficulty: Easy (well-maintained pathway)
The approach to the Valley Temple provides excellent positioning for photographing the Sphinx complex in its architectural context. This location offers both wide establishing shots and detailed architectural studies.
Pathway photography: Include the ancient causeway and modern walkways to show the layered history of the site. The contrast between ancient construction and modern tourist infrastructure creates interesting visual narratives.
Sphinx approach shots: Capture the dramatic reveal of the Sphinx as visitors approach along the causeway, documenting the emotional impact of first encounters with this magnificent monument.
13. Eastern Cemetery Area – Archaeological Context
Location: East of the Great Pyramid complex
Best Time: Late morning (11 AM-1 PM) for even lighting
Difficulty: Moderate (requires navigation through mastaba tombs)
The Eastern Cemetery contains numerous mastaba tombs that provide context for the pyramid complex’s role as a vast necropolis. These smaller monuments offer intimate photography opportunities while demonstrating the site’s comprehensive scope.
Archaeological photography: Focus on the contrast between royal pyramids and nobles’ mastabas, illustrating ancient Egypt’s social hierarchy through architectural photography.
Detail studies: The mastaba tombs feature well-preserved architectural details including false doors, offering tablets, and hieroglyphic inscriptions that make excellent macro photography subjects.
14. Helicopter Landing Area – Elevated Perspectives
Location: Elevated area near Panoramic Point
Best Time: Early morning or late afternoon for dramatic shadows
Difficulty: Challenging (requires significant walking or camel transportation)
This elevated position near the helicopter landing area provides unique bird’s-eye perspectives of the pyramid complex unavailable from ground level. The additional height offers improved composition options and reduced crowd interference.
Aerial perspective simulation: Use telephoto lenses to compress perspective and create pseudo-aerial compositions that emphasize the pyramids’ geometric relationships.
Panoramic opportunities: The elevated position allows for sweeping panoramic compositions that include the entire Giza complex, nearby Cairo urban sprawl, and the Nile River valley.
15. Sphinx Enclosure Base – Ground Level Drama
Location: Lower level of the Sphinx enclosure
Best Time: Mid-afternoon (2-4 PM) for face illumination
Difficulty: Moderate (requires descending into enclosure)
The Sphinx enclosure’s lower level provides dramatic upward perspectives that emphasize the monument’s imposing presence. This location offers the closest possible access to the Sphinx while providing unique compositional opportunities.
Upward perspective photography: Use wide-angle lenses to exaggerate the Sphinx’s height and create dramatic compositions that emphasize its role as guardian of the pyramids.
Geological context: Include the limestone bedrock and excavation evidence in your compositions to document the Sphinx’s creation from living rock rather than constructed blocks.
Professional Photography Techniques for Giza
Managing Extreme Lighting Conditions
Egypt’s intense sunlight creates challenging exposure conditions with extreme contrasts between bright limestone and deep shadows. Successful pyramid photography requires understanding and compensating for these conditions.
HDR techniques work exceptionally well at Giza, allowing capture of detail in both bright pyramid faces and shadowed architectural elements. Bracket exposures by at least 2 stops in each direction for optimal dynamic range.
Polarizing filters reduce glare from limestone surfaces while intensifying blue skies, creating more dramatic contrast between monuments and sky. Circular polarizers work best with modern autofocus camera systems.
Crowd Management Strategies
Timing is everything when photographing at Giza. Tour buses begin arriving around 9:30-10:00 AM and continue throughout the day, creating significant crowd challenges for clean compositions.
Patience and positioning allow photographers to capture moments between tour groups. Most tourists spend 15-20 minutes at each major location before moving on, providing brief windows for unobstructed photography.
Alternative perspectives help avoid crowd areas while creating unique compositions. Step back from popular viewpoints and use longer focal lengths to isolate monuments without including other tourists.
Equipment Protection in Desert Conditions
Sand and dust protection is crucial for camera equipment at Giza. Use UV filters on all lenses to protect front elements, and carry lens cleaning supplies for frequent maintenance during shooting sessions.
Heat management prevents equipment overheating in extreme temperatures. Store camera gear in insulated bags when not in use, and allow equipment to acclimate to temperature changes gradually.
Battery considerations: Cold desert nights and hot days drain batteries quickly. Carry multiple spare batteries and keep them insulated from temperature extremes for optimal performance.
Smartphone Photography Mastery at Giza
Maximizing Smartphone Capabilities
Modern smartphones excel in Giza’s bright conditions and offer significant advantages including built-in HDR, panoramic modes, and instant social media sharing capabilities.
Portrait mode effects create professional-looking depth of field when photographing people with pyramid backgrounds. Use this feature for dramatic foreground/background separation that emphasizes both subjects and monuments.
Night mode capabilities in newer smartphones allow for creative low-light photography during sound and light shows or early morning blue hour conditions.
Composition Tips for Mobile Photography
Grid lines help implement the rule of thirds when composing pyramid photographs. Position horizon lines along the lower third and place pyramid peaks at intersection points for more dynamic compositions.
Leading lines created by ancient causeways, modern pathways, and archaeological features guide viewers’ eyes toward pyramid subjects and create more engaging compositions.
Foreground interest prevents flat compositions by including ancient blocks, desert plants, or architectural details in the immediate foreground while maintaining pyramid prominence.
Social Media Photography Strategy
Instagram-Optimized Compositions
Vertical compositions work better for Instagram Stories and mobile viewing, though the horizontal pyramid landscape challenges traditional vertical formats. Focus on individual pyramids or use people as vertical elements in horizontal landscapes.
Square cropping considerations require careful composition planning since pyramids naturally occupy horizontal space. Center single pyramids in square formats or use creative cropping to highlight specific architectural features.
Storytelling sequences work well for Instagram’s multiple-image posts. Document your journey from arrival through exploration to sunset, creating narrative arc that engages followers.
Hashtag and Engagement Strategies
Location-specific hashtags like #GizaPyramids, #GreatPyramid, and #PyramidsOfEgypt connect your images with other travelers and Egypt enthusiasts. Research trending Egypt-related hashtags for maximum visibility.
Cultural sensitivity in captions and hashtags demonstrates respect for Egyptian heritage while sharing your experience. Acknowledge the privilege of accessing these UNESCO World Heritage sites.
Engagement timing affects post visibility, with early morning and evening posts typically receiving higher engagement from international audiences interested in travel content.
Weather and Seasonal Photography Considerations
Winter Photography (November-February)
Optimal conditions during winter months provide crystal-clear skies, comfortable temperatures, and minimal heat haze that can affect image sharpness. However, occasional morning fog may impact early shoots.
Shorter days mean golden hour arrives earlier (around 4:00 PM) and the site closes before sunset, making afternoon timing crucial for dramatic lighting.
Higher tourist numbers during peak season require more patience and crowd management strategies for clean compositions.
Spring and Fall Photography (March-May, September-November)
Shoulder seasons offer the best balance of good weather, reasonable crowds, and extended daylight hours. Temperatures remain comfortable for extended shooting sessions.
Variable weather patterns during transition seasons may include occasional sandstorms or unusual cloud formations that create dramatic skies for pyramid photography.
Dust and wind can affect equipment and image quality during certain weather patterns. Monitor local forecasts and adjust shooting plans accordingly.
Summer Photography Challenges
Extreme heat makes summer photography physically demanding and potentially dangerous. Early morning shoots become essential, with most photography completed before 10:00 AM.
Heat haze significantly impacts image sharpness, especially for telephoto photography. Focus on wide-angle compositions and closer subjects during summer visits.
Equipment stress from high temperatures requires careful monitoring and protection. Consider this season only for brief visits or professional assignments with proper heat protection.
Cultural and Legal Considerations for Photography
Respectful Photography Practices
Cultural sensitivity guides appropriate photography behavior at these sacred ancient sites. Avoid climbing on monuments, touching ancient stones unnecessarily, or creating disruptive setups that interfere with other visitors’ experiences.
Local guide relationships often enhance photography opportunities through insider knowledge of lesser-known viewpoints and optimal timing. Treat guides as cultural partners rather than simple service providers.
Vendor interactions require diplomatic handling when declining unwanted photography services or souvenir sales. Maintain respectful but firm boundaries while focusing on your photographic goals.
Photography Permissions and Restrictions
Commercial photography may require additional permits and fees beyond standard tourist photography permissions. Contact Egyptian tourism authorities well in advance for professional assignments or commercial work.
Drone photography is strictly prohibited around the Giza complex due to security concerns and aircraft safety regulations. Violators face significant fines and equipment confiscation.
Model release considerations apply when photographing local people, guides, or other tourists. Obtain verbal permission before including recognizable individuals in your photographs, especially for potential commercial use.
Post-Processing Tips for Pyramid Photography
Enhancing Desert Landscapes
Color grading can enhance the warm desert tones while maintaining natural-looking results. Subtle increases in orange and yellow luminance emphasize the limestone’s natural warmth without creating artificial appearance.
Contrast management helps handle the extreme dynamic range typical in pyramid photography. Use shadow/highlight adjustments to reveal detail in both bright limestone and deep shadows.
Clarity and texture adjustments enhance the ancient stone textures and weathering patterns that tell the pyramids’ 4,500-year story. Apply these adjustments selectively to avoid over-processing.
Architectural Enhancement Techniques
Perspective correction eliminates the keystoning effect common when photographing tall structures like pyramids. Use lens corrections or manual perspective adjustments to maintain straight vertical lines.
Noise reduction becomes important for high-ISO images shot in challenging lighting conditions or interior pyramid photography. Balance noise reduction with detail preservation for optimal results.
Sharpening techniques enhance architectural details while avoiding artificial enhancement. Apply output sharpening based on intended use, whether for social media, print, or professional presentation.
Conclusion: Capturing Eternal Monuments
Photography at the Pyramids of Giza offers the unique opportunity to document humanity’s most enduring architectural achievements while creating personal memories that will last a lifetime. These 15 epic photography locations provide diverse perspectives on monuments that have inspired wonder for nearly five millennia.
Success in pyramid photography lies not just in technical execution, but in understanding the cultural significance, respecting local customs, and approaching these sacred sites with the reverence they deserve. From the iconic three-pyramid alignment at Panoramic Point to intimate architectural details at individual monuments, each location offers unique opportunities to capture both the grandeur and the subtle beauty of ancient Egyptian achievement.
Whether you’re creating content for social media, building a professional portfolio, or simply documenting your personal journey, the Pyramids of Giza provide endless inspiration and photographic opportunities. Armed with this guide’s insights on timing, locations, and techniques, you’re prepared to create images that truly capture the magic and eternal appeal of these remarkable monuments.
Remember that the best pyramid photographs combine technical excellence with emotional impact, telling the story of both ancient achievement and contemporary wonder. Take time to experience these monuments beyond just photography – the inspiration you gain from truly understanding their significance will elevate your images from simple documentation to meaningful artistic expression.
📷 Photography FAQ
Q: Do I need professional camera equipment to get great pyramid photos?
A: Modern smartphones can capture excellent pyramid photos, especially in Egypt’s bright conditions. The most important factors are composition, timing, and understanding light rather than expensive equipment.
Q: When is the absolute best time for pyramid photography?
A: Early morning (8-10 AM) provides optimal lighting, minimal crowds, and clear atmospheric conditions. Late afternoon (3-5 PM) offers dramatic lighting but more crowds, and the site closes before sunset.
Q: Are tripods allowed throughout the Giza complex?
A: Tripods require a 20 EGP permit and are allowed in most outdoor areas. However, they may be restricted in crowded areas or inside pyramid interiors for safety and traffic flow reasons.
Q: Can I hire a local photographer for a professional shoot?
A: Yes, many local photographers offer services ranging from basic photo sessions to full-day shoots. Expect to pay 500-2000 EGP depending on duration and deliverables. Always verify credentials and discuss expectations clearly.
Q: How do I avoid getting only tourist-crowded photos?
A: Arrive early, be patient between tour groups, use longer focal lengths to isolate subjects, and explore less popular viewpoints. Consider visiting during weekdays or shoulder seasons for reduced crowds.
Q: Is special permission needed for commercial photography?
A: Yes, commercial photography typically requires advance permits and additional fees. Contact Egyptian Ministry of Tourism and Antiquities for specific requirements and applications procedures.
Q: What camera settings work best in Egypt’s bright desert conditions?
A: Use lower ISO (100-400), faster shutter speeds (1/250s or higher), and consider polarizing filters to manage glare. HDR or exposure bracketing helps handle extreme contrast between bright limestone and shadows.
Q: Are there restrictions on photographing local people?
A: Always ask permission before photographing individuals, especially locals and guides. Many appreciate being asked respectfully, while others prefer privacy. Tipping is often expected for posed photos with locals.
Q: How do I protect my camera equipment from sand and heat?
A: Use UV filters, carry lens cleaning supplies, store equipment in insulated bags when not in use, and allow gradual temperature acclimation. Keep spare batteries warm in cold conditions and cool in extreme heat.
Q: What’s the best strategy for photographing inside the pyramids?
A: Use smartphones for convenience in narrow spaces, be prepared for complete darkness requiring phone flashlights, and respect other visitors in confined areas. Professional cameras may be restricted due to space limitations.