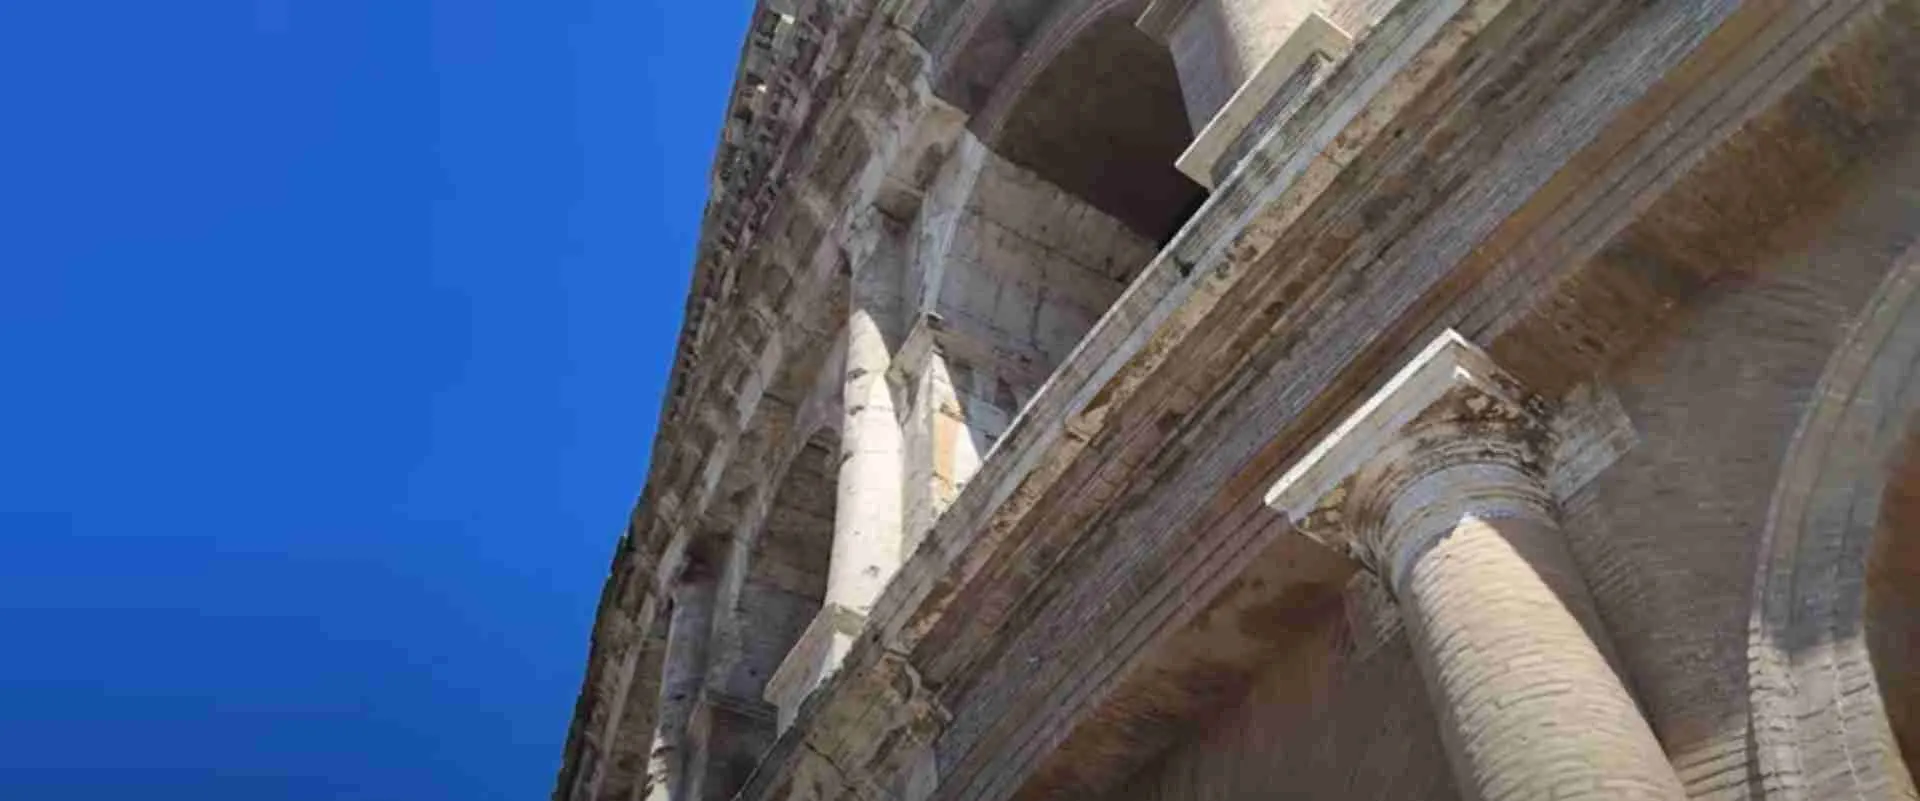
Colosseum Photography Guide: Best Spots & Pro Tips for Epic Photos
Standing before the Colosseum with your camera ready, you’re about to photograph one of the world’s most iconic monuments. But getting that perfect shot requires more than just pointing and clicking. After working with countless photographers and travelers visiting Rome’s greatest treasure, I’ve compiled the definitive guide to capturing the Colosseum in all its ancient glory.
Key Takeaways
- Best photo time: Arrive at sunrise (around 6:30-7:00 AM) for crowd-free shots and golden hour lighting
- Top exterior spot: Via Nicola Salvi offers elevated views without tourists blocking your frame
- Must-have gear: Wide-angle lens (16-35mm) to capture the full amphitheater structure
- Inside access: Book upper tier tours for exclusive aerial perspectives of the arena floor
- Hidden gems: Oppian Hill and Palatine Hill provide unique background compositions with the Colosseum
- Night photography: Golden hour and blue hour create dramatic lighting for atmospheric shots
Whether you’re shooting with a smartphone or professional camera equipment, this comprehensive photography guide will help you discover the best angles, optimal timing, and insider secrets that most tourists never learn. From sunrise shots without crowds to dramatic night photography, you’ll leave with images that truly capture the majesty of this 2,000-year-old amphitheater.
Essential Camera Settings for Colosseum Photography
Before exploring the best locations, let’s establish the fundamental camera settings that will help you capture sharp, well-exposed images of the Colosseum throughout different lighting conditions.
Daytime Photography Settings
For bright daylight shooting, start with these baseline settings and adjust based on your specific conditions. Use aperture priority mode (A/Av) with f/8 to f/11 for maximum sharpness across the frame. This sweet spot ensures both foreground details and the Colosseum’s architecture remain crisp and in focus.
Keep your ISO between 100-400 to minimize noise while maintaining image quality. The Colosseum’s limestone travertine surfaces can appear harsh in direct sunlight, so consider using graduated neutral density filters to balance exposure between bright sky and shadowed architectural details.
Shutter speed will typically fall between 1/125s to 1/250s in good light, but monitor your camera’s meter reading as conditions change throughout the day. The contrast between sunlit and shadowed areas of the amphitheater can be dramatic, particularly during midday hours.
Golden Hour and Blue Hour Settings
The magical hour before sunset and the blue hour immediately after create some of the most stunning Colosseum photographs. During golden hour, try f/5.6 to f/8 with ISO 200-800 depending on available light intensity.
For blue hour photography when the sky takes on deep blue tones while the Colosseum’s artificial lighting begins to glow, use f/8 with ISO 800-1600 and shutter speeds between 1/60s to 1/15s. A sturdy tripod becomes essential during these lower light conditions.
Consider bracketing your exposures during dramatic lighting conditions. The dynamic range between the bright sky and darker architectural shadows often exceeds what your camera can capture in a single exposure, making HDR processing valuable for these scenarios.
Extended multi-day tours – 5+ days
Featured Rome Multi-Day Tour Packages
5 days
The Ultimate Rome Food & Cultural Small-Group Tour Package – 5 Days
- ✓ Comprehensive Rome tour
- ✓ Expert local guides included
- ✓ All accommodation arranged
- ✓ Transportation provided
3 days
3-Day Pompeii, Capri & Sorrento Mini Tour
- ✓ Comprehensive Rome tour
- ✓ Expert local guides included
- ✓ All accommodation arranged
- ✓ Transportation provided
3 days
Advent in Rome: Markets, Churches & Tiramisu
- ✓ Booking needs min. 2 travelers
5 days
Ciao Italia: 5 Days, 2 Cities, Infinite Wonders
- ✓ Comprehensive Rome tour
- ✓ Expert local guides included
- ✓ All accommodation arranged
- ✓ Transportation provided
Multi-day tour packages powered by TourRadar. Prices and availability subject to change.
Best Exterior Photography Locations
The Colosseum’s massive scale and circular design offer numerous photographic opportunities from various external vantage points. Each location provides unique perspectives and compositional possibilities that showcase different aspects of this architectural marvel.
Via Nicola Salvi – The Instagram Famous Spot
Located on the elevated street directly north of the Colosseum, Via Nicola Salvi has become synonymous with classic Colosseum photography. This raised position allows you to capture the entire northern facade without tourists cluttering your foreground, while the slight elevation provides excellent depth and perspective.
The wall running along Via Nicola Salvi creates a perfect foreground element for composition. Position yourself at different points along this wall to vary your angle and find the most pleasing composition. Early morning light illuminates the Colosseum’s arches beautifully from this position, creating dramatic shadows that emphasize the structure’s three-dimensional form.
To reach this spot, exit the Colosseo Metro station and turn left. Walk along the northern perimeter until you see stone steps leading up to Via Nicola Salvi. The steps are across the street from the Colosseum, and the elevated walkway provides multiple shooting positions along its length.
Piazza del Colosseo – Wide-Angle Grandeur
For capturing the Colosseum’s complete scale and grandeur, position yourself in Piazza del Colosseo between the main entrance and the Roman Forum. This central location requires a wide-angle lens (16-24mm) to include the entire structure in your frame.
The challenge from this position is the constant flow of tourists, making early morning arrival essential for clean compositions. However, the payoff is dramatic: you can capture the full height and impressive bulk of the amphitheater, showcasing why this monument has inspired awe for nearly two millennia.
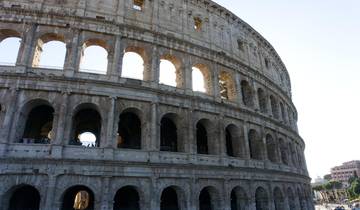
Experiment with different focal lengths from this position. A 24-70mm lens allows you to isolate specific architectural details like the distinctive three-story arcade system, while ultra-wide lenses can create dramatic perspective distortion that emphasizes the monument’s imposing presence.
Oppian Hill – Hidden Gem with Garden Frames
Few photographers discover the beautiful perspectives available from Oppian Hill, located directly behind the Colosseum. This elevated park area offers unique angles framed by Mediterranean vegetation, creating compositions that combine ancient architecture with natural beauty.
Multiple vantage points throughout Oppian Hill provide varying perspectives. Near the Oppian Cafe, you’ll find excellent elevated shots that showcase the Colosseum’s relationship to the surrounding Roman landscape. The park’s pathways wind through ancient ruins and gardens, offering numerous foreground elements to enhance your compositions.
During spring months, vibrant bougainvillea blooms create stunning natural frames for the Colosseum. These pink and purple flowers add color contrast against the neutral tones of the ancient stones, creating images that feel both timeless and contemporary.
Palatine Hill – Elevated Perspectives with Context
The terraces and viewing platforms of Palatine Hill provide some of the most comprehensive views of the Colosseum within its urban context. From these elevated positions, you can capture the amphitheater alongside the Roman Forum, creating images that tell the story of ancient Rome’s ceremonial heart.
The western terraces of Palatine Hill offer particularly striking sunset compositions. As golden light bathes the Colosseum’s western facade, the monument glows against the darkening sky, while the Roman Forum’s ruins create compelling foreground elements.
Access to Palatine Hill requires a ticket (included with Colosseum entrance), but the investment pays dividends for serious photographers. The elevated perspectives available here simply cannot be replicated from street level, making these viewpoints essential for creating unique images.
Interior Photography Opportunities
Photographing inside the Colosseum presents unique opportunities and challenges. The interior’s scale, architectural details, and dramatic lighting conditions require different approaches than exterior photography.
Arena Floor Access – Gladiator’s Perspective
Standing on the reconstructed arena floor provides one of photography’s most powerful perspectives. Looking up at the towering seating sections while standing where gladiators once fought creates images that convey the amphitheater’s original purpose and emotional impact.
Arena floor access requires special tickets, but the photographic opportunities justify the additional cost. Wide-angle lenses capture the arena’s oval shape and the imposing height of surrounding walls, while telephoto lenses can isolate architectural details in the upper tiers.
The contrast between the bright arena floor and shadowed upper sections creates challenging exposure conditions. Use spot metering to ensure proper exposure of your primary subject, and consider graduated neutral density filters to balance the extreme contrast.
Underground Hypogeum – Atmospheric Drama
The recently opened underground chambers beneath the arena floor offer atmospheric photography opportunities unlike anywhere else in Rome. These tunnels and chambers where gladiators and animals waited before battles create moody, dramatic images that emphasize the Colosseum’s more sinister history.
Low light conditions in the hypogeum require higher ISO settings (800-3200) and wider apertures (f/2.8-f/4). The artificial lighting creates interesting directional illumination that emphasizes texture in the ancient brick and stone construction.
Bring a tripod if possible, as the atmospheric underground chambers benefit from longer exposures that smooth out harsh artificial lighting. The underground tour’s limited duration makes pre-planning your shots essential for maximizing this unique access.
Upper Tier Belvedere – Aerial Arena Views
The highest accessible levels of the Colosseum provide breathtaking aerial views of the arena floor and exposed underground structures. These elevated positions offer perspectives that emphasize the amphitheater’s engineering complexity and architectural sophistication.
From the upper tiers, you can capture the arena’s oval geometry and the intricate network of underground passages. These bird’s-eye perspectives showcase details invisible from ground level, including the complex system of elevators and trapdoors that once brought gladiators and wild animals into the arena.
Upper tier access is limited and requires advance booking with authorized guides. The restricted nature of this access makes these perspectives particularly valuable for creating unique images that stand apart from typical tourist photography.
Seasonal Photography Considerations
Rome’s Mediterranean climate creates distinct photographic opportunities throughout the year. Understanding seasonal variations helps you plan visits that maximize lighting conditions and minimize weather-related challenges.
Spring Photography (March-May)
Spring offers ideal conditions for Colosseum photography, with mild temperatures, longer daylight hours, and blooming vegetation that adds natural color to compositions. Cherry blossoms and wisteria around the monument area create beautiful foreground elements during April and early May.
Weather can be variable during spring months, with occasional rain showers that clear quickly. These post-rain conditions often produce dramatic skies with interesting cloud formations that enhance architectural photography. The cleaner air after rain also improves visibility for distant shots from elevated positions.
Crowds begin increasing in spring as tourist season commences, making early morning photography sessions even more valuable. However, the comfortable temperatures make extended photography sessions more enjoyable than during summer’s intense heat.
Summer Photography (June-August)
Summer brings the most challenging conditions for Colosseum photography. Intense heat, harsh midday light, and maximum tourist crowds require careful planning and strategic timing. However, summer also offers the longest days, providing extended golden hour periods for optimal lighting.
The harsh contrast of summer sunlight can create extremely bright highlights and deep shadows on the Colosseum’s limestone surfaces. This high contrast can be challenging for exposure, but it also creates dramatic chiaroscuro effects that emphasize the monument’s three-dimensional form.
Plan summer photography sessions for very early morning (sunrise) or late evening (sunset and blue hour). The period between 10 AM and 4 PM produces harsh, unflattering light that’s best avoided. Bring plenty of water and sun protection for extended outdoor photography sessions.
Autumn Photography (September-November)
Autumn provides excellent conditions for Colosseum photography, with comfortable temperatures, dramatic skies, and fewer tourists than summer months. The changing light quality creates warmer, more golden tones that complement the monument’s travertine construction.
October and November often feature interesting weather patterns with dramatic cloud formations that enhance architectural photography. The lower sun angle during autumn months creates longer shadows that add depth and dimension to the Colosseum’s facade.
Fall foliage in nearby parks and along streets adds seasonal color that can enhance compositions. The warm yellows and oranges of autumn leaves provide beautiful color contrast against the neutral tones of ancient Roman architecture.
Winter Photography (December-February)
Winter offers unique photographic opportunities with dramatic skies, minimal crowds, and interesting lighting conditions. While temperatures can be cool, the reduced tourist numbers make composition easier, and the lower sun angle creates beautiful warm light even during midday hours.
Winter storms often produce spectacular skies with dramatic cloud formations that enhance architectural photography. The possibility of rare snow creates extraordinary photographic opportunities, transforming the ancient amphitheater into a winter wonderland.
Shorter daylight hours during winter concentrate the best lighting into a more compact timeframe. However, the golden hour light quality during winter months is particularly beautiful, with warm tones that complement the Colosseum’s stone construction.
Night Photography Techniques
The Colosseum’s illumination after dark creates spectacular photography opportunities that showcase the monument in an entirely different light. Night photography requires specific techniques and equipment but produces some of the most dramatic images possible.
Blue Hour Magic
The period immediately after sunset, known as blue hour, provides optimal conditions for night photography. During this time, the sky retains deep blue color that complements the warm artificial lighting illuminating the Colosseum’s arches and facades.
Blue hour timing varies seasonally, occurring approximately 20-30 minutes after sunset. This brief window requires preparation and quick execution, as the optimal lighting conditions last only 15-20 minutes. Scout your positions during daylight hours to ensure efficient setup when lighting conditions are ideal.
Use a sturdy tripod for sharp images during longer exposures required in low light conditions. ISO settings between 400-1600 provide good balance between image quality and light sensitivity, while apertures around f/8 ensure sharp focus across the frame.
Full Darkness Techniques
After blue hour ends, the Colosseum’s artificial lighting creates dramatic contrasts against the dark sky. These conditions allow for creative long exposure techniques that can smooth moving elements like passing pedestrians or vehicle lights.
Longer exposures (2-30 seconds) can create interesting effects with moving elements while keeping the illuminated architecture sharp. Use your camera’s built-in intervalometer or a remote release to minimize camera shake during these extended exposures.
Experiment with different white balance settings to enhance the warm tones of the artificial lighting. Tungsten or custom white balance settings can emphasize the golden glow of the illumination while maintaining natural sky colors.
Light Trail Photography
The busy streets surrounding the Colosseum provide opportunities for light trail photography that combines the ancient monument with modern urban energy. Position your camera to include both the illuminated Colosseum and nearby traffic patterns for dynamic compositions.
Use exposures between 10-30 seconds to capture smooth light trails from passing vehicles while maintaining sharp architectural details. The contrast between ancient stone and modern light creates compelling visual metaphors about Rome’s layered history.
Safety is paramount during night photography sessions. Work with companions when possible, remain aware of your surroundings, and secure your equipment properly. The Colosseum area remains reasonably safe at night, but standard urban precautions apply.
Smartphone Photography Tips
While professional cameras offer maximum flexibility, modern smartphones can capture excellent Colosseum photographs with proper technique and understanding of their limitations and strengths.
Maximizing Smartphone Capabilities
Modern smartphones excel in good lighting conditions and offer computational photography features that can enhance image quality. Use your phone’s HDR mode to handle the high contrast between bright sky and shadowed architectural details.
Portrait mode or similar depth-effect features can create attractive background blur that isolates the Colosseum from busy surroundings. However, use these effects judiciously, as the monument’s architectural details often benefit from sharp focus throughout the frame.
Take advantage of your smartphone’s convenience for candid shots and quick composition changes. The ability to shoot silently makes smartphones ideal for photography during guided tours or in crowded conditions where larger cameras might be obtrusive.
Composition Techniques for Small Screens
Smartphone screens can make composition challenging in bright sunlight. Use your hand or a lens hood to shade the screen when necessary, and rely on composition guidelines like the rule of thirds to create balanced images even when the screen is difficult to see clearly.
Take multiple shots from each position, as smartphone autofocus can sometimes hunt in complex lighting conditions. The ability to shoot quickly and review images immediately allows for rapid iteration and improvement of compositions.
Consider using third-party camera apps that offer manual controls for ISO, shutter speed, and focus. These apps unlock additional creative possibilities beyond the limitations of default camera applications.
Editing Smartphone Images
Smartphone photography benefits significantly from post-processing. Apps like Lightroom Mobile, VSCO, or Snapseed offer professional-level editing tools that can transform good smartphone images into exceptional ones.
Focus on basic adjustments like exposure, contrast, and vibrance rather than heavy-handed filtering. The goal is to enhance the natural beauty of your Colosseum photographs rather than creating artificial effects that distract from the monument’s inherent drama.
Pay special attention to straightening architectural lines and correcting perspective distortion that commonly occurs with smartphone wide-angle lenses. These technical corrections often make more difference than complex color grading.
Professional Photography Equipment Recommendations
Serious photographers visiting the Colosseum benefit from specific equipment that addresses the unique challenges and opportunities this monument presents. Building the right kit ensures you’re prepared for any photographic situation.
Essential Lens Selection
A 16-35mm wide-angle lens is indispensable for capturing the Colosseum’s full scale and grandeur. This focal length range allows you to include the entire structure in your frame from nearby positions while maintaining acceptable perspective distortion.
A 24-70mm standard zoom provides versatility for most shooting situations, from wide establishing shots to medium telephoto isolation of architectural details. This lens range covers 80% of typical Colosseum photography needs and offers excellent image quality across its focal length range.
Consider a 70-200mm telephoto lens for isolating specific architectural elements and compressing perspective for dramatic effect. This longer focal length allows you to photograph from more distant positions while achieving intimate detail shots of the upper tiers and decorative elements.
Support and Stability
A sturdy carbon fiber tripod is essential for low-light photography, long exposures, and ensuring maximum image sharpness. Choose a tripod that balances stability with portability, as you’ll be walking considerable distances around the monument area.
A ball head or three-way head provides precise composition control, especially important when working with heavy telephoto lenses or in windy conditions. Quick-release plates speed up equipment changes when moving between different shooting positions.
Consider a monopod as a lighter alternative for situations where tripods might be prohibited or impractical. Monopods provide stability for telephoto lenses while maintaining mobility for changing compositions quickly.
Filters and Accessories
Circular polarizing filters reduce reflections and enhance contrast in the limestone surfaces of the Colosseum while darkening blue skies for more dramatic compositions. This filter is particularly valuable during midday photography when contrast is highest.
Graduated neutral density filters help balance exposure between bright sky and shadowed architectural details. These filters are especially useful during golden hour and blue hour photography when dynamic range exceeds camera capabilities.
Variable neutral density filters enable longer exposures for creative effects like smoothing pedestrian movement or capturing cloud motion. These filters offer flexibility without carrying multiple fixed-density options.
Working with Crowds and Timing
The Colosseum attracts over six million visitors annually, making crowd management a crucial aspect of successful photography. Understanding visitor patterns and timing strategies helps you capture clean compositions even during busy periods.
Optimal Timing Strategies
Arrive at sunrise (approximately 6:30-7:00 AM depending on season) for the quietest conditions and best lighting. The first hour after the monument area becomes accessible offers optimal opportunities for crowd-free photography from exterior positions.
Late afternoon and evening hours, particularly during golden hour before sunset, provide beautiful lighting but increased crowds. Plan these sessions carefully, scouting positions during quieter midday hours to maximize efficiency during optimal lighting.
Weekday mornings generally offer fewer crowds than weekends, though the difference is less pronounced during peak tourist season (June-August). Winter months provide the most dramatic reduction in visitor numbers while maintaining good photographic conditions.
Crowd Management Techniques
Use longer exposures (1-4 seconds) to blur moving pedestrians while keeping static architectural elements sharp. This technique can effectively “remove” moving crowds from your compositions while maintaining the monument’s sharp detail.
Position yourself at different heights and angles to shoot over or around crowds. The elevated positions along Via Nicola Salvi and Oppian Hill naturally reduce the impact of ground-level crowds on your compositions.
Work systematically through different positions rather than waiting for perfect conditions at a single location. Moving between multiple shooting positions maximizes your chances of finding temporary clear shots while crowds shift and flow.
Alternative Perspectives
Focus on architectural details and close-up compositions when crowds make wide establishing shots difficult. The Colosseum’s intricate stonework, arches, and decorative elements provide endless opportunities for compelling detail photography.
Embrace the human element by including visitors in ways that add scale and life to your compositions. Silhouettes of tourists against the massive architecture can emphasize the monument’s imposing scale and enduring appeal.
Explore less obvious viewpoints that most tourists overlook. The areas around the Arch of Constantine, the upper levels of nearby buildings, and the various side streets offer unique perspectives that avoid the most crowded primary viewing areas.
Post-Processing Colosseum Images
Digital post-processing plays a crucial role in realizing the full potential of your Colosseum photographs. Understanding specific techniques for architectural photography helps you create images that accurately represent your experience while addressing technical challenges.
Basic Exposure and Contrast Adjustments
The high contrast between bright limestone surfaces and deep shadowed areas often requires careful exposure balancing in post-processing. Use graduated adjustments to brighten shadow areas while protecting highlight detail in bright stone surfaces.
Increase contrast moderately to enhance the three-dimensional quality of the architecture while avoiding harsh transitions that look unnatural. The goal is to reveal detail throughout the tonal range while maintaining realistic contrast ratios.
Pay attention to white balance, as mixed lighting conditions (daylight and artificial illumination) can create color casts that detract from the natural beauty of the travertine stone. Adjust temperature and tint to achieve neutral, accurate color reproduction.
Perspective Correction
Wide-angle photography of the Colosseum often produces perspective distortion that makes vertical lines appear to converge. Use lens correction tools in Lightroom or Photoshop to straighten these lines while maintaining natural perspective.
Vertical perspective correction is particularly important for architectural photography, as tilted buildings appear unstable and unnatural. However, avoid over-correction that creates an artificial, sterile appearance.
Crop thoughtfully after perspective correction, as these adjustments often require removing edge areas where distortion correction creates empty space. Plan compositions with some extra space around the edges to accommodate this cropping need.
Detail Enhancement Techniques
Use moderate clarity or texture adjustments to enhance the surface detail in the ancient stonework without creating an over-processed appearance. These adjustments help reveal the weathering and craftsmanship visible in the original construction.
Local adjustments using masks or brushes allow you to enhance specific areas without affecting the entire image. For example, you might enhance detail in shadowed archways while leaving bright areas unchanged.
Avoid over-sharpening, which can create artificial-looking edges and introduce noise. Instead, use capture sharpening appropriate for your output size and viewing conditions while maintaining natural-looking edge transitions.
Safety and Etiquette Guidelines
Responsible photography at the Colosseum requires awareness of safety considerations, respect for other visitors, and adherence to site regulations that protect both the monument and visitor experience.
Equipment Security
Rome’s tourist areas, including the Colosseum vicinity, attract pickpockets and opportunistic thieves who target expensive camera equipment. Use camera straps and consider additional security measures like peak design clips that keep equipment securely attached.
Avoid displaying expensive equipment unnecessarily when not actively photographing. Use discrete camera bags and keep equipment covered when moving between positions or taking breaks.
Never leave equipment unattended, even for brief moments. The busy environment around the Colosseum makes unattended gear an easy target for theft, regardless of how quickly you plan to return.
Respectful Photography Practices
Be mindful of other photographers and tourists when setting up equipment, especially tripods that can block pathways or create trip hazards. Communication and courtesy go a long way toward maintaining positive relationships with fellow visitors.
Respect photography restrictions in certain areas, particularly inside the monument where flash photography may be prohibited to protect ancient surfaces. Always check current regulations, as rules can change.
Consider the impact of your photography on others’ experience. While capturing the perfect shot is important, remember that the Colosseum is a shared cultural resource that everyone deserves to enjoy.
Weather Preparedness
Rome’s weather can change quickly, particularly during spring and autumn months. Protect camera equipment from unexpected rain with weather covers or plastic bags, and be prepared to seek shelter during storms.
Summer heat can affect both photographer comfort and equipment performance. Batteries drain faster in high temperatures, and direct sunlight can cause LCD screens to become difficult to see. Plan accordingly with extra batteries and shade when possible.
Winter conditions rarely involve extreme cold, but occasional frost or rain requires standard weather protection for electronic equipment. Condensation can be an issue when moving between heated indoor spaces and cool outdoor conditions.
Frequently Asked Questions
What’s the best time of day to photograph the Colosseum?
The optimal time is sunrise (6:30-7:00 AM) for crowd-free shots and beautiful golden light. Blue hour (20-30 minutes after sunset) offers dramatic lighting for night photography. Avoid midday hours (10 AM-4 PM) when lighting is harsh and crowds are heaviest.
Can I bring a tripod inside the Colosseum?
Tripod policies can vary and change frequently. Currently, small tripods are generally permitted, but professional-sized tripods may be restricted. Check current regulations before your visit and consider a monopod as an alternative.
Do I need special tickets for photography inside the Colosseum?
Standard admission tickets allow photography in most areas. However, access to special areas like the arena floor, underground chambers, or upper tiers requires specific tour bookings that include photography permissions.
What camera settings work best for Colosseum interior photography?
Use aperture priority mode with f/8-f/11 for sharpness. ISO 400-1600 handles mixed lighting conditions. Consider graduated neutral density filters for high contrast situations between bright and shadowed areas.
Where can I get the classic elevated view of the Colosseum?
Via Nicola Salvi, accessible via steps near the Colosseo Metro station, provides the famous elevated perspective. Exit the metro, turn left, and look for stone steps leading to the raised walkway across from the monument.
Is flash photography allowed inside the Colosseum?
Flash photography is generally prohibited inside the monument to protect ancient surfaces and other visitors’ experience. The available light is usually sufficient with proper camera settings and techniques.
What’s the best weather for Colosseum photography?
Partly cloudy conditions provide ideal lighting with interesting skies while avoiding harsh shadows. Post-rain conditions often produce dramatic skies and cleaner air for distant shots. Avoid completely overcast days that create flat, uninteresting lighting.
How early should I arrive for sunrise photography?
Arrive 30-45 minutes before sunrise to scout positions and set up equipment. The area around the Colosseum is accessible 24/7 for exterior photography, allowing early morning preparation for optimal lighting conditions.
Can I photograph the Colosseum from nearby buildings?
Some hotels and restaurants offer elevated views, but access varies by establishment. Public viewing areas like Palatine Hill and Oppian Hill provide excellent elevated perspectives without requiring permission from private businesses.
What lens focal length is most useful for Colosseum photography?
A 16-35mm wide-angle lens is essential for capturing the full monument. A 24-70mm provides versatility for most situations. A 70-200mm telephoto allows detailed architectural photography from greater distances.